?>
1514
3400
1933
A
ugust
19
Eat these now: Shishito Peppers

grilled shishito peppers


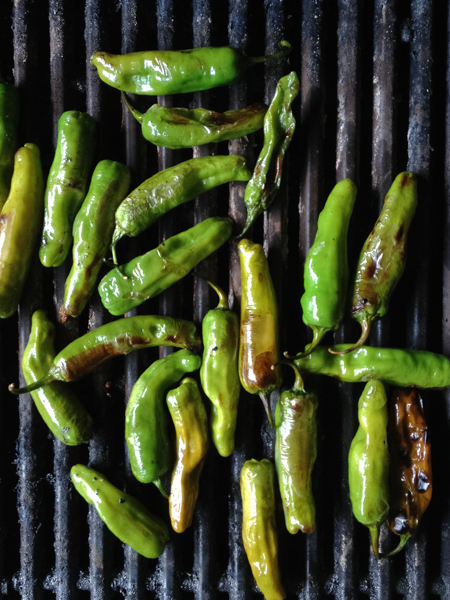
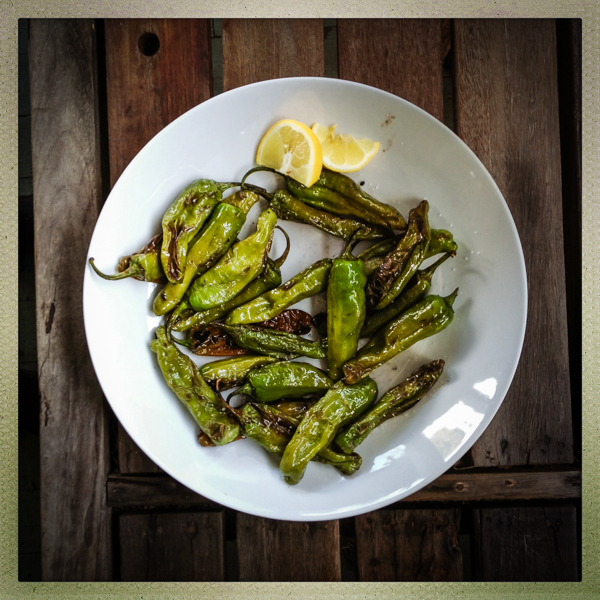
This mild pepper from Japan has become quite the culinary rage over the last handful of years.  I first had them as a snack in a benefit cooking master class for Slow Food NYC, and have been growing them in my garden ever since.

Shishito peppers are slender, bright green, and about the length of your index finger.  They are super flavorful yet mild, with about one in a dozen delivering a memorable amount of heat.  Consider it a party game.

I love serving a huge platter of grilled shishitos with cold cocktails at the start of a big summer dinner party.  Quick, easy, impressive, slightly unusual and pretty much universally adored--there should be no hesitation in adding these to the menu.  Padron peppers can be prepared and served the same way, but will be hotter in flavor overall.

We are in high shishito season right now, so keep an eye out at the market, and definitely grow your own next summer.


Grilled Shishito Peppers

Fresh Shishito Peppers
Olive Oil
Kosher Salt
Lemon

Grilled shishitos always fly off the platter when I serve them.  Plan for at least 3-4 per person, if not many more.  

Wash the peppers and dry thoroughly.

In a large bowl, toss peppers with a generous pour of olive oil, until evenly coated.

Grill on high medium-heat until evenly blistered and slightly charred.

Remove peppers from grill and transfer directly to a serving platter.  Sprinkle with kosher or other coarse salt, and a very liberal squeeze of fresh lemon juice.  Serve immediately with additional lemon wedges.


grilled shishito pepper tapas


1133
1664
933
J
uly
11
Salad Dressing of the Week: Roasted Strawberry Balsamic Vinaigrette (with a hint of white pepper)

Roasted Strawberry Balsamic vinaigrette-2


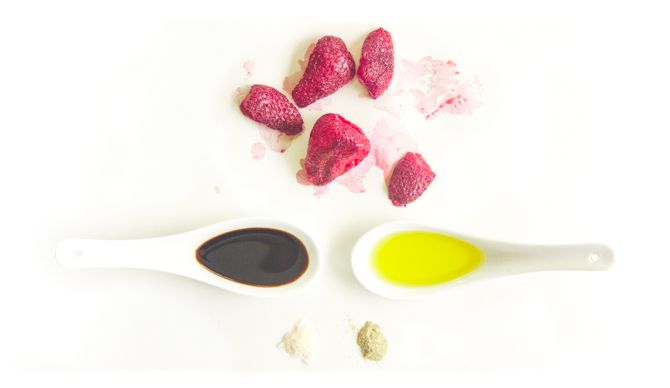
Make this right now, with all those plump ephemeral strawberries lurking around.   (If you are making this out of season--gasp--consider adding a small pinch of sugar to the berry puree to help boost the flavorless winter berries).

If you can make it past eating it directly from the mixing bowl, serve this dressing over a spinach salad with toasted pecans or walnuts and some crumbly goat cheese.  Or dip some grilled chicken into it.  Or grilled pork.  Or duck.  Or heck, put that on the salad too.

Oh, and do yourself a favor: get some really good balsamic vinegar.


Roasted Strawberry and Balsamic Vinaigrette
by Catie Baumer Schwalb

yeilds about 1/4 cup, for two servings.

2 tablespoons roasted strawberry puree, from about 6 medium strawberries (Make extra.  Trust me.)
1 1/2 tablespoons aged balsamic vinaigrette
2 tablespoons extra virgin olive oil
white pepper, ground, small pinch, to taste
salt, to taste

Heat the oven to 375º F.  Halve washed strawberries and roast on a baking sheet for 10-12 minutes until soft and fragrant.  The time will depend greatly on the ripeness.  Watch the berries closely so they don't burn.

Remove the berries from the oven and puree in a blender or food processor.

In a small bowl combine berry puree, balsamic vinegar, a slight pinch of ground white pepper and salt.  Whisk to combine.   In a very thin, slow and steady stream, pour the olive oil into the berry mixture, while whisking continually.  Taste and adjust salt and pepper.  Serve immediately or chill briefly.


391
1907
388
J
une
28
How to deal with Rhubarb

how to prepare rhubarb


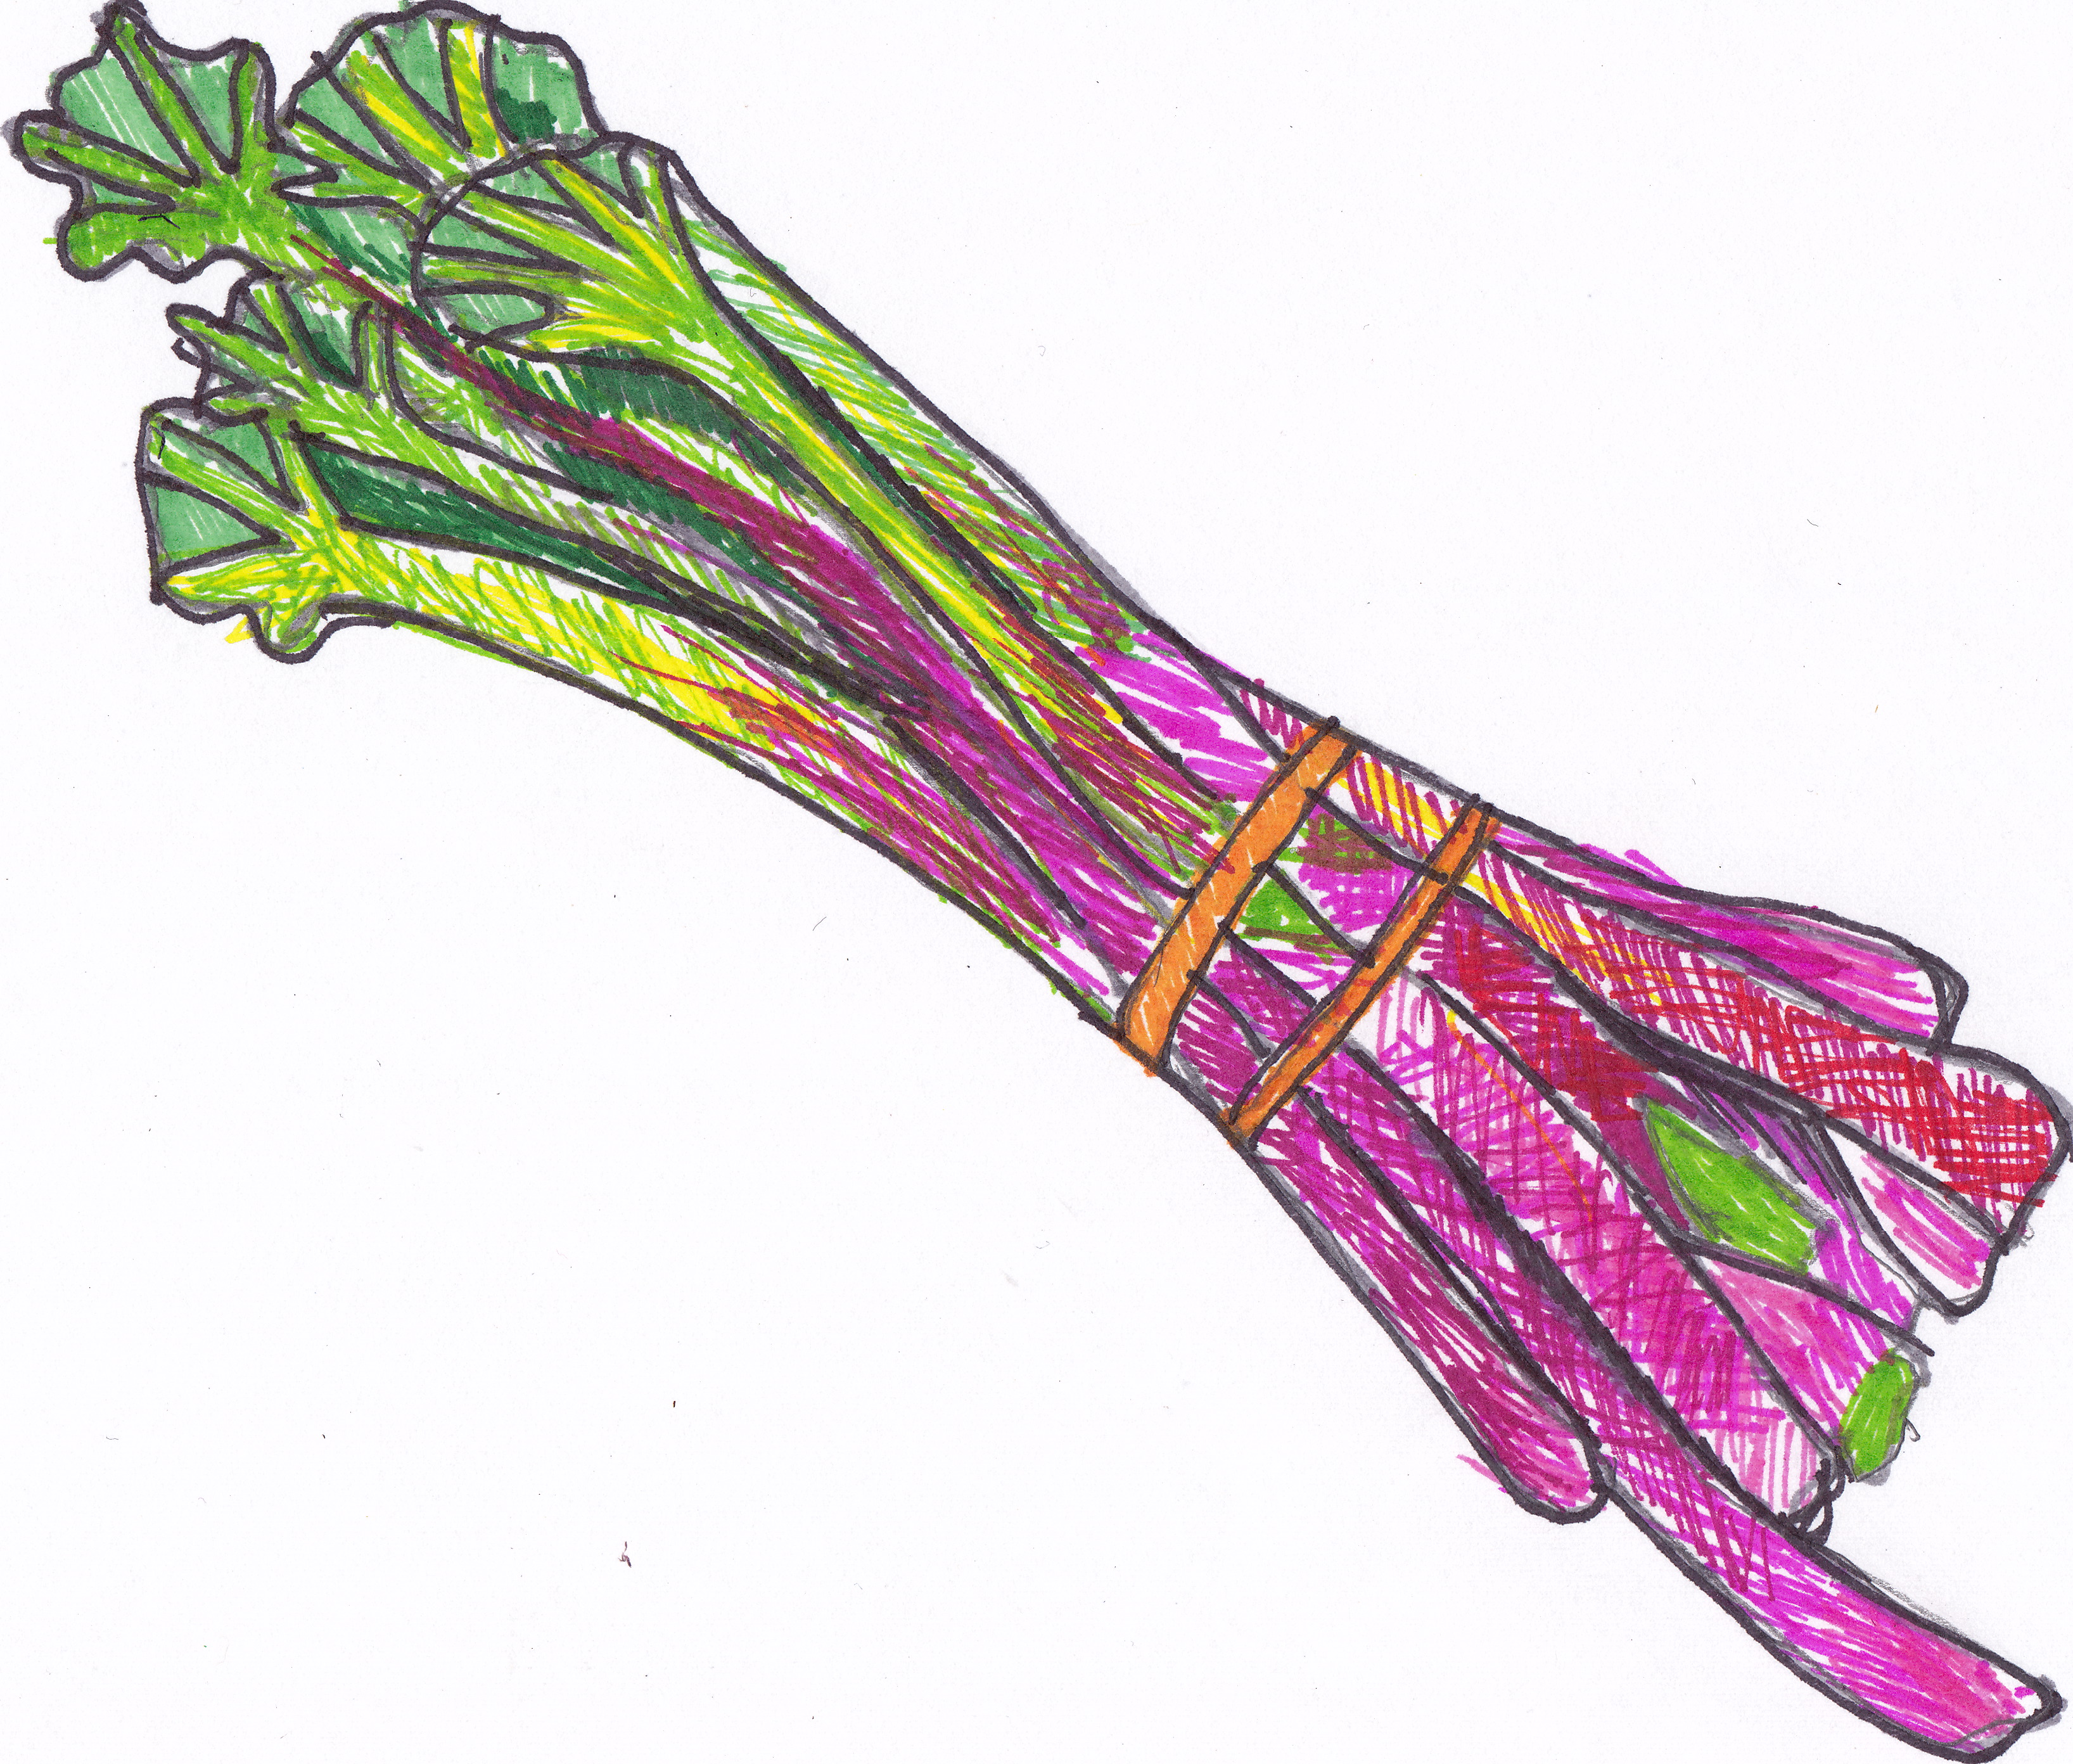
I love rhubarb.  I love it for it's old fashioned vibe.  I love it for it's color, striking tartness, and even for it's moderate shelf life.  I also love it for showing up so darn early in the spring and sticking around for several months.


And I too was at first intimidated by those long, irregular-shaped, tough magenta stalks at the market.  I actually overheard a conversation at our market up here recently, where a woman who had just bought a weekend house near the Delaware discovered she had huge decades-old rhubarb plants growing on her property.  However she didn't know when it was time to pick them.  Nor did the young woman working the farm stand, so I jumped in with what I knew.  She had been waiting for them to turn red, ripen, to pick.  I explained that some heirloom varieties, have very little red, and the stalks can range from thin to the thicker more uniform we're used to seeing in grocery stores.  I generally go by feel, but you can harvest stalks when between ten and fifteen inches long, avoiding letting them go too long and become tough, dry or woody.


Once you get your rhubarb back you your kitchen, from yard or market, they really are one of the most simple fruit to prepare.  Make sure all traces of the leaves are trimmed off, as they are not edible.  Rhubarb have a bad rap for being stringy, as in celery stringy, but as long as they are cut in small pieces before cooked, the strings will not be a nuisance.  For good measure, or habit, I tend to peel two or three strings off each stalk, from end to end, but not too much, as you are also peeling off any of the great magenta color.


Wash the stalks well and then cut into slices between an half inch and an inch thick.  You can then roast the pieces, throw them in to brighten up a rich stew, or as I do most often, simmer them down to a quick rhubarb puree or sauce.


Pack the rhubarb into a sauce pan or small pot that holds the pieces sort of snugly.  Add enough water to come up about 3/4 of the way up the sides of the slices, and simmer over a medium-low heat, until the rhubarb has broken down and is tender.  Add more water if the mixture seems to be getting to dry or risking burning at all.  When finished you can mash it up a little to have a sauce with more texture, or use a food processor, blender or immersion blender to give you smoother final product.


If you are looking to use the sauce as a topping by itself, add about a tablespoon of sugar per large stalk of rhubarb when simmering down, or another classic way to cut rhubarb's intense sourness is to add at least 1 part strawberries for every 3 parts rhubarb when starting the sauce.  Taste when finished and adjust sweetness if necessary.


Vanilla beans, ginger, orange, cinnamon, almost all berries and apples are all great additions as well.


Make a big batch.  Eat it warm or ice cold.  Spoon it over ice cream, blend it into cream cheese, swirl it in yogurt or oatmeal, drizzle it over a wedge of Stilton or duck or game meats, whisk it into your vinaigrette, blend it with ice for your margarita.  Really, what other fruit, the northeast no less, is quite so versatile?


1001
2325
676
M
ay
20
Sesame Roasted Asparagus

Pitchfork Diaries asparagus


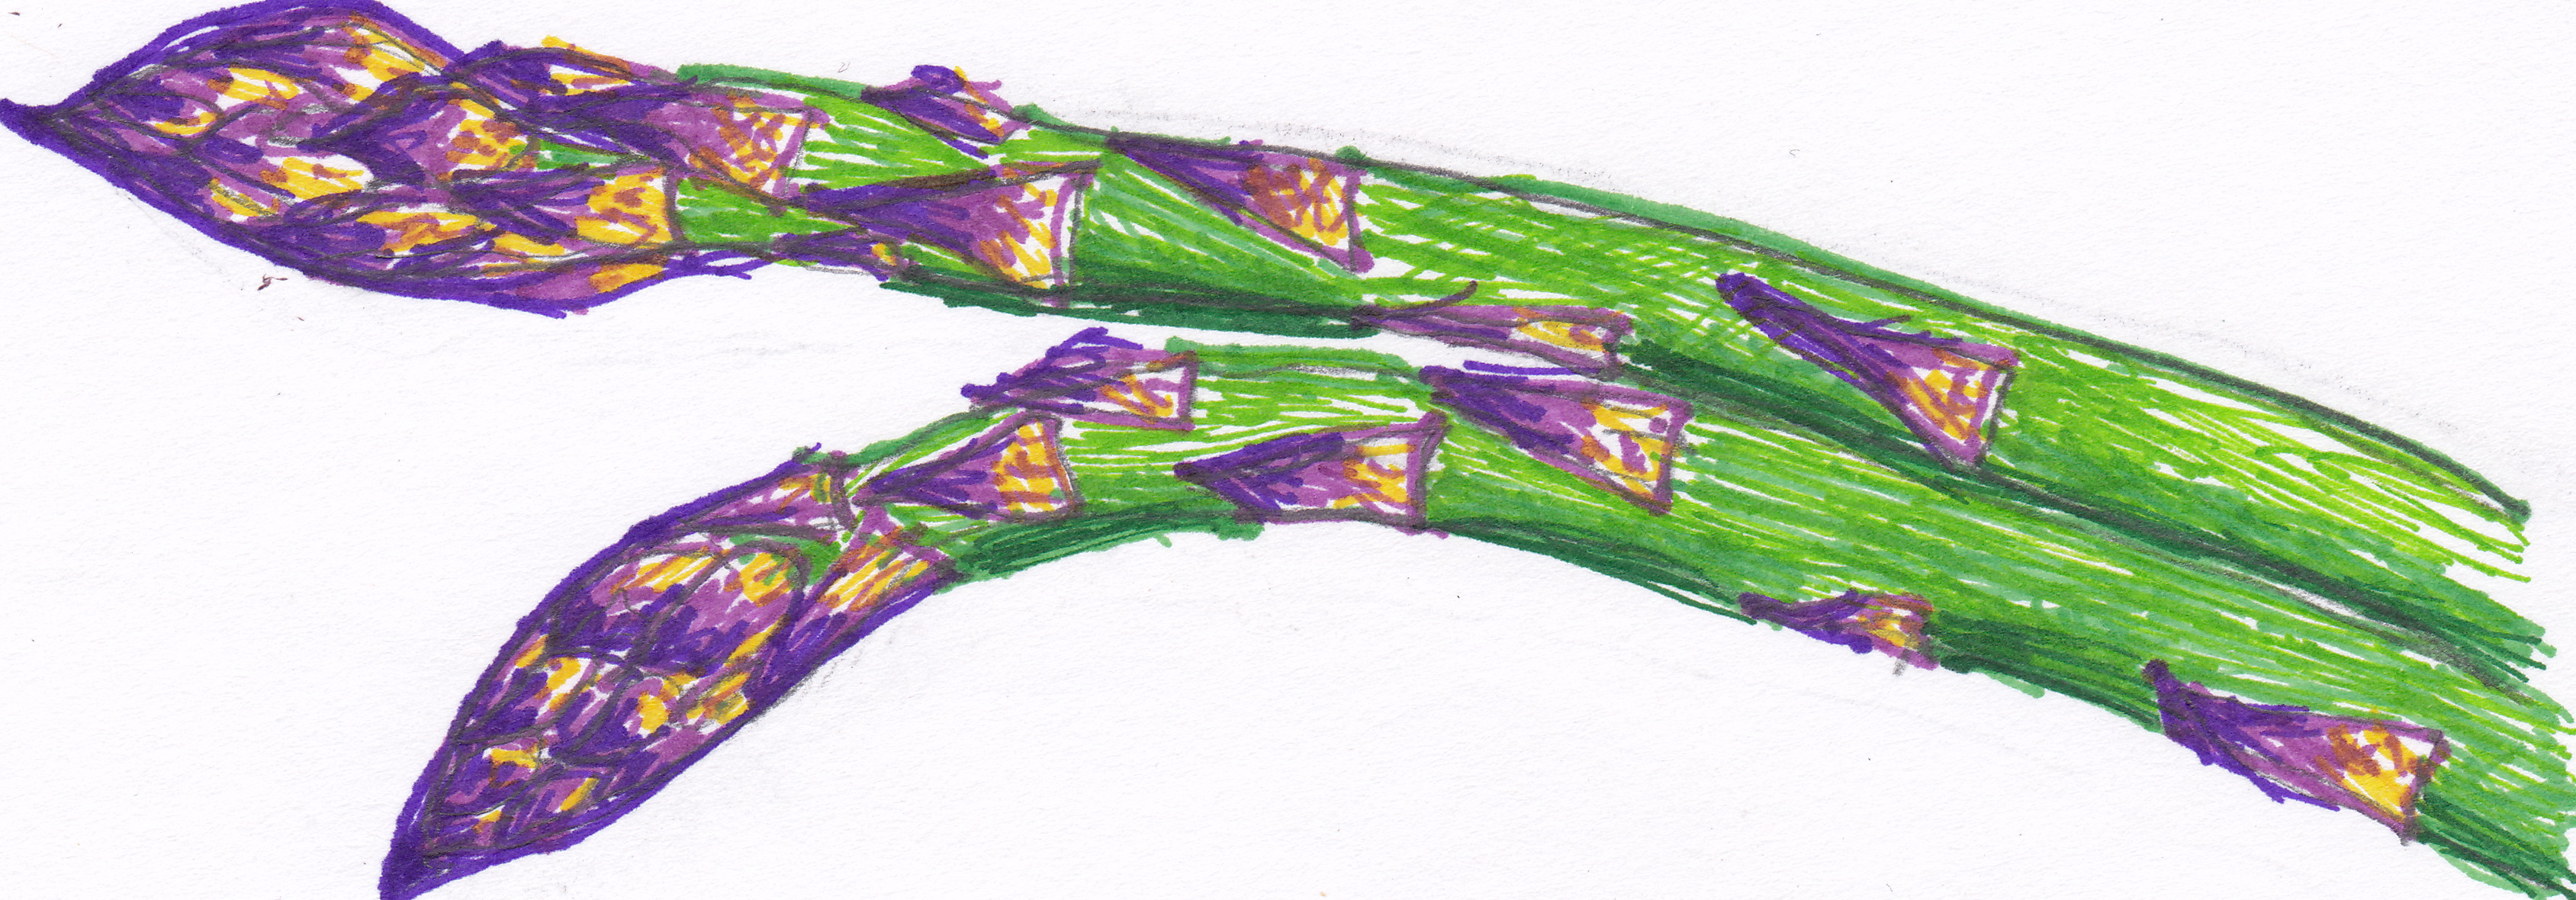
Something to do with asparagus right now...(and what I'm having for dinner.)


asparagus
olive oil
salt
sesame oil
toasted sesame seeds (a mixture of white and black, if available)

Heat oven to 350° F.

Toss asparagus stalks in olive oil and sprinkle lightly with salt.  Roast asparagus at 350° on a baking sheet in the middle of the oven, until tender.  Depending on the thickness of the stalks they will take about 15-20 minutes.  Half way through roasting gently move the stalks around, turning them over to cook evenly.

Allow the asparagus to cool slightly.  Dress with a delicate drizzle of sesame oil.  Sprinkle with black and white sesame seeds and toss to combine.

Serve as the base of a frisee or mixed greens salad topped with a poached egg and a very lemony vinaigrette.


378
1817
949
N
ovember
19
Put it on Toast. 25 ways to start Thanksgiving.
Help!   Thanksgiving is 72 hours away and while you have been dog-earing cookbooks for weeks, shopped the weekend before, and even managed to avoid the elbow to your shoulder by the feisty octogenarian who was going to in NO WAY let you have the store's last quart of whipping cream (this actually happened to me in graduate school), you just realized that you totally forgot to plan for something to occupy your relatives while you get the food ready for the table.  And so inevitably they will end up equally split between hovering directly in your path in your tiny overheated kitchen or rehashing the recent election and whatswrongwiththiscountry requiring a last-minute rearrangement of the pilgrim place cards.  Again.

Oh, right, and you have overzealously planned an almost too complicated multi-course meal culled from your favorite food blogs, and have no time left in the schedule or room in the oven to make another darn thing.

So, put it on toast.  Or bread, or thick oat-y crackers or toasted wedges of pita.

Here are a bunch of ideas, some quicker than others, for holiday-worthy crostini.  If you have the time, or children with idle hands, these all look pretty assembled and arranged on a platter, particularly the repetition of the shape and colors.  However, if you are pressed for time, just put all of the elements on a platter in small bowls with a heap of sliced bread rounds and your guests will love getting all interactive.

If you can manage, you can slice say a baguette on a deep angle to make long elegant oval slices, maybe brush it with olive oil or rub it with garlic and toast it in a low oven on a cookie sheet.  Or grill it quickly to get nice grill marks.  But again, fresh sliced good crusty bread is great just as is.  Also check with local food markets to see if any have frozen par-baked baguettes that you can finish in the oven yourself.

Here are several ideas, but definitely come up with your own with what you have on hand.  Just try to mix tastes and textures.  Layer something creamy/mushy on the bottom so it all sticks to the bread, and maybe top with something crunchy or colorful, or fresh herbs.

Gobble gobble.


make your own!) + lemon zest + chopped parsley + pepper + olive oil

Ricotta + fresh sliced fig + honey

Ricotta + roasted red peppers + a basil leaf

Ricotta + Parsley Pesto (parsley, garlic, olive oil, salt)

Creamy gorgonzola + sliced green apple + honey + chopped pecans

Brie + apricot jam + a basil leaf

Goat cheese + mushroom duxelles (finely chopped mushrooms + shallots sauteed with butter, thyme and wine)

Goat cheese + kalamata olive tapenade (pitted olives, parsley, lemon zest & juice, 1 anchovy fillet and olive oil in a food processor)

Goat cheese + diced roasted beets + chopped toasted hazelnuts + parsley

Cream cheese + smoked salmon + thinly sliced cucumber + sliver of red onion + lemon zest

cream cheese + smoked trout + thinly sliced cucumber + sprig of fresh dill

warm lobster or crab meat + melted butter (particularly good on brioche or soft mini rolls)

crab meat + diced avocado + diced cucumber + diced fresh red pepper + lime juice + cilantro

olive oil drizzled on the bread + Avocado mashed with lemon juice + a few hot red pepper flakes

Avocado + shrimp-cilantro salad (chopped shrimp with cilantro pesto)

Edamame humus (shelled cooked edamame pureed with lemon juice, olive oil and salt)

Chickpea humus + thinly sliced marinated carrots or roasted cherry tomatoes (Ruth Reichl's hummus recipe is etherial.)

White bean humus (pureed white beans with olive oil, lemon, parsley + salt) + chard sauteed with garlic

Baba Ganoush + crumbed feta cheese + sliced roasted red peppers

spinach or chard sauteed with diced onions, when cool, mixed with crumbed feta and fresh dill

Generous spread of great butter + thinly sliced radish + sprinkle of sea salt (trust me!)

Rub toast with a halved fresh tomato top with thinly sliced jamon imberico or prosciutto

Romesco sauce + chopped grilled scallions

Thinly sliced rare roast beef + horseradish cream + watercress

">

Good fresh ricotta (make your own!) + lemon zest + chopped parsley + pepper + olive oil

Ricotta + fresh sliced fig + honey

Ricotta + roasted red peppers + a basil leaf

Ricotta + Parsley Pesto (parsley, garlic, olive oil, salt)

Creamy gorgonzola + sliced green apple + honey + chopped pecans

Brie + apricot jam + a basil leaf

Goat cheese + mushroom duxelles (finely chopped mushrooms + shallots sauteed with butter, thyme and wine)

Goat cheese + kalamata olive tapenade (pitted olives, parsley, lemon zest & juice, 1 anchovy fillet and olive oil in a food processor)

Goat cheese + diced roasted beets + chopped toasted hazelnuts + parsley

Cream cheese + smoked salmon + thinly sliced cucumber + sliver of red onion + lemon zest

cream cheese + smoked trout + thinly sliced cucumber + sprig of fresh dill

warm lobster or crab meat + melted butter (particularly good on brioche or soft mini rolls)

crab meat + diced avocado + diced cucumber + diced fresh red pepper + lime juice + cilantro

olive oil drizzled on the bread + Avocado mashed with lemon juice + a few hot red pepper flakes

Avocado + shrimp-cilantro salad (chopped shrimp with cilantro pesto)

Edamame humus (shelled cooked edamame pureed with lemon juice, olive oil and salt)

Chickpea humus + thinly sliced marinated carrots or roasted cherry tomatoes (Ruth Reichl's hummus recipe is etherial.)

White bean humus (pureed white beans with olive oil, lemon, parsley + salt) + chard sauteed with garlic

Baba Ganoush + crumbed feta cheese + sliced roasted red peppers

spinach or chard sauteed with diced onions, when cool, mixed with crumbed feta and fresh dill

Generous spread of great butter + thinly sliced radish + sprinkle of sea salt (trust me!)

Rub toast with a halved fresh tomato top with thinly sliced jamon imberico or prosciutto

Romesco sauce + chopped grilled scallions

Thinly sliced rare roast beef + horseradish cream + watercress


And this roasted squash on toast recipe from Jean-Georges Vongerichten is next on my list to try.


917
1835
901
N
ovember
16
Four Fantastic Thanksgiving Hors d’Oeuvres


I have a really lovely huge piece in the current issue of the beautiful Green Door Magazine.  It is on hors d'oeuvres for Thanksgiving and fall gatherings--including southeast asian pickled shrimp, turnip soup, mini endive salads, and stuffed fresh figs.

Issues can be purchased online, in either print or digital, and some of my food piece can be found here.

It even has Vincent D'Onofrio on the cover.

Happy cooking.


646
1829
494
N
ovember
10
Little Neck Clams with White Wine Cream Sauce


Here is an elegant meal or appetizer, that takes not more than minutes to whip up.  Warm, rich and creamy, it is a great recipe to keep in mind for winter holidays.  Serve it with crusty bread for soaking up the outrageously good sauce left behind, or serve the whole thing over pasta for a more substantial dish.


see information on how to clean clams here)
2 tablespoons butter
2 tablespoons olive oil
3 cloves garlic, thinly sliced
2 shallots, minced
½ cup dry white wine
½ cup heavy cream, reduced slightly
¼ cup fresh parsley, chopped
1 tablespoon lemon zest
-no salt- (the clams should be plenty salty)

Heat butter and oil together in large, lidded, heavy bottomed pot.  Add garlic and shallots and saute until fragrant over medium-high heat.  Gently add clams and white wine, and cover.  Allow the clams to cook in the wine mixture, in the covered pot, until opened, about five minutes.

When all, or the majority, of the clams have opened, carefully remove them from the pot with a slotted spoon and cover them to keep warm.  Discard any clams that have remained closed.

Add the reduced cream to the wine clam broth in the pot, and continue to reduce a bit for a couple of minutes, over medium-low heat, if the sauce feels to thin.  Return the clams to the pot and gently mix to evenly cover with the sauce.  Sprinkle with fresh parsley and lemon zest.

Serve immediately, either with bread or add cooked pasta to the pot and portion out dishes.

">

Little Neck Clams with White Wine Cream Sauce
by Catie Schwalb

Makes four appetizers, or two main courses, or four main courses if served on pasta.

3 dozen little neck clams, cleaned (see information on how to clean clams here)
2 tablespoons butter
2 tablespoons olive oil
3 cloves garlic, thinly sliced
2 shallots, minced
½ cup dry white wine
½ cup heavy cream, reduced slightly
¼ cup fresh parsley, chopped
1 tablespoon lemon zest
-no salt- (the clams should be plenty salty)

Heat butter and oil together in large, lidded, heavy bottomed pot.  Add garlic and shallots and saute until fragrant over medium-high heat.  Gently add clams and white wine, and cover.  Allow the clams to cook in the wine mixture, in the covered pot, until opened, about five minutes.

When all, or the majority, of the clams have opened, carefully remove them from the pot with a slotted spoon and cover them to keep warm.  Discard any clams that have remained closed.

Add the reduced cream to the wine clam broth in the pot, and continue to reduce a bit for a couple of minutes, over medium-low heat, if the sauce feels to thin.  Return the clams to the pot and gently mix to evenly cover with the sauce.  Sprinkle with fresh parsley and lemon zest.

Serve immediately, either with bread or add cooked pasta to the pot and portion out dishes.


739
1835
484
N
ovember
08
Technique Tuesday: How to Clean Clams


Not just for summer fetes on the beach, clams and other bivalves are a spectacular, and traditional, addition to the holiday table, and perhaps even more importantly, the holiday cocktail hour.

A few critical steps can help insure a grit-free mouthful, and will dramatically reduce your chances of getting that one bad clam.

Buying

Buying the freshest seafood you can get is always the most important place to start, and the best way to help with this is to get to know the people at the seafood counter.

If picking them out yourself, look for clams that are not chipped, cracked, or have a damaged shell in anyway.  If buying them already bundled, discard any that are broken.  Always buy a few more than you need in case of broken shells or clams that don’t open.

Storing

Store clams in a bowl in the refrigerator covered with a damp cloth.  They can keep for a day or two, but the sooner you use them the better for all.

Cleaning

The day you want to cook them again go through all of the clams and discard any that have a damaged shell.  (when in doubt…throw it out.).  Scrub the outside of each shell thoroughly to remove any dirt.

As you are going through, one by one, if you find a clam that is open, gently tap it on the counter.  If it doesn’t close within a minute or two, it is dead and should be thrown out.  This is a critical step, as it will look like all the others that have also opened, after they all cook, and yet could potentially make you sick.  Any that are dead at the start need to go.

Place all of the scrubbed clams in a large bowl, or the sink, and cover with cold water by an inch or two.  Allow the clams to sit for twenty minutes in the water.  The clams will spit out any grit they have inside their shell.  Don’t leave them in the water for much longer than twenty minutes, or they will die.

Remove the clams gently, by hand, from the bowl, leaving the dirt and sand behind at the bottom.  Pouring them into a colander or scooping them out abruptly could stir up the grit and get it back in the shells.

Cook as desired (more on this later this week.).  And discard any clams that have not opened during the cooking process.


842
1452
775
O
ctober
07
One more bit of cherry tomato inspiration with which to send you off into the weekend…


I just discovered the Telepan TV channel on youtube.  Bill Telepan is one of my most favorite NYC chefs, who I had the great, great pleasure of cooking with for many months that the start of his inspirational and important Wellness in the Schools school lunch campaign.

He has started to put together videos, sharing some of his incredible recipes from his incredible restaurant Telepan.  The three recipes using cherry tomatoes in the video above are making me very. very. hungry.

Run! and get some cherry tomatoes at the markets this weekend while they are still available (we had a frost at our house last night!).


306
1756
295
S
eptember
01
Zucchini, Carrot and Scallion Fritters


These fritters are an homage to the perfect little hometown restaurant we had in our shoreline Connecticut town growing up in the 80s.  A place where everybody knew our name, where you could pop in casually for a wholesome lunch, or count on it for a suitably festive and elegant special occasion dinner.

I've been thinking a lot about food of that era lately.  As a kid I was permitted to tag along on many grownup restaurant dates, luncheons and dinner parties, giving me the chance to try copious amounts of new foods, many definitely not considered on the childrens' menu.  I remember these new tastes and textures more vividly than I do where I was or who I was with (go figure.)

But what is most interesting to me in hindsight, is that what was 80s nouvelle cuisine, was in many ways using a huge amount of the same ideas of locavore cooking now--using the freshest possible ingredients, lighter sauces or preparation to let the produce or proteins really be the focus, an overall lighter, fresher, more in-the-moment way of cooking.  The only difference being that then it seemed revolutionary and nouvelle, while today it is seen as a return to the basics.

This fritter is exactly in keeping with that.  The freshest possible ingredients, at the height of their season, minimally dressed up.  In the 80s something like this seemed very exotic, today it feels like the perfect, summer, wholesome appetizer, right out of a Deborah Madison book.

And plus...ding!  ding!  ding!...it is something to do with all of those zucchini piling up on your counters, that you perhaps might be starting to resent in just the slightest way.


Dipping Sauce ideas:

Soy sauce topped with a few teaspoons of toasted sesame seeds
and
Sour cream or plain greek yogurt mixed with a few teaspoons of freshly grated lemon zest
">
Zucchini, Carrot, and Scallion Fritters
by Catie Schwalb

makes about three dozen.

1 cup flour
1 ½ teaspoon baking powder
¾ teaspoon salt
few turns of fresh black pepper
¾ cup of milk
2 large eggs
1 1/4 cup grated, zucchini, about one medium zucchini
1 1/4 cup grated carrot, about three medium carrots
1/2 cup scallion, white and green parts, about three scallions
1/3 cup toasted sunflower seeds
canola or peanut oil, for frying

In a medium bowl, sift together flour, baking powder, salt and pepper. Set aside.

In a larger bowl, whisk together milk and eggs. Add the dry ingredients to the milk mixture and whisk until smooth.

Grate the zucchini on large holes of a box grater, or with the grating blade of a food processor. Squeeze in several layers of paper towel to remove as much liquid as possible. Grate carrots to the same size. Add both to the batter.

Thinly slice the scallions. Add scallions and sunflower seeds to batter and mix to thoroughly combine.

Fill a pot with canola or peanut oil, until it is 2 inches deep. Heat the oil to 360 F. Carefully drop about one tablespoon-sized dollops of the batter into the oil (they will puff up considerably). Do not put too many fritters in the pot at once, as the temperature of the oil will decrease too much. Also if the fritters are too large they won’t cook through by the time the outside is sufficiently browned, and will still be raw in the middle. Fry until golden brown, turning over once when cooking, about two minutes total. Turn the heat down if the fritters are browning too quickly or the temperature continues to rise.

Remove fritters with a slotted spoon to paper towels to drain. Salt lightly while still hot. Serve warm.


Dipping Sauce ideas:

Soy sauce topped with a few teaspoons of toasted sesame seeds
and
Sour cream or plain greek yogurt mixed with a few teaspoons of freshly grated lemon zest


392
1759
287
A
ugust
04
Roasted Nectarine and Zucchini Salad


Here is a quick recipe I dreamt up, while on my roasted produce kick this week, using what is in abundance in the gardens and at the market.  Thankfully, it turned out to be heavenly, lick-the-bowl-clean good.

There is a magical, sum is definitely greater than it's parts, result here, as with many very simple summer dishes (think: Tomatoes+Basil+Olive Oil.).  Sweet and sour and earthy and salty and bright and crunchy all going on in your mouth together. Roasting the nectarines and zucchini really intensifies their flavor and makes them both feel like vegetables...or fruit...or something new and unique completely.  A beautiful side dish for any summer meal, I imagine this would also be spectacular atop grilled fish, pork, or chicken.


ROASTED NECTARINE AND ZUCCHINI SALAD
by Catie Schwalb
Serves 4 as a side dish.

2 medium zucchini, about 5 cups cubed
4 nectarines, about 3 cups cubed (I used yellow nectarines, which are slightly more tart than the white.)
salt, to taste
1/4 + 1/4 cup olive oil
1 1/4 tablespoons lemon juice
4 ounces feta cheese
3 tablespoons fresh dill, finely chopped
1/4 cup pumpkin seeds, toasted

Heat oven to 425 F.

Toss zucchini and nectarines separately in a 1/4 cup of olive oil total between the two, just enough so they have a slight sheen.  Season with a good pinch of salt.  Taste, and add more if necessary.

Place nectarines and zucchini on a baking sheet in a single layer.  Keep them separate as they will be finished at different times.  Place in the top half of the oven.

After about 10 minutes check the zucchini and nectarines.  If starting to brown on one side, gently turn over with a spatula.

The cooking time will depend on the ripeness of your produce and the size of your pieces.  For a half inch cube, my nectarines took 12 minutes and zucchini took 22 minutes.

Check them again in a few minutes, and taste a piece to check for doneness.  Remove from the oven when they are brown on the edges and tender, but not mushy, all the way through.  Spread out on a plate or cool baking sheet and allow to cool.  Either chill or leave at room temperature.

Whisk together remaining 1/4 cup of olive oil and lemon juice.  Hold off using extra salt in this vinaigrette, as the salt already on the roasted zucchini and nectarines and in the feta should be plenty.

Just before serving, combine zucchini and nectarines, with feta, dill, and pumpkin seeds.  Gently toss with the lemon vinaigrette.  Taste, and add salt if necessary.  Serve immediately.

Zucchini and nectarines can be roasted a day in advance and kept in the refrigerator.


626
2213
611
J
uly
19
Garlic Scape and Herb Pancake


Move over scallions.  I may have to cheat on you.

My love affair with dim sum scallion pancakes is no secret.  There are few times I can think of when they don't appeal to me.  (or make me start to go all Pavlovian as I even type the words.)  Though green and doing very well, the scallions planted in my garden are still about the size of glorified dental floss and won't be serving up any exotic savories for a few weeks.

However, we do have garlic scapes!  And herbs!  Lots of both!

Scallions?  Who needs scallions?

While not exactly a necessity, (more of an insatiable craving), mother invention shone down and offered up this bright, summery, mildly garlicky, herby, southeast Asian-inspired perfection on a greasy paper towel.  There is a tremendous (and tremendously cheap) hole-in-the-wall dumpling shop in NYC's Chinatown, to which I make frequent pilgrimages.  Alongside their dumplings, they have a monstrous cast iron pan in which they make a very similar sesame pancake.  You can get a pizza-slice-sized wedge "stuffed with veggies" for $1.25, which is split laterally and crammed with shredded carrot and chopped cilantro leaves and stems.  There was definitely some inspiration from there in this as well.

Give these a try, using all that summer is offering up right now.  Shredded zucchini, carrot or beet, torn squash blossoms, thyme, sage, thinly sliced chard could all be welcome additions.  Fried dough + farm fresh herbs and produce = What could possibly be bad?

(more…)


819
1534
523
J
uly
06
happyradishwednesday.
 

Radishes at the Migliorelli Farm stand at the Union Square Greenmarket, NYC


Radishes of every color are pushing their way up through the dirt of my garden and attracting paparazzi-esque crowds at the farmers' market.  This fresh and this young, they are sweet and mild, and add a peppery snap to salads and summer meals.  Try some this week, with this so-easy-my-sheep-could-make-it recipe for irresistible radish, butter, and sea salt crostini.


And don't compost the radish greens tops just yet.  They are equally edible and equally wonderful.  Treat them as you would other hearty bitter greens; sauteed and tossed with pasta, stirred into soups, or whirled into pesto.  Here are a few ideas to try out from the kitchn.com.


Enjoy!


509
1726
330
J
une
22
Sorrel Pistou and Fresh Ricotta Crostini


With sorrel in its tangy, bright abundance at the farmers' markets now and throughout the summer, this pistou (or pesto or coulis) is a dynamite way to show it off.  Set out a platter of baguette slices, ricotta, and the green stuff and let your BBQ guests at it for a DIY appetizer.  Less work for you, no soggy for them.  Or, as we did last night, set out a platter of it between you and your loved one on the porch and call it dinner.

The lemony-green-herbal potency of the pistou is heavenly with the savory-creaminess of the homemade fresh ricotta.  But it is also an incredible addition in any place where you want a little herby, slightly sour, punch.  Toss it with warm pieces of boiled red potatoes for a new twist on potato salad, stir a small spoonful into a creamy root vegetable soup just before serving, toss with shrimp and orzo for a cold pasta salad, or drizzle over grilled vegetables, seafood, and chicken.

This is also a wonderful recipe to use to put away sorrel for the winter.  Make a big batch of the pistou and freeze in smaller portions, to stir into heavier winter dishes in the months to come.


SORREL PISTOU AND FRESH RICOTTA CROSTINI
by Catie Schwalb

makes about 1 1/2 cups of sorrel pistou

For the Pistou:
3/4 cup, packed, fresh sorrel leaves, thicker stems removed, washed and dried thoroughly
1/4 cup, packed, fresh parsley, washed and dried thoroughly
1 garlic clove
1 cup extra virgin olive oil
about 4 turns of fresh black pepper
salt to taste, a large pinch at least

For the Crostini:
Fresh ricotta cheese
thin slices of baguette, toasted or grilled if desired

For the pistou:

Combine sorrel, parsley, garlic clove, olive oil, salt and pepper in a blender or food processor.  Blend until uniform and smooth.  Taste and adjust salt and pepper to liking.

Will keep in an airtight container in the refrigerator for up to a week, but is most green and most flavorful the day it is made.  It can also be frozen, and thawed overnight in the refrigerator.  Stir before serving.

For the crostini:

Top slices of baguette, or thinly sliced rustic bread, with a large dollop of ricotta.  Top with a generous drizzle of pistou.  Serve immediately.

Alternative:

HERB POTATO SALAD

Steam or boil red skinned new potatoes.  Cut into bite-sized pieces while still warm, but cool enough to touch.  Toss with a generous amount of sorrel coulis.  Chill before serving.


351
1781
289
M
ay
12
Asparagus Ricotta Galette


As hinted at earlier this week, asparagus is bustin' out all over on our micro-farm.  One of the very first signs of a long season of fresh food from the gardens, this perennial faithfully returns each May, basically without us having to do a thing.  (That's my kind of garden vegetable!)

Since it is never better than right now, we'll eat just-picked asparagus almost every night for dinner for the next several weeks.  Then finally, when we can't stand it anymore, which fortunately is right about when the asparagus season peters out, we'll put our asparagus habit to bed for another 11 months.  Once you've had it this fresh and this good, you are spoiled for anything trying to masquerade as asparagus in the rest of the year.

But it is a challenge to keep it interesting in the dinners ahead.  Even as good as it is, when having asparagus almost nightly, sauteing, grilling, and soup-ing gets old quickly.  This savory galette was a very welcomed change, and was gobbled up quickly last evening.  It would also be wonderful for brunch, or cut in small squares for late spring hors d'oeuvres. I have been on a galette with corners kick this year, but feel free to form it in the more traditional round shape, or any free-form shape that works for you and your stalks.


1 single pastry crust (half of the recipe posted here, in my "Pie Crust 101" piece)
1 large bunch fresh asparagus, about 8 ounces, washed and woody ends trimmed.
1 1/2 cups shallots, sliced thin (4-5 large shallots)
1 cup ricotta (here's my recipe for homemade fresh ricotta)
1 tablespoon lemon zest, from about one lemon
2 eggs
salt
olive oil, for roasting and sauteing

Heat the oven to 350 F.

Make the pastry crust, as described here, and allow to rest for thirty minutes in the refrigerator.

Lightly toss asparagus with about a tablespoon of olive oil and a light sprinkling of salt.  Roast on a baking sheet in the oven until about half way roasted.  For pencil-thin asparagus this took six minutes.  Roast longer for thicker stalks.  Do not roast all the way, as they will continue to cook when the galette is baked.  Remove from the oven and set aside.

Increase oven temperature to 425 F.

In a wide saute pan, heat one tablespoon of olive oil on medium high heat.  Add shallots and stir to coat with oil.  Turn heat down to medium-low and slowly cook, stirring every few minutes, until fragrant, light amber, and caramelized, about 15 minutes.  Lower the heat if they start to brown too quickly.  Set aside.

Combine ricotta, lemon zest and a good pinch of salt.  Taste, and adjust salt if necessary.  Add one egg and mix thoroughly.

Roll out pastry dough to 1/4 " thin and transfer to a baking sheet, either by gently folding in quarters, or rolling around your rolling pin.  Spread a thin, about 1/4" layer of the ricotta mixture on the dough, leaving at least an inch boarder of dough around all sides.  Top with caramelized shallots, and then asparagus.  Fold dough up and over on all edges and crimp where necessary to hold in place.

For a more golden crust, mix one egg with a tablespoon of water, and using a pastry brush, gently brush perimeter of the crust with the egg wash.

Bake at 425 F for 35-40 minutes, until the crust is golden brown.
">
Asparagus Ricotta Galette, with Caramelized Shallots and Lemon Zest.
By Catie Schwalb

Makes one 9" square or round galette.

1 single pastry crust (half of the recipe posted here, in my "Pie Crust 101" piece)
1 large bunch fresh asparagus, about 8 ounces, washed and woody ends trimmed.
1 1/2 cups shallots, sliced thin (4-5 large shallots)
1 cup ricotta (here's my recipe for homemade fresh ricotta)
1 tablespoon lemon zest, from about one lemon
2 eggs
salt
olive oil, for roasting and sauteing

Heat the oven to 350 F.

Make the pastry crust, as described here, and allow to rest for thirty minutes in the refrigerator.

Lightly toss asparagus with about a tablespoon of olive oil and a light sprinkling of salt.  Roast on a baking sheet in the oven until about half way roasted.  For pencil-thin asparagus this took six minutes.  Roast longer for thicker stalks.  Do not roast all the way, as they will continue to cook when the galette is baked.  Remove from the oven and set aside.

Increase oven temperature to 425 F.

In a wide saute pan, heat one tablespoon of olive oil on medium high heat.  Add shallots and stir to coat with oil.  Turn heat down to medium-low and slowly cook, stirring every few minutes, until fragrant, light amber, and caramelized, about 15 minutes.  Lower the heat if they start to brown too quickly.  Set aside.

Combine ricotta, lemon zest and a good pinch of salt.  Taste, and adjust salt if necessary.  Add one egg and mix thoroughly.

Roll out pastry dough to 1/4 " thin and transfer to a baking sheet, either by gently folding in quarters, or rolling around your rolling pin.  Spread a thin, about 1/4" layer of the ricotta mixture on the dough, leaving at least an inch boarder of dough around all sides.  Top with caramelized shallots, and then asparagus.  Fold dough up and over on all edges and crimp where necessary to hold in place.

For a more golden crust, mix one egg with a tablespoon of water, and using a pastry brush, gently brush perimeter of the crust with the egg wash.

Bake at 425 F for 35-40 minutes, until the crust is golden brown.


563
1754
442
A
pril
08
Olive Oil Everything Crackers


Here is another cracker recipe with which to send you off into the weekend!

This recipe and the Cornmeal and Chive Cracker recipe from earlier this week contrast each other nicely, and would make a sublime little cracker basket assortment.  This cracker is a little more subtle in flavor and more tender in texture than the other, so pairs nicely with soft, less powerful cheeses too.  With or without the everything seed mix and this is a perfect, versatile, go-to cracker recipe to have in your bag of tricks.


1 cup flour
1/2 cup whole wheat flour
1/2 cup buttermilk
1/4 cup olive oil
1/2 teaspoon salt

Everything Seed Mix:
1/2 teaspoon each of toasted sesame seeds, poppy seeds, and flax seeds
1/4 teaspoon salt
1/4 teaspoon granulated garlic (available in the spice aisle) (optional, for the true everything bagel flavor)

Heat oven to 350 ° F.

Mix together flour, whole wheat flour and salt.  Make a well in the middle of the flour and pour in the buttermilk and olive oil.  Mix either by hand, with a paddle of a stand mixer, or in a food processor until dough comes together.

Lightly dust with flour a silpat or piece of parchment paper that is the same size as your baking sheet. Roll out a portion of the dough right on the paper or silpat. Try to get it as thin and even as you are able, without creating holes, ideally around 1/16th of an inch. Lightly sprinkle with more flour if the rolling pin starts to stick.

Using cookie cutters, my new favorite tool: a Pasta Bike, pizza cutter or carefully with a knife, cut crackers in desired shape. Remove excess dough.  Brush lightly with water and sprinkle liberally with seed mix.

Bake for 15-20 minutes, turning the sheet once in the oven about half way through. Crackers are ready when they are crisp and no longer pliable. Transfer to a cooling rack.

Will keep in an airtight container for a week.
">
OLIVE OIL EVERYTHING CRACKERS
by Catie Schwalb

Makes about two dozen 2.5" diameter round crackers.  However, cut in any shape you fancy.

1 cup flour
1/2 cup whole wheat flour
1/2 cup buttermilk
1/4 cup olive oil
1/2 teaspoon salt

Everything Seed Mix:
1/2 teaspoon each of toasted sesame seeds, poppy seeds, and flax seeds
1/4 teaspoon salt
1/4 teaspoon granulated garlic (available in the spice aisle) (optional, for the true everything bagel flavor)

Heat oven to 350 ° F.

Mix together flour, whole wheat flour and salt.  Make a well in the middle of the flour and pour in the buttermilk and olive oil.  Mix either by hand, with a paddle of a stand mixer, or in a food processor until dough comes together.

Lightly dust with flour a silpat or piece of parchment paper that is the same size as your baking sheet. Roll out a portion of the dough right on the paper or silpat. Try to get it as thin and even as you are able, without creating holes, ideally around 1/16th of an inch. Lightly sprinkle with more flour if the rolling pin starts to stick.

Using cookie cutters, my new favorite tool: a Pasta Bike, pizza cutter or carefully with a knife, cut crackers in desired shape. Remove excess dough.  Brush lightly with water and sprinkle liberally with seed mix.

Bake for 15-20 minutes, turning the sheet once in the oven about half way through. Crackers are ready when they are crisp and no longer pliable. Transfer to a cooling rack.

Will keep in an airtight container for a week.


359
1827
364
A
pril
06
Cornmeal and Chive Crackers


In my ongoing quest to eliminate store-bought processed foods from our kitchen and life, this week I tackled crackers.  There is a long and growing list food items that I no longer even think of not making myself, and yet almost weekly I think nothing of tossing (overpriced) box after box of these crisp vices in my shopping basket.

Growing up in shoreline Connecticut in the 80's "cheeseandcrackers" were a very big deal.  Practically their own extracurricular activity.  I vividly remember going to our immpeccable cheese shop on Main Street with my grandmother and picking out an appropriate assortment of contrasting cheeses and suitable cracker sidekicks for that weekend's cheese tray.  I was always most intrigued by the layer cake-esque Huntsman cheese, consisting of stripes of Double Gloucester and Stilton cheeses.  Carrying on in that early-ingrained tradition, we always have a nice piece or two of cheese on hand and a cupboard stocked with cracker choices for insta-entertaining.

So with my long history with cheeseandcrackers, I am even more surprised that making my own crackers hadn't come up before (particularly with now making my own cheese from time to time).  A remarkably easy project, offering a gazillion flavor possibilities, from as hearty and rustic to delicate and subtle as you want to make them.  When picking out a special piece of carefully crafted cheese, you can decide exactly what vehicle will deliver this creamy treasure to your gullet.  Doesn't your own cheeseandcrackers ritual deserve at least as much?


CORNMEAL AND CHIVE CRACKERS
by Catie Schwalb

These are a rustic,  full-flavored cracker taking advantage of gorgeous spring chives.  I found they also make a great chip-like snack cracker which would be great with dips or  just as a snack on their own.

Makes approximately four dozen 2” x 3.5” crackers.

1 cup cornmeal
3 tablespoons unsalted butter, cut in small cubes
1 ¼ cup flour, plus more for dusting
1 teaspoon kosher salt, plus more for sprinkling on top
1/8 cup chives, finely chopped

Heat oven to 350 ° F.

In a medium saucepan, heat one cup of water with the cubes of butter and salt. Allow the water to come to a gentle boil (the butter should be melted around the same time). Whisk in the cornmeal and cook for 2 minutes over low heat, stirring frequently. The mixture will be quite thick.

In a mixing bowl, combine cornmeal mixture with flour and chives. Mix until just combined. Try to avoid over-mixing as it will make the crackers tougher.

Wrap dough in plastic and let rest in the refrigerator for a half hour.

Lightly dust with flour a silpat or piece of parchment paper that is the same size as your baking sheet. Roll out a portion of the dough right on the paper or silpat. Try to get it as thin and even as you are able, without creating holes, ideally around 1/16th of an inch. Lightly sprinkle with more flour if the rolling pin starts to stick.

Using cookie cutters, a rolling pastry cutter, pizza cutter or carefully with a knife, cut crackers in desired shape. Remove excess dough and sprinkle crackers liberally with additional kosher salt.

Bake for 15-20 minutes, turning the sheet once in the oven about half way through. Crackers are ready when they are beginning to turn light brown around the edges and are no longer pliable. Transfer to a cooling rack.

Will keep in an airtight container for a week.


527
1848
482
M
arch
25
Pan-Seared Sea Scallops, with Pickled Watermelon Radish and Microgreen Salad


Here's a great little dish using those irresistable watermelon radishes and microgreens now growing at a farmers' market near you.  Ready in under a half hour, this would be a deceptively easy, super impressive first course for a local-chic dinner soiree.  Or triple the scallops, and pair it with cool buckwheat soba noodles dressed with sesame vinaigrette and sprinkled with additional microgreens for a light and springy main course.

Either way it uses some of the best items our farmers are offering up at this moment.  And after months and months of braised root vegetables, some very welcome fresh leafy crunchy variety.


Remove the adductor muscle from the scallops.  Pat dry with paper towels and keep refrigerated.

In a small bowl combine the radish slices with the sugar and salt.  Allow to sit for about five minutes.  They are ready to use at this point, or can be refrigerated for up to four hours.  Before using, rinse gently and blot with paper towels.

Put the rice vinegar in a small bowl, with a small pinch of salt.  Gradually whisk in the sesame oil.  Set aside.

Arrange radish slices on plates.

Remove scallops from the refrigerator, season lightly with salt. In a saute pan, over high heat, melt a tablespoon of butter with a tablespoon of oil. When hot and shimmering carefully add the scallops to the very hot pan. Do not move them at first. After about a minute gently check to see if they are stuck to the pan, and if browning too quickly. Turn down heat slightly, if so. After about another minute, they should be nicely browned an caramelized, flip to the other side and sear for another minute.

Place scallops on radish slices on serving plates. In a medium bowl toss microgreens with sesame dressing (you may not need to use all of it), and top scallops with dressed greens. Serve immediately.

">

PAN-SEARED SEA SCALLOPS,
WITH PICKLED WATERMELON RADISH AND MICROGREEN SALAD

Serves 4, as an appetizer. Triple recipe for a main course.

4 large sea scallops
12 thin slices of watermelon radish. (Other radish varieties will work well too, but will have a bit more bite.)
1 tablespoon sugar
1 teaspoon salt
1/2 cup loosely packed microgreens
2 teaspoon rice vinegar
2 tablespoon sesame oil
1 tablespoon unsalted butter
1 tablespoon canola, vegetable, or peanut oil

Remove the adductor muscle from the scallops.  Pat dry with paper towels and keep refrigerated.

In a small bowl combine the radish slices with the sugar and salt.  Allow to sit for about five minutes.  They are ready to use at this point, or can be refrigerated for up to four hours.  Before using, rinse gently and blot with paper towels.

Put the rice vinegar in a small bowl, with a small pinch of salt.  Gradually whisk in the sesame oil.  Set aside.

Arrange radish slices on plates.

Remove scallops from the refrigerator, season lightly with salt. In a saute pan, over high heat, melt a tablespoon of butter with a tablespoon of oil. When hot and shimmering carefully add the scallops to the very hot pan. Do not move them at first. After about a minute gently check to see if they are stuck to the pan, and if browning too quickly. Turn down heat slightly, if so. After about another minute, they should be nicely browned an caramelized, flip to the other side and sear for another minute.

Place scallops on radish slices on serving plates. In a medium bowl toss microgreens with sesame dressing (you may not need to use all of it), and top scallops with dressed greens. Serve immediately.


[caption id="attachment_2004" align="aligncenter" width="600"]http://www.pitchforkdiaries.com/2011/03/25/pan-seared-sea…crogreen-salad/ http://www.pitchforkdiaries.com/2011/03/25/pan-seared-sea…crogreen-salad/[/caption]


441
1795
394
F
ebruary
04
Scallion Pancakes
Scallion pancakes.  Oh how I love thee.


These remarkable, little chewy, salty, scallion-y, layered disks of oily crunchy heaven completely stole my heart when I first had them my first year living in the city a decade and a half ago.  Often I would grab a late night snack of scallion pancakes and dumplings on my way home from rehearsal near midnight, back when my metabolism could handle such an indulgence.

On our honeymoon in China three years ago, I stumbled upon a mirage-like goddess making scallion pancakes on a narrow back street in Beijing.


Just look at the size of that pan!  We got a New York pizza slice-sized wedge (see the table on the right), wrapped loosely in wax paper, that the newlyweds pawed at, stopped dead on the street, like malnourished tiger cubs.  Who got the last bite should have gone in a prenup.

Too recently I discovered that these treasures are not all that difficult to make yourself--however dangerous it could be to embark upon in the privacy of your own home.  Proceed with caution.  The management is not responsible for the abandonment of any new year's resolutions.

But if only in honor of Chinese New Year, give these a try.  The rolled out, uncooked, pancakes can be layered in slightly floured wax paper and stored in the refrigerator wrapped in plastic for about twenty-four hours, and then finished in a frying pan for two minutes on each side.  Do we hear a great Year of the Rabbit themed Super Bowl appetizer?


I used half all-purpose flour and half cake flour. Cake flour, available in the baking aisle at the grocery store, has a lower gluten content, resulting in a dough that wasn't as tough, and I could roll out thinly much more easily, as it wasn't springing back as I tried to roll. However, you can make this entirely of AP flour, it might just be a little more challenging to roll out thin.

1 1/4 cups all-purpose flour
1 1/4 cups cake flour
3/4 cup warm water
sesame oil, about 3 teaspoons
1/2 cup scallions, sliced thin
salt
peanut or canola oil, for frying

Combine flours together. Add water, either in a well in the middle of the flours, or in a stand mixer with a dough hook, and work to evenly combine. Knead for about three minutes until the dough is smooth and elastic. Place the ball of dough into a slightly oiled bowl, cover with a damp cloth, and let rest for about thirty minutes.


Divide dough into three equal pieces (or more depending on the size of pancake you wish). Roll one piece of dough out into a circle, as thinly as possible.


Brush one side of rolled out dough with a very thin layer of sesame oil. Sprinkle lightly with salt, and scatter scallions evenly and liberally over the dough, making sure to get the edges.


Starting at the edge, carefully roll dough in one direction, encompassing the scallions, until you have a long rope.


Coil the rope (think: cinnamon bun) into a tight bundle.  (Look at the large beehive-like coils on the table on the left with the man in the photo of Beijing earlier in the post.) Cover with a damp cloth and allow to rest for about thirty minutes.


After they've rested, flatten the coil slightly with your hand.


Roll the disk with a rolling pin, until it is an even circle about 8-10" in diameter.


Heat a tablespoon of peanut or canola oil in a pan over medium-high heat, until the oil shimmers. Gently place the pancake in the pan, laying it away from you as you put it in--so you don't get splashed with oil. Fry gently for about two minutes on both sides until golden brown. Drain briefly on a paper towel.

Cut into wedges. Serve warm with a dipping sauce of soy sauce infused with slices of fresh ginger.
">
SCALLION PANCAKES
Makes three 8-10" pancakes.

I used half all-purpose flour and half cake flour. Cake flour, available in the baking aisle at the grocery store, has a lower gluten content, resulting in a dough that wasn't as tough, and I could roll out thinly much more easily, as it wasn't springing back as I tried to roll. However, you can make this entirely of AP flour, it might just be a little more challenging to roll out thin.

1 1/4 cups all-purpose flour
1 1/4 cups cake flour
3/4 cup warm water
sesame oil, about 3 teaspoons
1/2 cup scallions, sliced thin
salt
peanut or canola oil, for frying

Combine flours together. Add water, either in a well in the middle of the flours, or in a stand mixer with a dough hook, and work to evenly combine. Knead for about three minutes until the dough is smooth and elastic. Place the ball of dough into a slightly oiled bowl, cover with a damp cloth, and let rest for about thirty minutes.


Divide dough into three equal pieces (or more depending on the size of pancake you wish). Roll one piece of dough out into a circle, as thinly as possible.


Brush one side of rolled out dough with a very thin layer of sesame oil. Sprinkle lightly with salt, and scatter scallions evenly and liberally over the dough, making sure to get the edges.


Starting at the edge, carefully roll dough in one direction, encompassing the scallions, until you have a long rope.


Coil the rope (think: cinnamon bun) into a tight bundle.  (Look at the large beehive-like coils on the table on the left with the man in the photo of Beijing earlier in the post.) Cover with a damp cloth and allow to rest for about thirty minutes.


After they've rested, flatten the coil slightly with your hand.


Roll the disk with a rolling pin, until it is an even circle about 8-10" in diameter.


Heat a tablespoon of peanut or canola oil in a pan over medium-high heat, until the oil shimmers. Gently place the pancake in the pan, laying it away from you as you put it in--so you don't get splashed with oil. Fry gently for about two minutes on both sides until golden brown. Drain briefly on a paper towel.

Cut into wedges. Serve warm with a dipping sauce of soy sauce infused with slices of fresh ginger.


302
1834
132
F
ebruary
02
Chinese Dumplings


Chinese new year begins tonight at midnight.  An integral part of the celebratory feasts are meat and vegetable stuffed dumplings.  Called jiao-zi in northern China, they are typically eaten right at the start of the new year.  Their crescent shape is reminiscent of the shape of ancient Chinese currency, silver and gold ingots, and eating them at the birth of the new year is thought to bring wealth and prosperity.

When I first moved to New York City in the mid-nineties, I had my first taste of really authentic chinese dumplings.  It was love at first slightly-burned-tongue.  More of an obsession, to be honest, as I would devour as many as I could afford, as often as I could justify.

Three years ago, my husband and I celebrated our honeymoon in China.  I had the wonderful good fortune of being able to learn a tremendous amount about the cuisine, with trips to many local markets, tremendous meals, and some cooking lessons at the Cloud 9 cooking school in Yangshuo on the banks of the breathtaking Li River.

One of the dishes we cooked in class were dumplings.  Here is one of our lovely teachers explaining how to fold the rounds of dough into the crescent shape.

http://www.youtube.com/watch?v=aphirz7wcbM

So below are my recipes for both pork and vegetable dumplings.  I have adapted them through the years from what I learned in that class, what I've learned from a big assortment of great cookbooks, and most definitely from what I've learned from eating this favorite of any food I can think of.  On a desert island, these are what are coming with me.

I am sure there are Chinese grandmothers who will find unauthentic hues in some part of my recipes.  But they are as authentic as I've been able to learn through every best effort, and when I burn my tongue with that first divine chewy bite, send me back to China and Chinatowns I've loved, and make me feel very fortunate.

Shaoxing rice wine or medium-dry sherry
1/2 teaspoon salt
1/4 teaspoon ground black pepper
2 teaspoons sesame oil
2 tablespoons soy sauce

With the blunt edge of a cleaver or chef's knife, smash and bruise the ginger. Put into a 1/2 cup of cold water and let sit for at least 10 minutes.

Combine all other ingredients with the pork. Stirring in one direction, slowly add strained ginger water to pork mixture, making sure to squeeze out ginger to get as much juice as you can. Discard ginger solids. Stir until water is incorporated. Refrigerate until ready to fill dumplings.

You may pan fry a small spoonful of the filling to sample and adjust seasoning if desired.

Vegetable Filling (for 60 dumplings)
(Below is a combination that I enjoy and is fresh, bright and balanced. But these dumplings are a wonderful blank canvas for vegetable fillings in particular, and a great way to use seasonal produce throughout the year.)
3 large carrots
3 scallions, white and some of green parts
1 1/2 cups packed baby bok choy
8 large fresh shitake mushrooms
1/2 cup packed fresh spinach leaves
1 1/2 teaspoons salt, or more to taste
1/4 teaspoon ground black pepper
1 1/2 teaspoon finely grated fresh ginger (freeze first, and grate on a microplane for great results.)
3 teaspoons sesame oil

Grate or chop all vegetables as finely as possible and combine. Alternatively, you can chop all vegetables in a food processor, until it resembles a chunky paste. Combine vegetables with salt, pepper, ginger and sesame oil. Taste and adjust seasoning.


Dough (for approximately 60 dumplings)
(You can certainly use any of the round of dumpling wrappers that are widely available at grocery stores and asian specialty food markets, but if you have a little extra time, making the dough yourself is a well-rewarded effort.)
4 cups all-purpose flour
3/4 teaspoon salt
1 1/2 cups water


Comine flour and salt. Make a well in the middle and pour in the water. Slowly combine from the sides of the well, and knead until all incorporated. Knead for at least 5 minutes, until the dough is smooth and elastic. Cover with a damp cloth and let rest for 20 minutes.

Alternatively you can make the dough in a stand mixer using the dough hook.

After the dough has rested, roll out on a floured surface, into a rope about the width of your thumb. Cut pieces a little less than an inch, so when rolled into a ball they are about the size of a large cherry. Keep unused dough under a damp cloth as you work.

Flatten the balls into a disk and then roll out into a circle about 3-3.5 inches in diameter, using more flour as needed. You can also run them through a pasta roller, at number 4 thickness.

Assembly
(Please see video above.)
Place one circle of dough in the palm of your hand. With your finger, lightly wet the outer edge of the dough with water, to help make the seal.  Place about a teaspoon of filling in the center of the dough. Pinch the top and bottom together at one point, so that it is folded in half. Holding that point with one hand, use your other hand to make one fold on one side of the dough towards the center like a pleat. Repeat on that same side and then seal that half well at the top. Switch hands so the other is holding the center point. Do the same two pleats on the other side towards the center and seal.

Place finished dumplings upright on a baking sheet lined with parchment or slightly floured.
Dumplings can be frozen at this point, by placing the sheet in the freezer, freezing them individually. When frozen they can be removed from the sheet and consolidated to a freezer bag.

To Boil the Dumplings:
Bring a pot of water to a boil. Add fresh or frozen (directly from the freezer, no need to thaw) dumplings. Allow water to return to a boil and add one cup of cold water to the pot. Allow to come to a boil again and add one more cup of cold water to the pot. When the water returns to a boil, the dumplings should be cooked through. The addition of the cold water also keeps the water from boiling too vigorously and breaking apart the dumplings.

Dipping Sauce:
My favorite is:
3 parts soy sauce
2 parts Chinkiang vinegar, chinese black vinegar, or balsamic vinegar
1 part sesame oil

Mix well to combine.

Another version:
3 parts soy sauce
2 parts Chinkiang vinegar, black vinegar, or balsamic vinegar
Fresh ginger, peeled and finely diced, to taste
Sugar, to taste
">
PORK AND VEGETABLE CHINESE DUMPLINGS

Each recipe makes approximately 60 dumplings.

Pork Filling (for 60 dumplings)
1 lb ground pork
4 inch piece of fresh ginger, unpeeled
1/2 cup scallions, white and green parts, thinly sliced
1 egg
1 tablespoon Shaoxing rice wine or medium-dry sherry
1/2 teaspoon salt
1/4 teaspoon ground black pepper
2 teaspoons sesame oil
2 tablespoons soy sauce

With the blunt edge of a cleaver or chef's knife, smash and bruise the ginger. Put into a 1/2 cup of cold water and let sit for at least 10 minutes.

Combine all other ingredients with the pork. Stirring in one direction, slowly add strained ginger water to pork mixture, making sure to squeeze out ginger to get as much juice as you can. Discard ginger solids. Stir until water is incorporated. Refrigerate until ready to fill dumplings.

You may pan fry a small spoonful of the filling to sample and adjust seasoning if desired.

Vegetable Filling (for 60 dumplings)
(Below is a combination that I enjoy and is fresh, bright and balanced. But these dumplings are a wonderful blank canvas for vegetable fillings in particular, and a great way to use seasonal produce throughout the year.)
3 large carrots
3 scallions, white and some of green parts
1 1/2 cups packed baby bok choy
8 large fresh shitake mushrooms
1/2 cup packed fresh spinach leaves
1 1/2 teaspoons salt, or more to taste
1/4 teaspoon ground black pepper
1 1/2 teaspoon finely grated fresh ginger (freeze first, and grate on a microplane for great results.)
3 teaspoons sesame oil

Grate or chop all vegetables as finely as possible and combine. Alternatively, you can chop all vegetables in a food processor, until it resembles a chunky paste. Combine vegetables with salt, pepper, ginger and sesame oil. Taste and adjust seasoning.


Dough (for approximately 60 dumplings)
(You can certainly use any of the round of dumpling wrappers that are widely available at grocery stores and asian specialty food markets, but if you have a little extra time, making the dough yourself is a well-rewarded effort.)
4 cups all-purpose flour
3/4 teaspoon salt
1 1/2 cups water


Comine flour and salt. Make a well in the middle and pour in the water. Slowly combine from the sides of the well, and knead until all incorporated. Knead for at least 5 minutes, until the dough is smooth and elastic. Cover with a damp cloth and let rest for 20 minutes.

Alternatively you can make the dough in a stand mixer using the dough hook.

After the dough has rested, roll out on a floured surface, into a rope about the width of your thumb. Cut pieces a little less than an inch, so when rolled into a ball they are about the size of a large cherry. Keep unused dough under a damp cloth as you work.

Flatten the balls into a disk and then roll out into a circle about 3-3.5 inches in diameter, using more flour as needed. You can also run them through a pasta roller, at number 4 thickness.

Assembly
(Please see video above.)
Place one circle of dough in the palm of your hand. With your finger, lightly wet the outer edge of the dough with water, to help make the seal.  Place about a teaspoon of filling in the center of the dough. Pinch the top and bottom together at one point, so that it is folded in half. Holding that point with one hand, use your other hand to make one fold on one side of the dough towards the center like a pleat. Repeat on that same side and then seal that half well at the top. Switch hands so the other is holding the center point. Do the same two pleats on the other side towards the center and seal.

Place finished dumplings upright on a baking sheet lined with parchment or slightly floured.
Dumplings can be frozen at this point, by placing the sheet in the freezer, freezing them individually. When frozen they can be removed from the sheet and consolidated to a freezer bag.

To Boil the Dumplings:
Bring a pot of water to a boil. Add fresh or frozen (directly from the freezer, no need to thaw) dumplings. Allow water to return to a boil and add one cup of cold water to the pot. Allow to come to a boil again and add one more cup of cold water to the pot. When the water returns to a boil, the dumplings should be cooked through. The addition of the cold water also keeps the water from boiling too vigorously and breaking apart the dumplings.

Dipping Sauce:
My favorite is:
3 parts soy sauce
2 parts Chinkiang vinegar, chinese black vinegar, or balsamic vinegar
1 part sesame oil

Mix well to combine.

Another version:
3 parts soy sauce
2 parts Chinkiang vinegar, black vinegar, or balsamic vinegar
Fresh ginger, peeled and finely diced, to taste
Sugar, to taste


318
1856
393
J
anuary
25
Flavored Salt


In honor of last week's National Popcorn Day, I've done some tinkering in the kitchen with flavorings.  My favorite project was coming up with different flavored salts.  It is outrageous that I haven't done this sooner, and even more outrageous the number of super costly little precious jars of flavored finishing salts that I have sitting in my spice cabinet.

The technique is nothing more than combining good quality salt, either kosher or sea salt, and good quality spices, herbs, citrus, or a combination.  It is up to you as far as the ratio of salt to flavors, depending on how concentrated you want the flavor and the color, and how strong the ingredient is you are using.  On average I used about 1 part flavor to 1 1/2 parts salt.  Simply put all ingredients in a spice grinder, coffee grinder, food processor, or mortar and pestle and pulse or grind until well incorporated.

Hint:  For spices, toast them lightly first to release more of their flavor.  Place them in a dry pan over medium heat, swirling frequently for a few minutes until they start to become fragrant.

This powdery little flavor bomb is amazing sprinkled over hot fresh popcorn, and as a finish for so many of your dishes.  It also looks gorgeous as a pop of color sprinkled around a plate.  They'll keep for about a year in an airtight container, making them fantastic gifts.  I mean, have you seen what these things cost lately?

Here are a few ideas below, but the combinations are endless.  Keep a little jar or two on your counter, and you'll find yourself using them on everything.  Put a few small dishes on your dinner party table, and let guests play with their food.

CURRY SALT
I used a brilliant french version of an indian masala, called Vadouvan, from the exquisite Spice House in Chicago.  Amazing on popcorn, but also chicken, fish, roasted vegetables (especially cauliflower), or a cold chicken salad.

PIMENTON SALT
Smokey, sweet, brilliantly colored spanish paprika. It rocked on popcorn. Would also be stunning on fried eggs, roasted potatoes, grilled shrimp, and roasted meats.

CHIVE AND SHALLOT SALT
I used some high quality freeze dried shallots and chives (again, thank you Spice House), resulting in a savory blend that exploded with the most amazing aroma as it hit the hot popcorn. It was also absurdly good on my poached eggs this morning, and the small batch is almost gone. Mashed potatoes? Yes. Roast Chicken? Yes. Just about anything you want to spruce up with a little savory brightness? Most definitely. Bonus points for drying your own homegrown chives.

CITRUS SALT
Zest the peel of a lemon, lime, orange, meyer lemon or tangerine. Allow to dry on paper towel, and then combine with salt.
Poultry and seafood would be particularly good, as well as roasted peppers.

VANILLA SALT
Split and scrape a vanilla bean, and combine seeds with salt. Could have interesting results with some delicate fish and lobster, but I'm dreaming more of a stunning salty finish to a dessert, on a scoop of dense gelato, or a crunch on dark chocolate covered caramels.


CHINESE FIVE SPICE POWDER SALT
Get the best five spice you can, and then bring me the popcorn! ...And the roasted chicken wings, roasted pork, roasted brussels sprouts, and noodles.

PORCINI SALT
Pulse dried porcini mushrooms in grinder to a fine powder, and then pulse with salt. This earthy, chocolaty, elegant finisher adds a new element to a side of rice, a creamy pasta, eggs, a crostini with oozy cheese, or topping a puree of potato soup.

LEMONGRASS AND KAFFIR LIME
Dry both slightly, and grind with salt to make a bright, southeast Asian inspired topping. Beautiful in a ramen soup, on grilled fish or chicken, and even as an unexpected finisher to desserts.


301
988
295
J
anuary
21
Popcorn
[caption id="attachment_1177" align="alignleft" width="319" caption="My younger sister, circa 1996."][/caption]

This Wednesday was National Popcorn Day.  Yes, I seemed to miss the parade too.

We ate gallons of air popped popcorn growing up.  And later in the 80s, I quite willingly made the transition to the ballooning bags in the microwave.  Then on August 14, 2003 my popcorn life was changed forever.  That day was the massive blackout across most of the northeast.  I was living in Brooklyn at the time, and working in Times Square.  With every form of public, and private, transportation debilitated, I walked to a friends apartment (in flip flops) thirty blocks south.  I spent the night there, before walking across the Brooklyn Bridge (ah-hem, flip flops) the next morning.  With no electricity, we scrounged up a pretty great eight-hour happy hour in their courtyard, subsisting mostly on popcorn popped on their gas stove.

If you haven't made it before, RUN (ideally not in flip flops) to your stove and whip up a batch of anti-microwave popcorn.  The instructions are below.  A bag of kernels yeilds so much more, costing so much less, than a box of three microwave bags.  And you get to control the flavor, fat, salt, and freshness of the whole production.  (psssst...a lot less packaging and waste for the planet too!)

Look for popcorn kernels at your farmer's markets as well!  A great, whole food, snack that you can easily replenish again and again on game day.

And coming up next is the main attraction:  DIY Flavored Salts!


Remove from heat.  Carefully remove lid, as a lot of steam will build up during the cooking process.  Season to taste.

Note:  This yields about 8 cups of popped corn, depending on variety and number of dud kernels.  It is a deceivingly small amount of kernels which results in such a large amount of finished product.   Resist the urge to throw in another handful, or else you could exceed the capacity of the pot and end up with a small disaster.
">
STOVETOP POPCORN
3 Tablespoon Cooking Oil (Canola, Sunflower, Peanut--oils with a high smoke point, not olive oil)
1/3 Cup Popcorn Kernels

Pour oil and 3-4 popcorn kernals in a large heavy bottomed pot, with a lid.  Cover with lid and put over high heat.  Wait for "test kernals" to pop, and then carefully remove the lid and pour in the remaining kernels all at once.  Return the lid to the pot and turn heat down slightly. Shake pot frequently, back and forth, as the corn is popping.  Continue until the pops decrease to every few seconds.

Remove from heat.  Carefully remove lid, as a lot of steam will build up during the cooking process.  Season to taste.

Note:  This yields about 8 cups of popped corn, depending on variety and number of dud kernels.  It is a deceivingly small amount of kernels which results in such a large amount of finished product.   Resist the urge to throw in another handful, or else you could exceed the capacity of the pot and end up with a small disaster.


401
1688
371
D
ecember
30
New Year’s Thai Sauce for Oysters


First, I would love to have mouthwatering photos of fresh, succulent oysters, glistening under the spell of my dipping sauce.  But alas, the shucking big snow storm this week kept my delivery from getting from the Chelsea Market to me in middleofnowhereville, and my dinner guests from being my oyster sauce guinea pigs.

So you'll have to take my word for it, that it both tastes and looks spectacular.

Thai food typically has a balance of four flavors: salty, sweet, sour, and spicy.  This sauce is no exception, with sour lime, salty fish sauce, spicy thai bird chili (frozen from this year's garden), and a little sugar to balance it all out.  I am a purest when it comes to slurping down those bivalve blobs of heaven, often eating them plain, or with just the slightest drizzle of a classic mignonette sauce, but there is something about this sour-herbal-savoriness that thrills me.

It will also look like confetti in a bowl for your new years fete.

Oh, and with all of the extra herbs and limes you have, try out a mint & thai basil mojito.

10...9...8...7...6....

Thai Sauce for Oysters
by Catie

Makes about 1/3 cup.

2 tablespoons warm water
1 1/2 teaspoons sugar
1/4 cup lime juice, from about 1 lime
1 1/2 tablespoons Thai Fish Sauce (Nam Pla), available at asian food markets
1/2 teaspoon thai bird chili, finely minced
1/2 teaspoon fresh cilantro, finely chopped
1/2 teaspoon fresh mint, finely chopped
1/2 teaspoon fresh basil, use thai basil if available, finely chopped

In a small bowl dissolve the sugar in the warm water.  Add lime juice, fish sauce, and chili.  Chill until ready to use.  Add fresh herbs just before serving.


577
1800
468
N
ovember
18
Turnip Soup


This remarkably simple, and remarkably comforting recipe has always been a part of our holiday meals.  When she first started making it, my grandmother used to enjoy quizzing unsuspecting guests as to what the star ingredient was in the soup.  It is so mellow, and balanced, and not cluttered with leek or potato, that it is actually hard to discern that it is simply the lowly turnip.

As a kid we would slurp down bowl after bowl of this creamy winter favorite.  It was always present at cold weather dinner parties thrown by my parents, as surprisingly, it was a safe bet to please a large crowd.  Again, not attributes, if I think about it now, I would consider assigning to this particular vegetable.

But try this one!  It is wonderful, and makes me joyfully lug home heavy bags of turnips (white or purple) as soon as they arrive at the farm stands.  It is a warm and soulful start to most of our Thanksgiving meals together.

TURNIP SOUP
by Catie Schwalb

Serves 6

5 TBS Butter
5 TBS Flour
6 cups Chicken Stock, or Vegetable Stock or water
1 medium or 3-4 small Turnips, white or purple, peeled and cubed, yielding about 3 cups
1/4 tsp White Pepper
Salt, to taste
1 cup Milk or Cream

Melt butter in heavy bottomed soup pot. Sprinkle flour over melted butter and stir to combine. Gradually whisk in stock until all incorporated. Add cubed turnip, bring to a gentle boil, and then reduce to a simmer until turnip is tender.

Puree soup either in a blender or with an immersion blender. Return to low heat, add milk or cream, and then season with salt and white pepper.

Soup can be made up to 3 days in advance and reheated before serving.
Shown below garnished with crispy shoestring carrots and turnip chips.


262
1541
240
S
eptember
02
Utterly Chard-ming


First, yes, it is a terrible pun.  But in all honesty, I had a dream about writing this post, and that is the title I watched myself type in the dream.  So who am I to interfere with subconscious inspiration/intervention?

Moving on...

Our garden is still loaded with beautiful food.  But as is the case when September shows up, the plants are not looking quite as robust as they did a few weeks ago.  There is definitely a sign that it is the end of the season and these plants are tired.  However, our gorgeous Five Color Silverbeet Chard, that was looking a little peaked in the hottest days of August, has started to really perk up in this last week, with it's cool evenings.

I first started growing this heirloom variety of chard, after reading Barbara Kingsolver's glowing endorsement of it in Animal, Vegetable, Miracle: A Year of Food Life:
"If I could only save one of my seed packets from the deluge, the heirloom vegetable I’d probably grab is five-color silverbeet.  It is not silver (silverbeet is Australian for Swiss chard), but has broad stems and leaf ribs vividly colored red, yellow, orange, white or pink.  Each plant has one stem color, but all five colors persist in a balanced mix in this beloved variety.  It was the first seed variety I learned to save, and if in my dotage I end up in an old-folks’ home where they let me grow one vegetable in the yard, it will be this one."

Chard is a wonderful culinary green, loaded with iron and antioxidants.  It stands up well in soups, and sautés, as well tarts and fillings.  It is a great alternative to spinach and kale, and unlike either, comes up early in the garden season and lasts through early frosts.

With it too warm to have spinach in the garden lately, I substituted chard recently in Spanakopita-inspired phyllo purses.  These little bundles are impressive and loaded with summer flavor.  The filling is also equally good folded into larger phyllo pockets for a great lunch or vegetable dish.


CHARD, DILL, AND FETA BUNDLES
by Catie
makes approximately 30 hors d'oeuvres bundles, or 10 large pockets.

2 TBS Olive Oil
1 small Sweet Onion, diced small
Large bunch of Chard, about 1 lb, tough stems removed and roughly chopped
1 TBS fresh Dill, chopped, or 1 tsp dried Dill
2 TBS fresh Parsley, chopped
4 oz Feta Cheese, finely crumbled
1 egg, slightly beaten
Salt and Pepper, to taste
1/2 pkg of Phyllo Dough (8 oz)
melted butter

Heat the oven to 350° F.

Heat the oil in a large pan.  Add the diced onion and gently saute until fragrant and translucent.   Add the chopped chard, in large handfuls, as it starts to wilt down.   Saute for a minute more until just cooked, adding the dill and parsley about 30 seconds before removing from heat.

Using either a spoon on the edge of the pan, or pouring the mixture into cheesecloth, squeeze out and drain as much liquid as you can from the vegetables.

Add the feta cheese to the chard mixture and evenly combine.  Taste the mixture at this point before seasoning. Feta is salty and you may only need to add pepper.  Once you are happy with the seasoning, add the egg and mix well.

Unwrap the phyllo dough, and keep flat under a damp towel or paper towels.   On a counter or cutting board, place one sheet of dough.   Brush dough lightly, but evenly, with melted butter, and top with another sheet of dough.   Repeat so you have a stack that is three sheets thick.  With a large knife or pizza cutter, cut sheets into 6 pieces (down the middle the long way, and then in thirds in the other direction).   Place about a tablespoon of chard mixture in the center of one of the phyllo rectangles, gather up corners, and twist slightly in one direction.   Place on a cookie sheet.   Repeat with remaining mixture and dough sheets.

Alternatively, you can cut the stack of three sheets in half, lenghwise, put about 1/3 of a cup of mixture in the lower right corner, and then fold in triangles, as you would fold a flag.

Bake for 15-20 minutes, until dough is golden brown.  Bakelightly longer for the larger triangles.


291
1653
293
A
ugust
11
Right Here, Right Now


This, all too brief, time of year when the garden is offering up treasures I would drive multiple time zones for in February, I find myself stumped in the kitchen.  Surprising, since I have before me the best raw materials I will see all year.

But that’s just the point.  I want to step aside, get out of their way, and let these vibrant little bundles do what they do best all on their own.  How can I possibly improve upon late summer perfection?

This year for the first time we are growing in our gardens elegant little french breakfast radishes and delicate and creamy fingerling potatoes.  The radishes have been surprisingly successful and grow quite rapidly.  As a kid radishes were one of only two foods I wouldn’t touch (the other was PB&J….)  But these are crisp and bright, and have a wonderfully mild peppery zing.

The potatoes have just started to bear fruit, almost a foot underground.  I have been diligently nursing the plants all season, mounding and mounding the dirt.  When I read on the internet the other day that the first small new potatoes should be ready around day 60, I was sent into a complete impromptu digging frenzy.  No plan, no shovel, and dirt painfully jammed very deeply under my triumphant fingernails.  But so very worth it for the small two serving colander-full that I brought in for supper.  They were a revelation.  Fragile, tissue-paper thin skins, and a complex flavor that reminded me that these were a delicacy, not just a background starch.

Here are two quick and simple recipes that showcase these vegetables in their purest form, with nothing covering up their brilliant flavors.  If you can get beauties from the farmer’s market, or your garden, it is like tasting potatoes and radishes for the first time.

French Radish Crostini
(first taught to me by Jacques Pepin)

Fresh Radishes
Butter, higher quality the better, room temperature
Sea Salt
Crusty Baguette

Slice radishes as thinly as possible.  Thinly slice the baguette, slightly on a bias, in 1/4-1/2” slices.  Spread liberally with butter.  Layer radish slices on buttered bread.  Sprinkle with sea salt.  (Note:  Baguette slices may be toasted slightly on a cookie sheet if desired.)

Oven Roasted Fingerling Potatoes

New Fingerling Potatoes
Olive Oil
Thyme Sprigs, stems removed
Salt and Pepper

Heat oven to 400 °F.

Cut potatoes, if necessary, so that they are fairly uniform in size, but try to keep as many whole as possible.  Toss with enough olive oil to evenly cover.  Add thyme leaves, a few large pinches of salt and grinds of black pepper.  Toss again to evenly distribute.  Pour into a roasting pan or baking sheet, preferably in a single layer.  Roast in the oven until tender, about 40 minutes, depending on the size of the pieces.


472
1537
345
J
uly
30
Herb and Ricotta Stuffed Squash Blossoms


Our few small winter squash plants, that I started from seed this year, have taken off, and taken over, and are now literally climbing the walls of the new squash garden we put in.  It is still amazing to me that one tiny 1.5 cm long seed can turn into a gigantic sprawling little-shop-of-horrors-like vine with leaves that are waist-high.  Looks like we will pretty certainly have an abundance of squash, and currently have an abundance of glorious, delicate, and elegant squash blossoms.

If picking them yourself, try to do it early in the day, when they are open and slightly more resilliant--they tear very easily. Also, you'll want to pick the male flowers, as the females are the ones that the squash will grow from.

So with our glut of blossoms, guess I'll just have to stuff them with creamy cheese and fry them, fry them, fry them.


Fresh Cheese
2 TBS fresh herbs (parsley, basil, thyme, oregano), finely chopped
Salt and Pepper, to taste

For the Batter:
1 cup of AP Flour
1 tsp baking powder
1 tsp Salt
1 egg
1 1/4 cup beer or seltzer water, cold

Oil, canola, vegetable, peanut, for frying.

Carefully remove the anther from the inside of the blossoms (if using male flowers) with scizzors. You can cut a seam down the side if it is too hard to get in there without tearing the flower.

Combine the cheese with herbs and season to taste. Gently stuff each blossom with about a tablespoon of filling.


Combine dry ingredients for the batter.  Add the egg, and then the cold beer or seltzer.   The batter should be the consistency of a loose pancake batter.

Heat 3 inches of oil in a heavy bottomed pot to 350 degrees.  Gently dip each blossom in the batter, letting the excess drip off.  Carefully lay the blossom in the oil, frying until golden brown, turning occasionally.  Remove with a slotted utensil, and drain on a plate lined with paper towels.  Season with salt immediately and eat right away.
">
Herb and Ricotta Stuffed Squash Blossoms
by Catie

12 squash blossoms
1 Pint Ricotta or Fresh Cheese
2 TBS fresh herbs (parsley, basil, thyme, oregano), finely chopped
Salt and Pepper, to taste

For the Batter:
1 cup of AP Flour
1 tsp baking powder
1 tsp Salt
1 egg
1 1/4 cup beer or seltzer water, cold

Oil, canola, vegetable, peanut, for frying.

Carefully remove the anther from the inside of the blossoms (if using male flowers) with scizzors. You can cut a seam down the side if it is too hard to get in there without tearing the flower.

Combine the cheese with herbs and season to taste. Gently stuff each blossom with about a tablespoon of filling.


Combine dry ingredients for the batter.  Add the egg, and then the cold beer or seltzer.   The batter should be the consistency of a loose pancake batter.

Heat 3 inches of oil in a heavy bottomed pot to 350 degrees.  Gently dip each blossom in the batter, letting the excess drip off.  Carefully lay the blossom in the oil, frying until golden brown, turning occasionally.  Remove with a slotted utensil, and drain on a plate lined with paper towels.  Season with salt immediately and eat right away.


452
1768
449
A
pril
26
Ramp Tortilla Recipe
Ummmm...eggs...ramps...potato...


When my brother returned from his junior year in Spain, he craved the egg tortilla espanola found on the counter at most tapas bars and eateries.  It also happened to be one of my favorite recipes I learned in my "egg" lesson in my first weeks in culinary school (thank you Chef Justin).  The farmer who I get my ramps from, Rick Bishop, has mentioned to me a few times how much he likes to cook ramps and eggs together.  With a good amount of my own foraged ramps still left, this turned out to be a great combination.


Remove potato and ramp from the oil, and combine in a bowl with the eggs.

Leave about teaspoon of oil in the pan, bring to medium-high heat, and add the potato, ramp and egg mixture to the pan. Reduce the heat to medium-low and allow the tortilla to cook for about 10 minutes, until mostly set. Gently flip the tortilla to cook for about 5 minutes more on the other side. You may do this by inverting the tortilla onto a plate and then sliding back into the pan if helpful.

When cooked through, remove to a plate, allow to cool slightly, slice and serve. The tortilla is also great served at room temperature, and even cold. Would be lovely for lunch or brunch with some grilled asparagus, crusty bread, and a green salad.
">
RAMP TORTILLA
by Catie

1/4 cup olive oil
2 medium to large potatoes, peeled and sliced thin
6 ramps, cleaned, sliced thin, keeping leaves and stalks separate
4 eggs
salt and pepper, to taste

Peel potatoes and slice thin, about 1/8 of an inch, and pat dry. Keep the slices as uniform in size as possible.

Beat the 4 eggs in a bowl, season with salt and pepper, and set aside.

Heat oil in an 8" pan, non-stick if possible. When oil is hot, fry potato slices until tender and just starting to crisp around the edge. Just before they are finished, add the slices of the ramp stalk, and at the very last few seconds, add the ramp greens.

Remove potato and ramp from the oil, and combine in a bowl with the eggs.

Leave about teaspoon of oil in the pan, bring to medium-high heat, and add the potato, ramp and egg mixture to the pan. Reduce the heat to medium-low and allow the tortilla to cook for about 10 minutes, until mostly set. Gently flip the tortilla to cook for about 5 minutes more on the other side. You may do this by inverting the tortilla onto a plate and then sliding back into the pan if helpful.

When cooked through, remove to a plate, allow to cool slightly, slice and serve. The tortilla is also great served at room temperature, and even cold. Would be lovely for lunch or brunch with some grilled asparagus, crusty bread, and a green salad.


501
1799
462
A
pril
21
Spicy-Tart Pickled Ramp Recipe


This past weekend friends who live near us upstate, on an area overrun with ramps, graciously invited us over for our second annual swap of all-we-can-pick ramps for a pick-up truck full of our "like gold" sheep manure for their garden. (So very cutting-edge-hipster-locavore.   Then again, poop for weeds...)

After a very muddy morning, we brought home two substantial garbage bags of ramps with their roots and soil intact, to transplant to our woods, and a very generous shopping bag of loose ramps to cook and eat.   I got to work on a big batch of these slightly hot, slightly sweet, bright and tangy pickled ramps that night.  I am now addicted, and looking forward to ice cold pickled ramp martinis later this summer.  Oh, and picked ramps also go brilliantly with fish and roasted meats, on sandwiches, or alongside cheeses and charcuterie.

1 dried thai chili, about 2" long, seeds removed for less spice
1 bay leaf

Bring a large pot of salted water to boil. Have a bowl of ice water ready nearby. Blanch ramps in salted water for about 30 seconds, and then shock in ice water to stop the cooking. This will preserve some of the ramps' color. Dry and transfer to a quart sized jar.

In a non-reactive pot, combine vinegar, sugar, water, ginger, chili, bay leaf, and spices. Bring to a boil, remove from heat, and pour over blanched ramps.

Cool, cover and refrigerate. Ramps will be sufficiently pickled in about 3 days, and will keep in the refrigerator for a few weeks. If you'd like to preserve them longer, process in a canning water bath to seal jar.
">
SPICY-TART PICKLED RAMPS

by Catie

2 large bunches of cleaned ramps, stalks only, trimmed of greens (about 2-3 cups, loosely packed) (Save greens for scrambled eggs.)

Kosher salt
1 cup cider vinegar
1 cup water
1/3 cup sugar
1 tsp coriander seed
1 tsp black mustard seed
1 tsp fennel seed
1 tsp peppercorns, white, green, or black, or combination
2 1/2" piece of ginger root, cut in 1/2" pieces
1 dried thai chili, about 2" long, seeds removed for less spice
1 bay leaf

Bring a large pot of salted water to boil. Have a bowl of ice water ready nearby. Blanch ramps in salted water for about 30 seconds, and then shock in ice water to stop the cooking. This will preserve some of the ramps' color. Dry and transfer to a quart sized jar.

In a non-reactive pot, combine vinegar, sugar, water, ginger, chili, bay leaf, and spices. Bring to a boil, remove from heat, and pour over blanched ramps.

Cool, cover and refrigerate. Ramps will be sufficiently pickled in about 3 days, and will keep in the refrigerator for a few weeks. If you'd like to preserve them longer, process in a canning water bath to seal jar.


556
1670
455
M
arch
24
Polenta with Goat Cheese, Shallots, and Greens recipe
On a trip to the farmers market it doesn't serve you to bring a list or to have rigid expectations.  The most effective shopping there is always done by just discovering what is the very best of this week's offerings.  As mentioned before, that can sometime be rough in the less produce-friendly times of year.


This week the stars, or farmers, seemed to align.  There are a few bonuses of spring starting to show up, and enough cold storage winter vegetables left to anchor a recipe.

I found sweet, plump shallots, an abundance of hearty greens, luscious queso blanc made from goats milk, and had a few bags of organic polenta from a farm in Ithaca, NY, I had stocked up on during a previous market day.  They all came together beautifully in this comforting, yet bright dish.  A great vegetarian meal, or elegant side dish, that could be easily expanded to a more substantial meal by adding some braised chicken thighs or aromatic local sausages to the mix on top.


Cayuga Pure Organics
4 Cups homemade stock, chicken, turkey or vegetable
6-8 large shallots, cut in wedges, from Muddy River Farm
4 oz goat cheese (I used a goat queso blanc), from Patches of Star Dairy Farm
2 large bunches of greens (spinach, dandelion, tatsoi, kale, chard), about 12 oz, from Two Guys from Woodbridge, roughly chopped

Bring the stock to a boil.  Gradually whisk in polenta, and return to a gentle boil.  Cook for 5-8 minutes, stirring frequently, until grains are at desired softness, polenta has thickened, and excess liquid has been absorbed.  Season with salt and pepper to taste.  You may add a tablespoon or two of butter or olive oil to add some richness.

Heat a tablespoon of cooking oil in a wide pan.  Add shallots and cook over medium-low heat, slowly, until slightly caramelized, about 10 minutes.  Increase heat and add greens, and saute just until wilted.  Season with salt.

Spoon polenta on plates.  Top with greens and shallots.  Crumble goat cheese on top.
">
POLENTA WITH GOAT CHEESE, SHALLOTS AND GREENS
By Catie
Serves 4

2 Cups coarse-ground polenta (not instant), from Cayuga Pure Organics
4 Cups homemade stock, chicken, turkey or vegetable
6-8 large shallots, cut in wedges, from Muddy River Farm
4 oz goat cheese (I used a goat queso blanc), from Patches of Star Dairy Farm
2 large bunches of greens (spinach, dandelion, tatsoi, kale, chard), about 12 oz, from Two Guys from Woodbridge, roughly chopped

Bring the stock to a boil.  Gradually whisk in polenta, and return to a gentle boil.  Cook for 5-8 minutes, stirring frequently, until grains are at desired softness, polenta has thickened, and excess liquid has been absorbed.  Season with salt and pepper to taste.  You may add a tablespoon or two of butter or olive oil to add some richness.

Heat a tablespoon of cooking oil in a wide pan.  Add shallots and cook over medium-low heat, slowly, until slightly caramelized, about 10 minutes.  Increase heat and add greens, and saute just until wilted.  Season with salt.

Spoon polenta on plates.  Top with greens and shallots.  Crumble goat cheese on top.


399
1693
357
M
arch
10
Homemade Fresh Ricotta


Lately we have been getting the most wonderful fresh milk from Dirie's Farm, a small family-owned dairy farm near us.  The milk has a whole melody of flavor, that clearly illustrates what people are talking about when they refer to the terroir in wine.  You can taste this area.  You can taste the differences in the seasons, and the grassy fields and hay on which these cows are feeding.

A few months ago I had an impromptu lunch out by myself (I mean, with my date, New York Magazine) at Veloce Pizzeria in the East Village of NYC.  They have a divine ricotta crostini "spuntini" (Italian snacks).  Superb rich ricotta slathered on crusty toasted bread with fresh black pepper.  Heaven.

So craving that, this week's farm milk became glorious ricotta.  It's easy, easy, easy.  There are many recipes out there, using several different acidifying agents (vinegar, lemon juice, buttermilk, and citric acid).  I learned this from my culinary school, and Ricki the Cheese Queen, both using the exact same method with citric acid, so I'll stick with that.  Citric Acid is pretty widely available.  It is often called for in canning tomatoes.  I have seen it in my grocery store near canning supplies or products like Fruit Fresh.  But you can also easily get it here, from the wonderful New England Cheesemaking Supply Company.

cheese salt)

Combine milk, citric acid, and salt in a non-reactive pot (heavy bottomed if available), over medium-high heat.  Stirring gently, making sure nothing is sticking or burning on the bottom, heat to just under a boil, to 195° F.  At that point turn off the heat and let the milk sit undisturbed for 10 minutes.


Line a colander, over a large bowl (the whey that drains off can be used in place of buttermilk), with several layers of cheesecloth or a clean dish towel or floursack.  After the 10 minutes, gently ladle the ricotta milk into the colander.  Let drain for a few minutes, then carefully tie opposite corners of the cloth to made a bundle.  Let ricotta continue to drain in colander, over the bowl, in the refrigerator for a 1/2 hour to overnight.  If too thick for desired use, can be thinned with a little cream.  Season with more salt to taste.  Will keep for several days in refrigerator.
">
HOMEMADE FRESH RICOTTA

Makes about 2 cups

2 Liters whole milk

1/2 tsp citric acid

1/2 tsp salt (if you can get it, use cheese salt)

Combine milk, citric acid, and salt in a non-reactive pot (heavy bottomed if available), over medium-high heat.  Stirring gently, making sure nothing is sticking or burning on the bottom, heat to just under a boil, to 195° F.  At that point turn off the heat and let the milk sit undisturbed for 10 minutes.


Line a colander, over a large bowl (the whey that drains off can be used in place of buttermilk), with several layers of cheesecloth or a clean dish towel or floursack.  After the 10 minutes, gently ladle the ricotta milk into the colander.  Let drain for a few minutes, then carefully tie opposite corners of the cloth to made a bundle.  Let ricotta continue to drain in colander, over the bowl, in the refrigerator for a 1/2 hour to overnight.  If too thick for desired use, can be thinned with a little cream.  Season with more salt to taste.  Will keep for several days in refrigerator.


460
1693
400
M
arch
07
Pea Shoot, Celeriac, Apple and Hazelnut Salad


One of the toughest parts of eating almost exclusively locally in Upstate, NY, is the lack of bright, refreshing, crunchy, raw foods and salads in the colder months. We are overflowing in hearty carrot and squash soups, but there are definitely days I would kill for the snap of a thick slice of fresh cucumber.

This week, particularly with the few amazing days of spring-promised sunshine we've had, I was already dreaming of getting started on my gardens, and craving some food of much warmer months. I did, however, gather at the farmer's market a collection of ingredients that came together for a great salad. When tested on my husband, the review was-- "Refreshing!". Perfect.


PEA SHOOT, CELERIAC, APPLE AND HAZELNUT SALAD

by Catie

Serves 4

2 large tart green apples (I used Mutzu apples from Migliorelli Farm)

1 medium celeriac (from Muddy River Farm in Goshen, NY)

Medium handful of pea shoots, about 1 oz (from Two Guys from Woodbridge hydroponic farm, in Hamden, CT)

1/4 cup toasted and chopped hazelnuts

for the dressing:

1 tsp apple cider vinegar

1 TBS hazelnut oil

salt and pepper to taste.

Cut the rough exterior off the celeriac, and cut the inner white part into thin matchsticks. Bring a pot of salted water to a boil. Have ready a bowl of ice water. When water is boiling, put in cut celeriac and blanch until al dente, about 30 seconds, depending on the size of the pieces. Immediately scoop out with slotted spoon and shock in ice water. Drain and dry.

Cut apples in small cubes. Wash and dry pea shoots.

Put cider vinegar in large bowl. Slowly add hazelnut oil in thin stream while whisking constantly. Season with salt and pepper.

Add celeriac, apple, pea shoots, and hazelnuts to bowl. Toss with vinaigrette.

Gently mound salad on a plate. Sprinkle top with a few more nuts.


284
1407
303
F
ebruary
28
Winter Chicken “Noodle” Soup, with Dill Parmesan Crisps


After the 3+ feet of snow we had this past week, I find it impossible to believe that I am watching even more flurries outside today.  The blizzard this week caused the farmers, whose work ethic is only outdone by their good sense, to not come to NYC for the greenmarket this Friday.  Union Square, though stunning all decked out in white, was empty.

Fortunately last week I bought a lot of long-keeping root vegetables.  Perfect tools for a shut-in day upstate, with no takeout around for miles.


WINTER CHICKEN “NOODLE” SOUP WITH DILL PARMESAN CRISPS

By Catie

Serves 4

For the Soup:

2  quarts Chicken Stock

1 medium Celeriac, about 6 oz, peeled and shredded or sliced thin

2 medium Parsnips, about 6 oz, peeled and shredded or sliced thin

3-4 Carrots, about 6 oz, peeled and shredded or sliced thin

salt to taste

For the Crisps:

1 packed cup Parmesan Cheese, grated

1 tsp Fresh Dill, finely chopped (I used dill I had frozen from our garden this summer)

For the Crisps:

Preheat oven to 350° F.

Thoroughly mix grated parmesan and fresh dill together in a small bowl.  Make  small mounds (about 2 TBS each) of the cheese mixture evenly spaced on a silpat mat on a sheet pan.  Gently flatten each mound into a disc shape—the cheese won’t spread much beyond where you place it.  You should have about 6 discs.


Bake at  350° F for about 8 minutes—just until the melted cheese has reached the center of the discs, and the edges are just starting to turn golden.  Don’t over cook, or they tend to get bitter.  Let the crisps cool on the silpat.  Gently remove with a thin spatula.

For the Soup:

The vegetables can be cut in a variety of ways.  The easiest is shredding them all in the food processor with the large grating blade.  However, you can also use a mandoline for long thin strips, julienne them by hand, or (as I did with the celeriac this time) thinly slice with a vegetable peeler—which ended up looking the most like noodles.  It is pretty to slice them in a few different ways, particularly if you have two vegetables that are the same color.

(The most important thing is to make sure that all the vegetables are relatively similar in thickness once they are cut, so they cook evenly.  You can certainly stagger putting them into the pot if you have larger cuts, so they can all be finished at the same time.)

Heat the chicken stock over medium heat to a gentle boil.  Add the shredded vegetables.  Bring the stock back to a boil, and reduce to a simmer until the vegetables are al dente—about 4 minutes total.  Season with salt to taste.

Portion into four bowls, and mound vegetables slightly in the center.  Top with a Dill Parmesan Crisp.


{ welcome! }
Catie Baumer Schwalb is a chef, food writer and photographer, who splits her life between the city and the country. Not too long ago Catie was a New York City based actress and playwright for more than a decade. She has her Master of Fine Arts from the National Theater Conservatory, and her Grand Diplôme in classic culinary arts from the French Culinary Institute in New York City. ... Read More

{ get in touch }


{ what's new }
September 12, 2015
August 19, 2013
August 15, 2013
August 13, 2013
August 1, 2013


{ favorites }


{ archives }


{ currently reading }