With rhubarb's glorious reign quickly coming to a close, I wanted to give it one last hurrah, before it is replaced in the fruit bowl with stone fruit of a multitude of dizzying hues. I made this rhubarb vanilla ice cream with (generous) dark chocolate chunks to bring to dinner with friends recently, and was giddy with how it came out. So giddy in fact, that I fell ill (no relation) and my husband had to courier the ice cream over to the gathering on my behalf. A testament to this great recipe, in all the "hellos", "she's not feeling well", "she'll be fine", and "yes, thanks I'd love to stay for one glass of wine", he forgot to tell the ladies what flavor of ice cream it actually was. So when dessert rolled around, and he had long made his exit, there was a marvelous guessing game, as I was told, as to what they were actually eating. The chocolate chunk part, fortunately, was obvious, but the tangy, slightly fruity, slightly vegetal, very rich and creamy rest of it elicited guesses from mascarpone to peach to lemon curd, in an email steam entitled "Mystery Ice Cream". (more…) | ||||||||||||||||


My son just celebrated his very first birthday. I was naturally flooded with an enormous range of huge emotions. But, instead of being very weepy and nostalgic for the entire month prior, staring at him constantly, willing time to stop, I instead funneled all of my sentimentalism into obsessing about his very first birthday cake. This process was not unlike trying to make each precious decision about our wedding. Would this be the best choice, that I will then look back on in a decade and remember with zero regrets and nothing but fondness? Or even more, is this the best choice of all of the options I have entertained in my mind imagining this day for the last 3+ decades? Of course, an impossible assignment. But wanting it to be a perfect day and first cake experience for him, I pored over old family recipes scribbled in pencil on cocoa-powdered index cards. My first thought was my dad's carrot cake recipe. It is spectacular. But I kept looking, and came across again Aunt Margaret's Chocolate Frosting. It is the perfect, dark, rich, everything your yellow birthday cake screams for recipe. It is one of the top three recipes in our family's repertoire. Certainly worthy of a first birthday party. I then pictured him smashing his first piece of his first birthday cake into his face with his chubby hands, and pictured dark brown Jackson Pollock's covering the walls of my grandparents' condo. (I also then remembered a first birthday I attended where the cake was red velvet, leaving the kid and high chair looking like something out of a slasher film.) So opting for a more neutral hued confection, I finally settled on the dense-banana-cream cheese-miracle that is Amy's Bread's Monkey Cake Ok, so what's the point? The point is that he's one, and loved the cake, and mostly likely would have loved any cake. I loved obsessing over what to make, baking it for him, whipping the frosting, and seeing him literally lick the plate. I also loved that it was an opportunity to really go back to my cookbooks, my notes and my recipe cards and rediscover old favorites. And work on something that I was excited to share with the people I love. That, after all, is exactly why I cook.
 | ||||||||||||||||||||||


 My grandfather loves cantaloupe. At least I assume he does, as he has eaten a half cantaloupe filled with cottage cheese for lunch almost every day that I have known him. I vividly remember him coming home for lunch (coming home for lunch!) when I was visiting them in my childhood, and my grandmother having his melon ready at his arrival. He's turning 89 in four days, so the cantaloupe clearly did right by him. For the most part cantaloupe has been something I could take or leave. I'd take some to balance out the color at the occasional brunch buffet, but generally would dig though the melon bowl to scoop out as many of the sweeter watermelon cubes as I could unearth. However, when I was pregnant last summer, the only slightly unusual craving I developed was for cantaloupe. And lots of it. Particularly as the summer went on and the weather was sizzling hot. It was then I discovered an orange-fleshed melon Shangri-La on the tables of the summer's farmers' market. Tiny, outrageously sweet, nubby-skinned melons came out in abundance in the months when we needed them the most. Numerous heirloom varieties, particularly ones about the size of a softball, exploded with fleeting flavor. Heaven. And obviously Papa was hip to this many decades earlier. This incredibly simple, two ingredient, refresher is a stunning way to use this stunning fruit. It also helps in keeping their fast-ripening goodness around for a day or two longer. Happy Birthday Charlie, and thank goodness for the humble cantaloupe.
 | ||||||||||||||||||||||


I'm back. My hands have been very, delightfully full these last many months, but I feel like we are all finally starting to figure out a good rhythm together. And being a mom is, well, utterly remarkable, and it is hard to not devour every minute. Even with our full hands, we did manage to get our gardens in this year. Even more square footage than last year, as I am more able bodied this summer and can actually do something. More plants, more varieties, more of everything. And so far it is all looking strong and healthy. I cannot wait to cook with all of it. I walk through the rows and see recipes everywhere. I have also had my first food pieces and photographs in print, in the months since the baby has been born. There is a beautiful one year old magazine in our area called Green Door, and I have been so honored to do pieces for their last three issues. In the latest issue I have a piece on gourmet farmers' market popsicles. Three great recipes, which we have been enjoying ourselves, very frequently, since the weather turned warm. (The magazine is on sale throughout the Hudson valley, in New York City, for download, as well as subscriptions.) There was one other ice pop recipe that was gnawing at me as I was developing the recipes for the article: Rhubarb. However, there was no rhubarb to be found to recipe test with in the spring when the piece was due. So at last, with piles of ruby stalks covering market tables, I was able to give it a try. Rhubarb is indeed sour, yet in a perfect, summer way. It is almost always paired with strawberries to balance its tartness. I opted instead for beautiful white cherries that were on the next market stand over. The fresh in-season cherries gave the whole mixture a really mellow sweetness, and the combination with the very tart rhubarb results in a overall sour cherry flavor, which is one of my favorites. The sugar amount below is just a guideline. Certainly your cherries' sweetness will vary. Taste the mixture and adjust to your liking. However, keep in mind that when frozen a good portion of the perception of sweetness will be deadened by the cold, so the mixture should taste a bit more sweet at room temperature than you are shooting for. Happy summer.
| ||||||||||||||||||||||


Last month I was asked to be one of the Foodie 100 on the new Foodie.com beta site. It is a very pretty, very full, social network-y site with, among others, 100 great food writers and bloggers as contributors. I have three recipes on the site now, that I created just for them. Check them out and take a look around. There is a lot of really delicious stuff going on there.
| ||||||||||||||||


If you are going to rot your teeth out with sweets on this Halloween, why not do it with a sweet, savory, nutty, homemade confection, that also makes use of the often discarded remnants of jack-o-lantern carving?? There are many recipes for pumpkin seed brittle out there, but most use the raw, hulled seeds (or pepitas). Really wanting to use the seeds from my own carved pumpkin, instead of buying additional ones at the health food store, I did track down instructions to try to hull my own. It can be done, but was not wildly successful, or worth the effort, in my opinion. First you rinse off the seeds and thoroughly dry them out, which I did in a 250 degree oven for about 15 minutes. Then crack and smash the outer part of the seeds with a rolling pin, or in my case, a meat tenderizer. Then, place all of the seeds in a bowl, fill with water, swish them around vigorously, and theoretically, the inner seed kernels will sink and the outer shells will float to the top. Which did happen in my case, for about six of the seeds. The rest didn’t really get smashed effectively or broke in half completely, and I found myself picking each seed from its shell—not practical when I needed at least a half cup. So then, why not make brittle using the entire seed, which we eat anyway when making roasted pumpkin seeds? Success! And still getting to use our own seeds. And much easier. And the added bonus of ending up with a flavor almost identical to caramel corn, with some nutty seeds thrown in. Cracker Jack! So wishing you a very happy Halloween, and treat yourself to this treat very soon. (and all winter long with any winter squash seeds.) (more…) | ||||||||||||||||


 Corn this time of year is so sweet and full of natural sugar, that it lends itself to both sweet and savory preparations. (They don't call it "Butter and Sugar" for nothing.) This recipe is part homage to Meredith Kurtzman, the pastry chef and queen of all things gelato, at New York City's Otto. In addition to her famous and irresistible olive oil gelato, Meredith also has a criminally delicious sweet corn gelato, that I first had at a master class she gave while I was in culinary school. Not too sweet, creamy and highlighting everything that is best about corn right now, it is perfect, and only available for the few weeks while the best fresh corn is in season. Crème caramel, often called crème renversee, is a classic french custard dessert. Very similar in overall flavor to a crème brulee, but the difference being that in this case the caramelized sugar is first placed on the bottom of the ramekin baking dish and the custard baked on top of it. It is then removed from the dish to serve, and reversed, like an upside down cake, with the now top of the custard infused with the caramel. The magic trick of this recipe, is that also somehow in the cooking, some of the caramel first put in the bottom of the dish and hardened, permanently liquifies, making its own sauce at the same time. (For a crème brulee, the custard is baked on its own, topped with sugar just before serving, and then the sugar is burnt (bruleed) with either a torch or broiler, to make that crackly hard top.) Anyway, custard + caramel= amazingly good. Caramel + corn=old time ballpark good. Two together? Yes, good. (more…) | ||||||||||||||||


 This is a peach pie my grandmother has made for years. I adore the visual of the entire peach halves, that always elicits at least one gasp of admiration when set down on the table. With peaches stunningly sweet this time in the season, I also really appreciate the addition of the custard-like filling, instead of the usual toss with cinnamon and sugar. Though it does contain sugar, the custard-souffle-y filling really compliments the fruit and cuts the sweetness some. This pie is also really beautiful, and really delicious, with blueberries tucked into the spaces and cavities in and around the peaches. Summer overload in a crust. I haven't tried it, but I imagine raspberries wouldn't be awful either.
 | ||||||||||||||||||||||


 There are few things that could get me to turn on the oven in the middle of this oppressive heat wave. However, much to the dismay of my panting dog, clafouti is one of them. Unlike almost everyone else in the country right now, the red and golden raspberries in our garden are adoring the heat. They have just started to really take off, offering up several pints a week. (That is, those that aren't stolen when I'm not looking, right off the thorny branches, by aforementioned panting dog). Clafouti ("klau-foo-tee") is a both rustic and elegant dessert, with a ridiculously fun to say name, that originated in the Limousin region in the southwest of France. It was traditionally made with cherries, as they had an abundance they had to figure out what to do with each summer, poor things. I learned of it from my well-loved, dog-eared copy of Julia Child's Mastering the Art of French Cooking, and was in love from the start. Further investigation revealed that when made with any other fruit other than the traditional cherries, it is actually not called Clafouti, but "Flaugnarde". Are you kidding me? I feel like those rogue Limousinians just came up with the most clumsy sounding word they could to shame the rest of the world into strict adherence to their recipe. My fancy, summer, whatever-berry-filled french dessert will be called clafouti, so there. (more…) | ||||||||||||||||


 Our herb garden is growing like weeds. Well, truth be told, the weeds are also growing like weeds. But between the weeds are fragrant, mystical herbs, that are spicing up meals and will also shortly be hoarded away in ziplocks in the freezer for less bountiful months. My favorite herb is lemon verbena. It smells like something that should come from a much more tropical locale--even the plant, with its woody stems and slender leaves, looks rainforesty. Rubbing your fingers on one of the leaves, as I do at the start of many days, is an instant antidepressant. Bright, intensely fragrant, with an aroma and flavor that is distinctly the sweeter side of citrus. Too much and it can make a dish taste like bad perfume, in the right amounts it is transporting. My husband's favorite herb is thyme. It definitely stems (pun intended) from his early childhood-rooted love affair with weekly roast chickens. He painstakingly freezes bunch upon bunch of this savory treasure and stuffs several sprigs under the skin of our weekly roast chickens through the year--as well as it being used in our homemade soups and beloved stocks. So this recipe is a love letter to our favorite herbs. Citrus and thyme marry beautifully, fortunately for us, and both herbs are in great abundance now and for the next couple of months in gardens and markets. A not-too-sweet aromatic addition to sodas and cocktails, and a refreshing palate cleanser when spun into a sorbet or scraped into a granita. Try any of the above with a few fresh berries, oh my. (more…) | ||||||||||||||||


So here is another recipe handed down from Catherine the Great. No, not the Empress of Russia, but my maternal grandmother--one of my first cooking influences, and for whom I am named. I make this pie at least once a year. I can't keep myself from it as soon as I see quarts of local strawberries showing up on the tables at the farmers' markets. It is simple as pie (pun intended). A great buttery crust, plump, fresh, raw strawberries, and a quick jammy glaze. Fruit and high quality carbs: two tastes that should always go together. It is reminiscent of toast and jam, strawberry short cake, or dare I say...pop tart? Since the ingredients are so sparse, the quality of the products you use is paramount. Make a wonderful, flaky, homemade pie crust, use a golden farm-fresh egg and great butter, and above all, use amazing strawberries at the height of their season. It just won't be that great otherwise. Also, because the strawberry flavor can vary a lot from sour to sweet, start slowly with the sugar and the lemon juice in the glaze, and adjust as necessary depending on the flavor of the strawberries you are using. (more…) | ||||||||||||||||


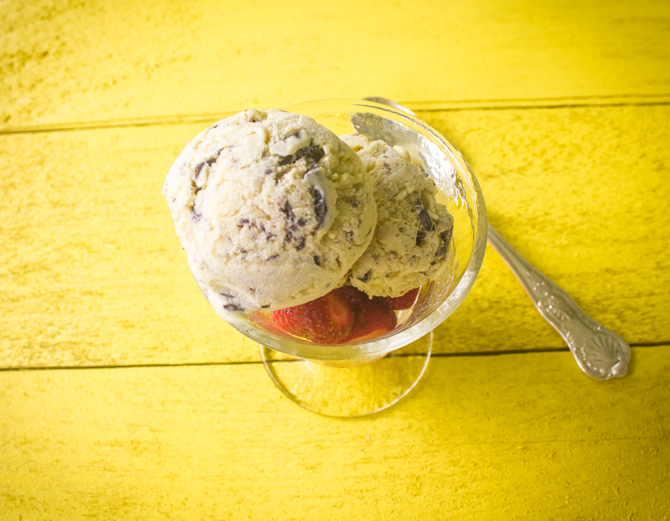
 Now I know my Italian affogato-loving purists will find the title of my recipe sacrilegious. Affogato means "drowned" in Italian, and the classic Affogato dessert is really named affogato al cafe or "drowned in coffee". It is a shot of hot espresso poured over a scoop of vanilla ice cream. When I first had it, it was presented in a tall wine glass. Tall, elegant, bitter and sweet, hot and cold, and melty--heaven in a goblet. Musing on rhubarb this month, I keep returning to the first and only rhubarb recipe I knew as a kid. My grandmother would stew down some rhubarb with a little sugar, and strawberries if on hand. Served warm over vanilla ice cream, it was perfect. Rhubarb pie a la mode, without the pie. Ice cream drowned in warm rhubarb sauce. Can you see where I am going with this? And so I offer you affogato of the rhubarb variety. Hot and cold, sour and sweet, tart and creamy--heaven in a goblet too. The woodsiness of the rosemary cuts the sweetness of rhubarb, and adults-up this compote. Feel free to add strawberries if you have them around. And none of this is to say that the original affogato holds any less of a place in my heart. Try that one immediately as well.
 | ||||||||||||||||||||||


My mother and grandmother, 1951. Just a year ago today I published my first blog post. There have been a bunch of changes over the year (including the name and url), but I am so thrilled where I have landed and am so excited for all that is ahead. In the past twelve months I've published 35+ original recipes, about 15 DIY tutorials, and am just shy of 80 posts--which included a handful of months I needed to be away from my laptop to get our heirloom vegetable micro farm planted, weeded, and thriving. I have finally managed to set up a Pitchfork Diaries facebook fan page, am no longer intimidated by twitter (@pitchforkdiary), and just this past weekend had an incredibly flattering feature on thekitchn.com. A splendid way to start year number two. Thank you so much for all of your invaluable interest and comments. More delicious days to come. Some of my favorite posts from the last year...
| ||||||||||||||||


 Soon after I finished culinary school a wise and wonderful chef and cookbook author asked me, as I was first meeting her, what kind of food do you cook? I was a little stumped. I was just out of a year of cooking little other than classical french cuisine. And a year of cooking predetermined recipes that I had to master, in order to learn said classical french cuisine. Eating locally, and seasonally, and knowing where my ingredients come from are always paramount when I cook, but beyond "farm to table", I didn't really have a ready response as far as my personal style with food. But after some introspection, I think at least one of my approaches to cooking, though perhaps somewhat obvious, is to get the finest possible ingredients, at the height of their season or freshness, from the best possible sources, and then: get out of their way. Or compliment their strengths that are already therein, rather than transforming or imposing. At least that's the goal. How can I possibly improve upon a homegrown, just-picked Jaune Flamme heirloom tomato, drizzled with exceptional olive oil This recipe does just that. Blood oranges are in season right now, and at the height of their glorious flavor. They are a stunning deep garnet color, with a taste that ranges from orange to raspberry to grape. A phenomenal homemade pastry crust, along with the roasted fruit, this galette reminds me a lot of my great grandmother's jam-filled thumbprint cookies, or a very sophisticated Pop-Tart. And brings some necessary brightness to a dull week of winter. (more…) | ||||||||||||||||


 I was combing through my files and came across this incredibly decadent recipe for Dark Chocolate Dipped Shortbread that I posted just about a year ago. I wouldn't turn down a batch of these from my valentine. Perhaps housed in this box. ♥  | ||||||||||||||||


 This little love letter in a ramekin is the perfect way to say "I love you enough to learn what stiff peaks are" on Valentine's Day. And in actuality, the ratio of difficulty to wow-factor is absolutely in your favor. Have you had a chocolate souffle? Have you made your own chocolate souffle? Have you ever ended a blissfully romantic date by pulling (mostly prepped ahead) warm, airy, utterly decadent chocolate souffles out of the oven, whilst the room is filled with puffs of bittersweet chocolate love-air? Or for that matter, have you ever taken a ten minute vacation, and sat alone on the couch eating your first warm chocolate souffle direct from the oven, without having to share one little bit of it. (highly recommended.) This is absolutely a recipe that should be in your back pocket. You can so do this, with just a few techniques to pay attention to. (more…) | ||||||||||||||||


Bleached flour, partially hydrogenated lard with BHA and BHT, wheat starch, water, xanthan gum, potassium sorbate and sodium propionate (preservatives), Yellow 5, and Red 40.
Butter, Flour, Salt, Water, and sometimes an egg. The first is a list of just some of the ingredients of a popular, store-bought, ready-to-unroll, pie crust. The second is what comprises a homemade, you-are-looney-not-to-make-yourself, pie crust. I remember taking a homemade pie, with a homemade pie crust to a friend's house a few years back. When someone raved about the crust and asked what brand it was, I told them I had made it myself. They were shocked, and I was shocked that they were shocked. They then responded that "it must be nice to have the time to make your own pie crusts"... Well, I'm here to tell you, my friends, that you can have these made in about the time it takes you to defrost your hydrogenated lard sheets of dough, and your golden color will come from creamy butter and perhaps a farm fresh egg yolk, instead of Yellow numero 5. And let's just chat about cost for a brief moment. At a recent glance, store bought refrigerated or frozen pie crusts ranged from $3.79 to $4.99 for a two crust package. Making it at home will run you about $2. Are you with me people? But isn't it really tough? Only if you over work it. (gluten humor.) No! But there are a couple of things to be aware of that will help you achieve buttery flaky pastry nirvana, and avoid a gravelly, leaden disappointment. Gluten! This small word (from the latin word for glue) is getting an enormous amount of air-time these days. Gluten is a substance found in certain grains and flours, most commonly wheat, that when mixed with moisture is activated to create a sticky, bonding compound which makes great bagels so chewy, or lousy pastries dense doorstops. The stronger the gluten bond, the less flaky and light the crust will be. Fats, sugar, or acids inhibit the formation of a strong gluten structure. However, the more you knead, play with, or "work" a dough, the more developed the gluten bonds will be. So when working with a dough, you want to handle it as little as possible. Don't leave the food processor on high and have the ball of dough whipping around the machine. Don't knead it! Just do as much as you have to to get the ingredients to come together, and then hands off. Also, allowing the dough to rest in the refrigerator for a half hour after you've made it, will allow the gluten structure to relax some as well. The recipe below makes two crusts, for one double crusted pie (top and bottom), or two separate single pie shells. If I am going to take the time to get flour about the kitchen, I always make this full recipe, sometimes doubling it for four crusts. Divide and wrap unused dough in two airtight layers of plastic wrap or freezer bags, and they can be frozen for about 3 months. Remove to the refrigerator the day before to thaw. Give this a try. The ease, and more importantly, the taste will astound you. Get this down now and you'll be a crust making-fool in time for peach pie season. BASIC PIE CRUST PASTRY Makes 2 crusts for one double crust pie, or two single pie shells. 3 cups all-purpose unbleached flour 1 teaspoon salt 8 oz (2 sticks) unsalted butter, cubed and chilled (or popped in freezer for 15 minutes after cut into cubes) 1/2 cup water, ice cold OR 2 large eggs with 4 teaspoons of water Step 1: Combine flour and salt in a food processor. Add cubes of chilled butter.  Step 2: Gently pulse food processor, until the butter is the size of small peas. These pieces of fat in the dough will create pockets when it is baked, and result in the flaky texture.  Step 3: Evenly distribute the ice water, or egg and water mixture, and pulse just until the dough comes together in a ball. It may be necessary to add just a bit more moisture, which you can do a tablespoon at a time, again, just until the dough comes together.  Step 4: Pour the dough onto a well-floured surface. In balls about the size of a walnut, gently push and smear the dough out with the heel of your hand, just once each ball. Continue until you have done this with all of the dough. The term for this in french is fraisage. It will help make sure there aren't any giant pieces of unincorporated butter, that will melt and cause a hole in your crust, but will also help create long layers of butter in your dough, that will ideally help with the flakiness.  Step 5: When all of the dough has been fraisage-d, form into two disks, that are generally flat and round. This will help give you a head start on the shape you are trying to achieve when it comes time to roll it out. Wrap individually in plastic, and place in the refrigerator for a half hour to rest. You can also freeze the disks of dough at this point.  Step 6: Remove the dough disk from the refrigerator and place on a gently floured surface. It might need a minute or two to come up just a bit in temperature, so it doesn't crack all over when you put a rolling pin to it. Gently press down with a rolling pin, and apply light pressure, at first, as you roll forward. Continue to roll forward only, turning the dough as you need, until you have a circle about an inch wider on all sides than the pie plate you are using.  Step 7: Brush excess flour off the top surface of the dough. To transport the rolled out dough to a pie plate, gently roll the dough around the rolling pin, brushing off excess flour on the bottom, as you go.  Step 8: Bring the dough-wrapped rolling in to your baking dish, and unroll in the opposite direction.  Step 9: Loosely fit the dough into the shell, using a small ball of spare dough to push it gently into the corners, if needed. Trim any large overhanging edges, leaving about a 1/2 inch on all sides. With your thumb and pointer finger on one hand, and the tip of your thumb on the other, go around the top of the edge, pinching your two hands together every inch or so, to create a fluted edge to your crust.  Step 10: Return pie shell to the refrigerator to chill slightly before baking, or filling and baking. Voila! | ||||||||||||||||


 The Christmas season in my paternal grandparents' house, when I was growing up, was always marked by tins of the exact same assortment of homemade cookies, painstakingly baked in legions by Grandma Baumer. There were wreath spritz cookies, apricot or mincemeat oatmeal bars, buttery vienna crescents, and then, the espresso chocolate balls. The latter were not easy to love as a kid. They didn't have the crunchy green colored sugar of the wreaths, or the gooey pie-like interior of the bars, nor the melt-in-your-mouth heavenly almondness of the crescents. They were small, brown, unadorned, a little bitter, and crumbled in your mouth, crying for a glass of milk (which I wasn't a big fan of either). And yet, year after year, I tried to like them. I knew there was something challenging and grownup about them, and I'd give it another go each time they were the only remaining variety in the tin. I recently came across the recipe again, in my grandmother's handwriting, among some of her belongings. The inkling about them being a grown-up cookie was correct. They are a deep bitter espresso, with a wave of dark cocoa, finishing just at the end with a flicker of salt. They are also the quickest and easiest holiday cookie I have made yet. These are subtle and elegant, and would be a charming finish to a winter dinner, alongside coffee, port or dessert wine. Or try them as a late sunday afternoon snack with a glass of medium-bodied red wine. I did. With a toast to Marie.
 | ||||||||||||||||||||||


 With homemade vanilla extract on my mind (and growing increasingly darker on my counter), I have found myself craving homespun desserts of yore. It is certainly this time of year too; our new pine-y tree perfuming the house has me tearing through files of stained recipe cards trying to recreate tins of cookies of my foremothers'. With homemade vanilla extract on my mind (and growing increasingly darker on my counter), I have found myself craving homespun desserts of yore. It is certainly this time of year too; our new pine-y tree perfuming the house has me tearing through files of stained recipe cards trying to recreate tins of cookies of my foremothers'.I have had a few amazing meals at an outstanding humble restaurant, The Moosse Cafe, in Mendocino, CA. The menu is a wonderful array of comforting classics, but so carefully prepared with impeccable ingredients you feel you are meeting them for the first time. This was certainly the case with their legendary dark chocolate pudding. Dense and rich and not too sweet, it was perfect. But also...it was pudding. Not custard or mousse, nor crème nor bruléed. With all of the frothy, eggy, well-tempered desserts my french culinary background has given me, I am in love with the honest simplicity of pudding right now. I even love the brief snap of the skin on top of the bowl as my spoon first dives in. I brought this pudding recently to a dinner party and it was a lick-the-plate-clean hit. Easy to transport and serve, in small ramekins (keep the portions small, as it is a rich one), accompanied by a bowl of whipped cream, and a bowl of an irresistible crunchy toasted hazelnut, shaved chocolate and sea salt topping. This would also be festive and easy to set up on a holiday soiree buffet. (psst...and all made in advance.) Fa-la-la-la-la.
 | ||||||||||||||||||||||


 There is little that will get me running to the kitchen faster than reading about a new (or most of the time, quite old) culinary trick to produce a food or ingredient that I had never thought about making by hand. Food and Wine magazine has a great feature this month on the Best Handmade Gifts. Included in that article is a recipe for homemade vanilla extract. Who knew? There is little that will get me running to the kitchen faster than reading about a new (or most of the time, quite old) culinary trick to produce a food or ingredient that I had never thought about making by hand. Food and Wine magazine has a great feature this month on the Best Handmade Gifts. Included in that article is a recipe for homemade vanilla extract. Who knew?The procedure couldn't be simpler: Combine 10 vanilla beans, split lengthwise, with 1 1/2-2 cups of vodka in a clean glass jar or bottle. Add a 1/2 cup more vodka, if needed, to completely cover the beans. Let sit for about 6 weeks in a cool, dark place. The extract is ready when the vodka is a rich, dark color and knocks you over with vanilla wafting from the jar when opened. If you'd rather not have the grainy vanilla bean seeds in your extract, pour through a coffee filter to strain. I also read in another extract article online, that you can make a second batch of extract with the same beans. Just fill up the container again with vodka when empty, and repeat the steeping process one more time. Yes, Christmas is only 3 1/2 weeks away, and well, Happy Hanukkah already. But I can certainly see giving this a start with the time you have, and then portioning it out for gifts, beans included in each bottle, with instructions to wait a week or two more before using. It would also make a lovely Valentine... Speaking of Valentine-- This year for Valentine's Day I gave my husband, the ice cream chef in the family, a half pound of glorious, moist, outrageously fragrant vanilla beans. I found an amazing online vanilla bean resource, Amadeus Vanilla Beans, and the totally indulgent bundle of about 50 beans, for about 65 cents each, far exceeded my wildest expectations. Start there. And here are a few great options for packaging up your gift portion of bean and extract: The Container Store Save on Crafts Specialty Bottle And finally, with New Year's right around the corner, while you are working with these same ingredients, how about also getting a larger glass bottle, using a slightly less vanilla bean to vodka ratio (2-4 beans per liter of vodka, depending on desired strength), and make homemade vanilla vodka. I mean, anyone can bring champagne to the party. Ho Ho Ho! | ||||||||||||||||


 I've been thinking a lot lately about my food heritage. Partly because I have cooked little other than french food for the last two years, and simultaneously have spent more time in Chinatown than ever before. And in part because as I wade deeper and deeper into a career with food, I am having strong food-related distant memories coming back to me. I am remembering specific meals I had when I was a kid in startling detail. Eating experiences I haven't thought about in decades are flooding back, making unexpected connections to paths I am exploring now--and in many ways, confirming that this was not an out of nowhere career change. I have also started to revisit, and to collect and protect, old family recipes. They are serving up smells and tastes that take me right back to meals with my relatives, some I've met, some I didn't get to. And even more precious, is cooking from old family recipes, that are in the handwriting of those relatives. I definitely feel them at the stove with me, looking over my shoulder as I stir and refer to their stained index cards. I recently came across my father's carrot cake recipe. My dad, who was an incredibly talented and curious home cook and baker, died just about 12 years ago. I haven't made this cake, or had it, in at least that long. First, it is the best carrot cake recipe I have come across, using at least twice as much fresh grated carrots as other recipes (in abundance right now at farmer's markets), resulting in an incredibly moist, yet grounded cake. And also, it is such a powerful way to feel connected to him. That little scrap of paper he sent me in college with the recipe could have so easily been lost. I am so grateful I am a pack rat, and have it now to pass along. 
| ||||||||||||||||||||||


 I was asked to bring dessert to a dinner with some of my favorite girls (you know who you are...), the day after Easter. With this year's holiday resulting in a serious lack of bunny candy (believe me, for the better) I thought about trying to come up with a grown-up easter sweet. These dark chocolate dipped shortbread cookies were the perfect fit, and paired very well with the individual creme caramels I made in addition. They are both classic and elegant, and not too sweet, so could be great with afternoon tea or alone with dessert wine. DARK CHOCOLATE DIPPED SHORTBREAD By Catie makes about 2 1/2 dozen cookies, depending on shape 1 lb (4 sticks) unsalted butter, softened 1 cup sugar 1 vanilla bean (optional, but worth it), split and scraped 1 tsp vanilla extract 4 cups AP flour 3/4 tsp salt 8 oz dark chocolate Preheat oven to 350 F. With either a hand mixer, or stand mixer with a paddle attachment, cream together softened butter, sugar, and the split and scraped vanilla bean (seeds and bean pod), until combined and fluffy, and the oils from the vanilla bean have been beaten into the butter. Remove the vanilla bean. Add vanilla extract and mix to combine.  In a separate bowl sift together flower and salt. Add to butter mixture, a bit at a time, until all mixed in. Shape into two disks on a floured surface, wrap in plastic wrap and refrigerate for 30 minutes. Gently roll out one of the disks of dough on a well floured surface to a 1/3" thick. Cut into desired shape, either with a knife or cookie cutters. Place on cookie sheet, sprinkle with a little extra sugar, and bake at 350 F for about 20 minutes, until the bottom and edges are just turning golden. Cool on baking rack. You can freeze any unused portion of dough.  For the chocolate: Finely chop the dark chocolate with a large chef's knife. To temper the chocolate, so it stays glossy when it dries and doesn't develop that dull gray finish, place half of the chopped chocolate in a microwave-save bowl. Microwave for 30 seconds, remove and stir, and repeat at 30 second intervals until just melted. Then add a portion of the unmelted chocolate shavings to the bowl, stir in to melt by the heat of the chocolate (no more microwave). Repeat until all the unmelted chocolate has been incorporated. When cookies are cool, gently spoon chocolate on one of the ends of the cookies, scraping off any excess. Place on a baking sheet lined with parchment to cool. Note: For the chocolate, try not to use chocolate chips. Most chips contain an emulsifier so that they don't melt completely and ooze everywhere when baked in cookies. Instead use your favorite good dark chocolate eating bar, or these Guittard chocolate wafers  | ||||||||||||||||


A lovely and unexpected flavor combination, that serves as a small sweet forecast of warmer weather ahead.
 I saw a new stand at the market this week I hadn't noticed previously. Lavender by the Bay is a lavender farm in East Marion, NY. They were selling a variety of dried lavender sachets and bouquets, but what caught my eye were small bags of dried lavender buds "for baking and tea."  Inspired by Sophie Dahl's iced tea recipe in this month's Food and Wine magazine, I experimented with the lavender and some excellent organic earl grey loose tea I had from specialteas.com, and came up with a delicate, floral, light dessert, that is not too sweet, and slightly musky. Definitely has me dreaming of warmer days with glass of iced tea on the porch. 
 | ||||||||||||||||||||||


 I have some Mutzu apples from a recent trip to the farmers’ market. These apples are softball-huge and bright lime green, and immediately caught my attention as I was perusing the Migliorelli Farm stand. They are such gorgeous specimens it seemed blasphemous to peel them and cut them up into chunks—or toss them with a lot of sugar and seasoning. This recipe is sort of a cross between an apple dumpling, rugelach, galette, with probably a little hamentashen thrown in there too. I love that it really just puts this outstanding apple on a pedestal (or buttery crust), to enjoy almost bare naked. It is simple and rustic, and great by itself—but even better with a scoop of my husband’s homemade vanilla ice cream.  
 | ||||||||||||||||||||||


Yesterday I received in the mail some adorable vintage aluminum baking molds that I purchased a little while back from the great upcycle shop AntiNu on Etsy.com. I had sweet potatoes from the market, and got to work.  A handful of years ago the Center for Science in the Public Interest did a study comparing the nutrients of vegetables. Sweet potatoes were ranked the most beneficial of all. They are super high in fiber, beta carotene, vitamin C, and, unlike their regular white potato cousins, are a complex carbohydrate, so won't send your glucose soaring (as much). The cakes came out beautifully. Not terribly sweet, they were moist yet airy, and filled the kitchen with warmth and an earthy spice. They would also be great with brunch, or as a dessert with cream cheese frosting.
  | ||||||||||||||||||||||


|
{ welcome! }
 Catie Baumer Schwalb is a chef, food writer and photographer, who splits her life between the city and the country. Not too long ago Catie was a New York City based actress and playwright for more than a decade. She has her Master of Fine Arts from the National Theater Conservatory, and her Grand Diplôme in classic culinary arts from the French Culinary Institute in New York City.
... Read More ≫
Catie Baumer Schwalb is a chef, food writer and photographer, who splits her life between the city and the country. Not too long ago Catie was a New York City based actress and playwright for more than a decade. She has her Master of Fine Arts from the National Theater Conservatory, and her Grand Diplôme in classic culinary arts from the French Culinary Institute in New York City.
... Read More ≫{ get in touch }
{ what's new }
September 12, 2015
August 19, 2013
August 15, 2013
August 13, 2013
August 1, 2013
{ favorites }
{ archives }
Appetizers / Breads & Pastry / Breakfast / Cakes / Canning / Condiments / Dinner / DIY foods / Drinks / Fall / favorites / Grains / Holidays / Local / Noodles & Pasta / Pies & Tarts / Poultry / Salads / Seafood / Snacks / Soup / Spring / Summer / Sweets / Techniques / Vegetables / Vegetarian / Winter /
{ currently reading }
|


