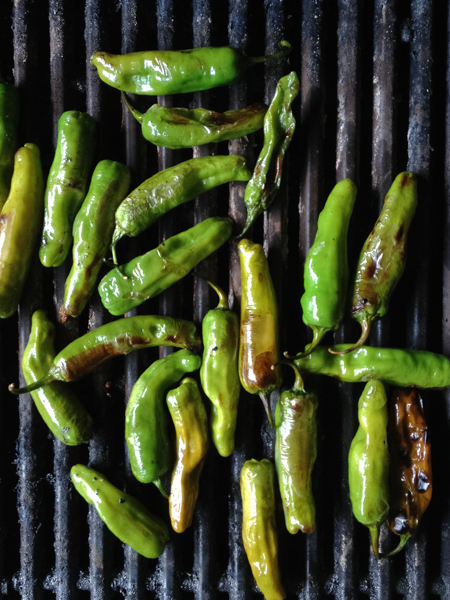
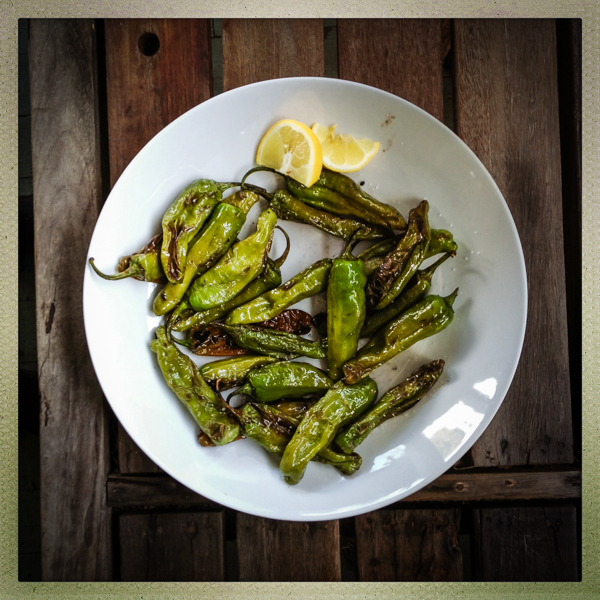
This mild pepper from Japan has become quite the culinary rage over the last handful of years. I first had them as a snack in a benefit cooking master class for Slow Food NYC, and have been growing them in my garden ever since. Shishito peppers are slender, bright green, and about the length of your index finger. They are super flavorful yet mild, with about one in a dozen delivering a memorable amount of heat. Consider it a party game. I love serving a huge platter of grilled shishitos with cold cocktails at the start of a big summer dinner party. Quick, easy, impressive, slightly unusual and pretty much universally adored--there should be no hesitation in adding these to the menu. Padron peppers can be prepared and served the same way, but will be hotter in flavor overall. We are in high shishito season right now, so keep an eye out at the market, and definitely grow your own next summer.
| ||||||||||||||||||||||


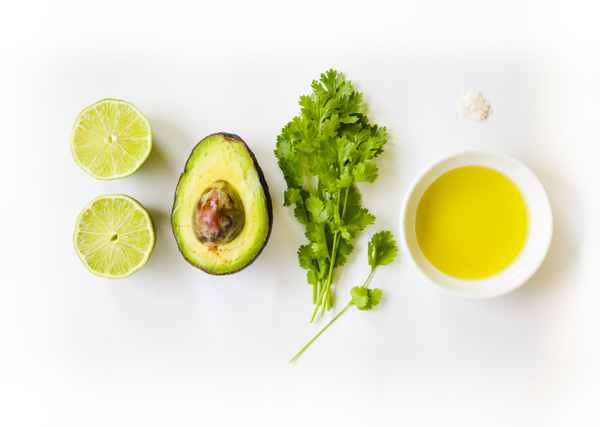
I made this quickly in the blender this week, to go over a cold rice salad with shredded poached chicken, local corn, a few early tomatoes and chunks of avocado. Mostly the goal was to distribute the little bit of avocado I had on hand as much as possible throughout the salad. We loved the result, and I expect we'll be drizzling this all over salads, soups, sandwiches, and all sorts of grilled things all summer long. Creamy Avocado Lime and Cilantro Dressing By Catie Baumer Schwalb makes about one cup. 1/2 avocado 3 tablespoons fresh lime juice, from one large lime, or a few smaller 1/4 cup, packed, fresh cilantro (include stems too if they are young and fresh) 1/2-3/4 cup olive oil salt, to taste In a blender, combine avocado, lime juice and cilantro. Blend until smooth. Through the hole in the blender lid, slowly pour in the olive oil, with the blender on low. Start with a half cup, and taste for balance. If it seems too tart, add a little more gradually, tasting as you go. Season with salt, to taste. Serve immediately, or chill briefly. | ||||||||||||||||


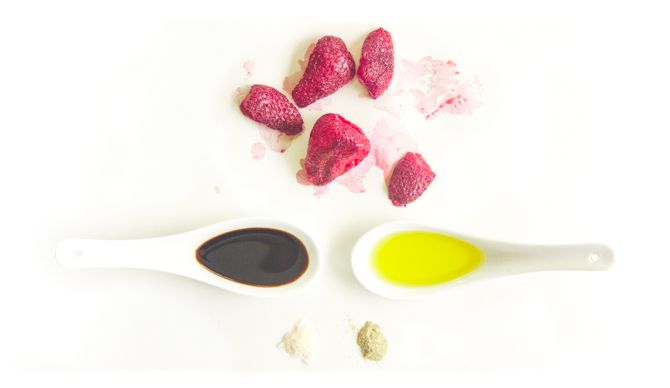
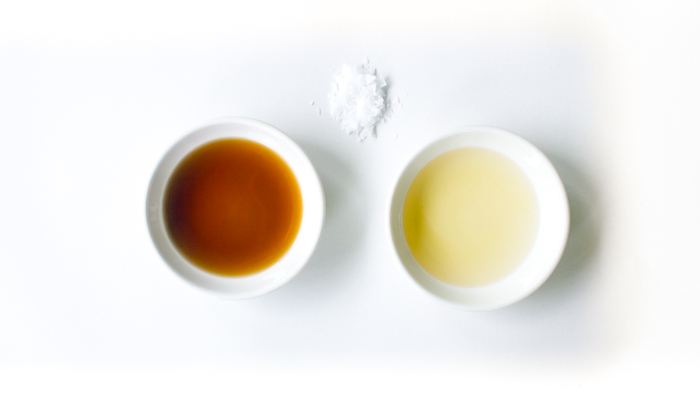
Make this right now, with all those plump ephemeral strawberries lurking around. (If you are making this out of season--gasp--consider adding a small pinch of sugar to the berry puree to help boost the flavorless winter berries). If you can make it past eating it directly from the mixing bowl, serve this dressing over a spinach salad with toasted pecans or walnuts and some crumbly goat cheese. Or dip some grilled chicken into it. Or grilled pork. Or duck. Or heck, put that on the salad too. Oh, and do yourself a favor: get some really good balsamic vinegar.
| ||||||||||||||||||||||


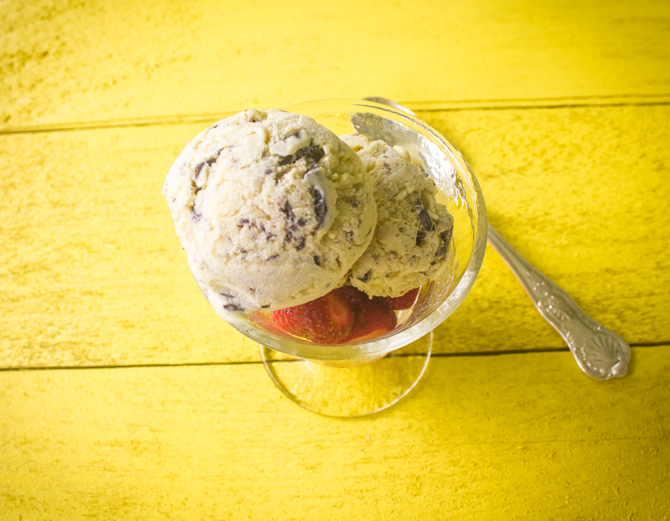
With rhubarb's glorious reign quickly coming to a close, I wanted to give it one last hurrah, before it is replaced in the fruit bowl with stone fruit of a multitude of dizzying hues. I made this rhubarb vanilla ice cream with (generous) dark chocolate chunks to bring to dinner with friends recently, and was giddy with how it came out. So giddy in fact, that I fell ill (no relation) and my husband had to courier the ice cream over to the gathering on my behalf. A testament to this great recipe, in all the "hellos", "she's not feeling well", "she'll be fine", and "yes, thanks I'd love to stay for one glass of wine", he forgot to tell the ladies what flavor of ice cream it actually was. So when dessert rolled around, and he had long made his exit, there was a marvelous guessing game, as I was told, as to what they were actually eating. The chocolate chunk part, fortunately, was obvious, but the tangy, slightly fruity, slightly vegetal, very rich and creamy rest of it elicited guesses from mascarpone to peach to lemon curd, in an email steam entitled "Mystery Ice Cream". (more…) | ||||||||||||||||


 Last night I was having dinner with some of my favorite lady friends, and we were talking about salad dressings, as you do with your lady friends. They were saying that they each always make their same standby dressing, and were enjoying this new blog feature to help get out of their ruts. We shared what each of our quick, don't have to think about it, dressing recipes are, and I had forgotten that for the longest time this one was mine. The mellow rounded sweetness of the sherry vinegar and the rich roasted nuttiness of the hazelnut oil are a combination that is tough to beat. It also makes one of my favorite birthday or hostess gifts. A bottle of each, and perhaps some great salad servers, have yet to make anyone unhappy. Use this dressing as an excuse to use up any hazelnuts that are left over in your pantry from some long-forgotten holiday cookie recipe. I love subtly mirroring the dressing in the salad ingredients.
| ||||||||||||||||||||||


I love rhubarb. I love it for it's old fashioned vibe. I love it for it's color, striking tartness, and even for it's moderate shelf life. I also love it for showing up so darn early in the spring and sticking around for several months. And I too was at first intimidated by those long, irregular-shaped, tough magenta stalks at the market. I actually overheard a conversation at our market up here recently, where a woman who had just bought a weekend house near the Delaware discovered she had huge decades-old rhubarb plants growing on her property. However she didn't know when it was time to pick them. Nor did the young woman working the farm stand, so I jumped in with what I knew. She had been waiting for them to turn red, ripen, to pick. I explained that some heirloom varieties, have very little red, and the stalks can range from thin to the thicker more uniform we're used to seeing in grocery stores. I generally go by feel, but you can harvest stalks when between ten and fifteen inches long, avoiding letting them go too long and become tough, dry or woody. Once you get your rhubarb back you your kitchen, from yard or market, they really are one of the most simple fruit to prepare. Make sure all traces of the leaves are trimmed off, as they are not edible. Rhubarb have a bad rap for being stringy, as in celery stringy, but as long as they are cut in small pieces before cooked, the strings will not be a nuisance. For good measure, or habit, I tend to peel two or three strings off each stalk, from end to end, but not too much, as you are also peeling off any of the great magenta color. Wash the stalks well and then cut into slices between an half inch and an inch thick. You can then roast the pieces, throw them in to brighten up a rich stew, or as I do most often, simmer them down to a quick rhubarb puree or sauce. Pack the rhubarb into a sauce pan or small pot that holds the pieces sort of snugly. Add enough water to come up about 3/4 of the way up the sides of the slices, and simmer over a medium-low heat, until the rhubarb has broken down and is tender. Add more water if the mixture seems to be getting to dry or risking burning at all. When finished you can mash it up a little to have a sauce with more texture, or use a food processor, blender or immersion blender to give you smoother final product. If you are looking to use the sauce as a topping by itself, add about a tablespoon of sugar per large stalk of rhubarb when simmering down, or another classic way to cut rhubarb's intense sourness is to add at least 1 part strawberries for every 3 parts rhubarb when starting the sauce. Taste when finished and adjust sweetness if necessary. Vanilla beans, ginger, orange, cinnamon, almost all berries and apples are all great additions as well. Make a big batch. Eat it warm or ice cold. Spoon it over ice cream, blend it into cream cheese, swirl it in yogurt or oatmeal, drizzle it over a wedge of Stilton or duck or game meats, whisk it into your vinaigrette, blend it with ice for your margarita. Really, what other fruit, the northeast no less, is quite so versatile? | ||||||||||||||||


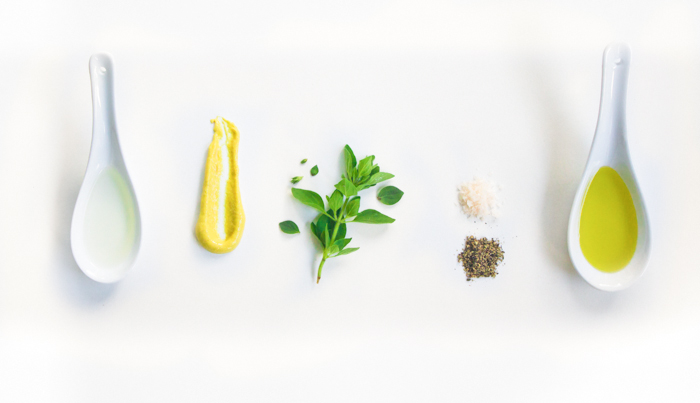 For another step in my continued fight to close down the salad dressing aisle in grocery stores, I'll offer you a homemade salad dressing recipe each week. Fresh oregano certainly has a pronounced flavor, but actually so much more mellow and herbal and complex than what dried drab green flecks and pizza restaurant shakers have lead you to believe. We had this dressing last night on crisp fresh red leaf romaine, a small handful of fresh sorrel leaves (both sliced into ribbons, both from our garden), cucumber, and a generous handful of toasted sesame seeds. This vinaigrette would also be incredible on a salad of baby spinach, chickpeas and sliced hardboiled egg, or as a base for a potato salad. Also, P.S., oregano is probably the most idiot-proof herb to grow, super hearty, pops up first in the spring and faithfully returns each year. Grab a plant and stick it almost anywhere in your yard now for years of salad dressings and marinaras to come.
| ||||||||||||||||||||||


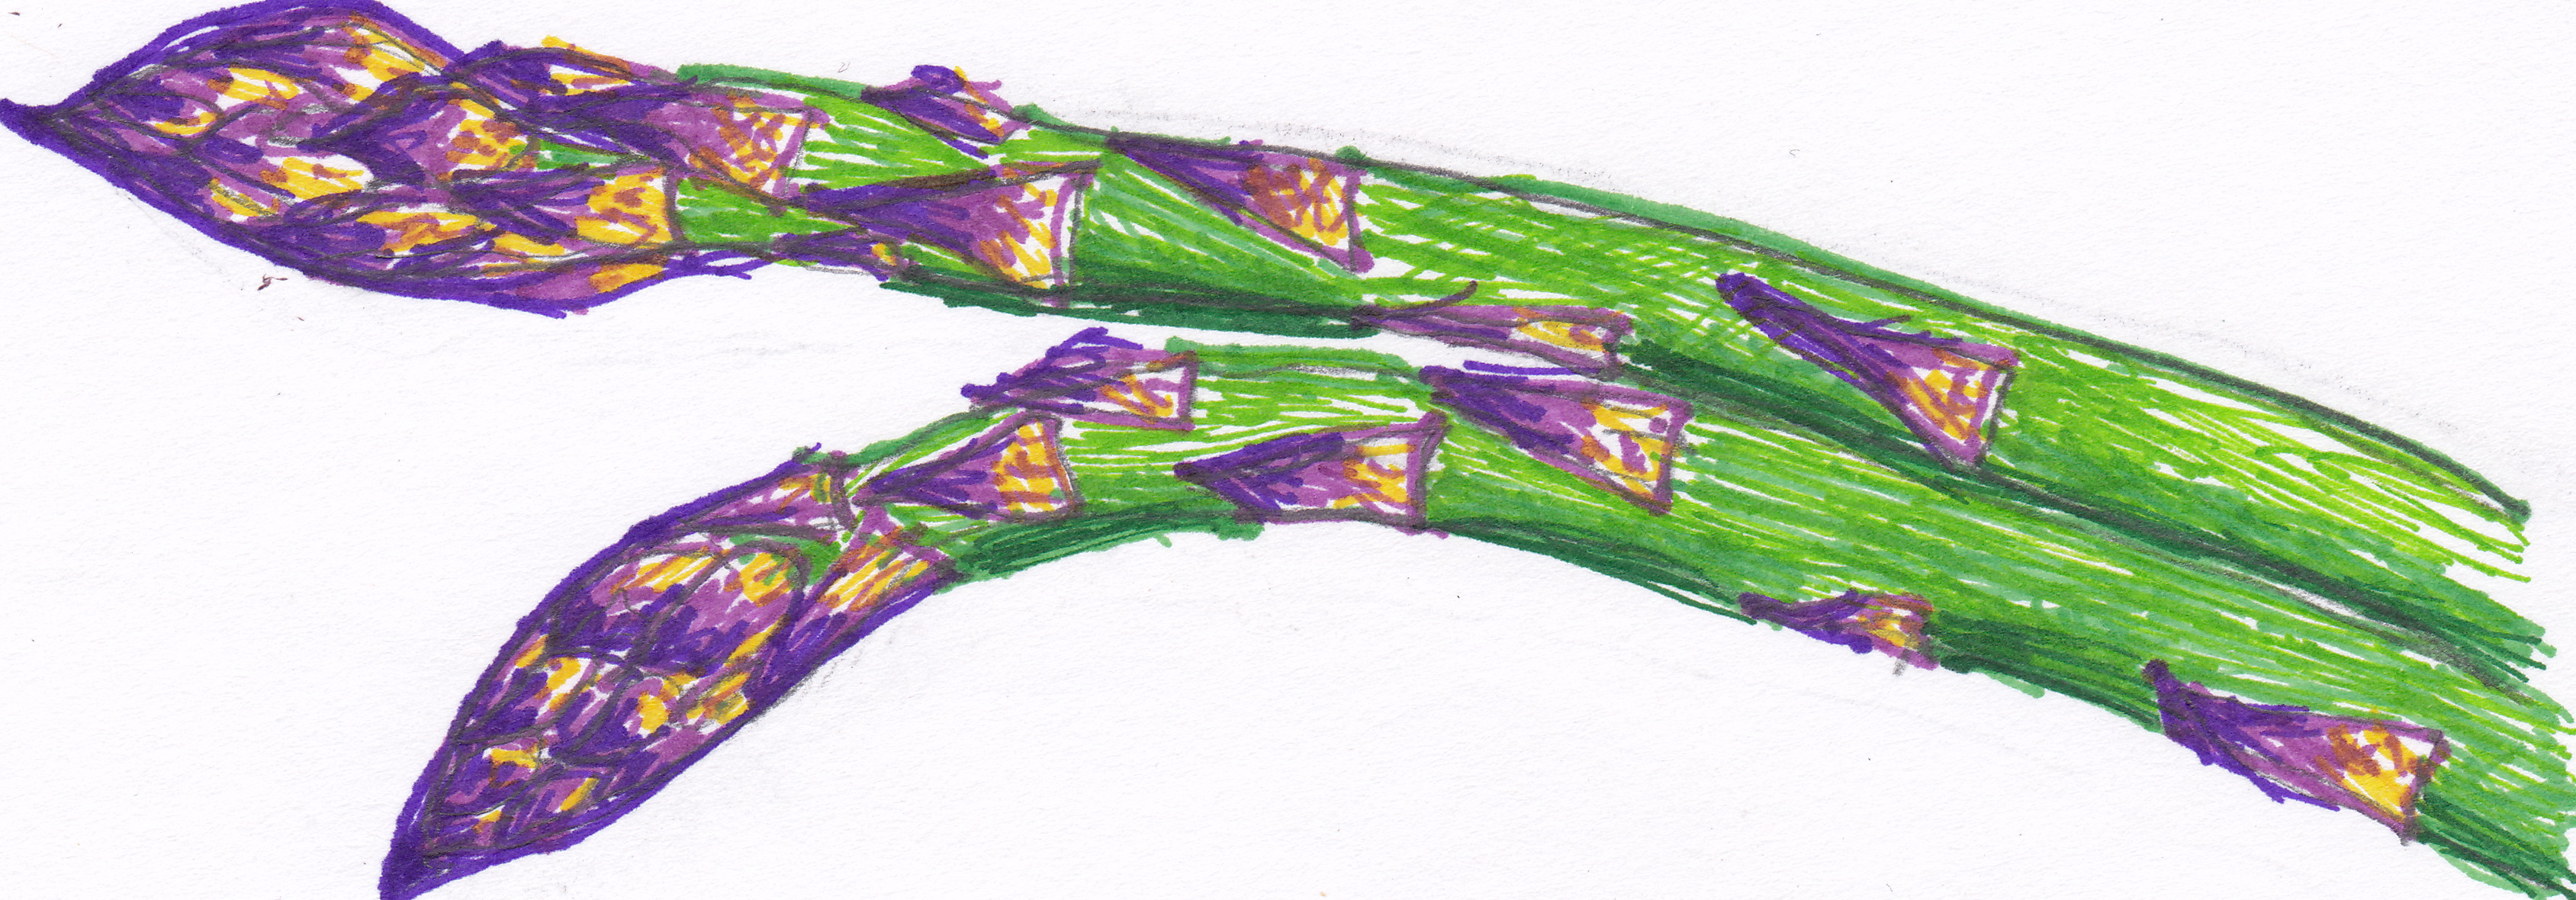
Something to do with asparagus right now...(and what I'm having for dinner.)
| ||||||||||||||||||||||


 My grandfather loves cantaloupe. At least I assume he does, as he has eaten a half cantaloupe filled with cottage cheese for lunch almost every day that I have known him. I vividly remember him coming home for lunch (coming home for lunch!) when I was visiting them in my childhood, and my grandmother having his melon ready at his arrival. He's turning 89 in four days, so the cantaloupe clearly did right by him. For the most part cantaloupe has been something I could take or leave. I'd take some to balance out the color at the occasional brunch buffet, but generally would dig though the melon bowl to scoop out as many of the sweeter watermelon cubes as I could unearth. However, when I was pregnant last summer, the only slightly unusual craving I developed was for cantaloupe. And lots of it. Particularly as the summer went on and the weather was sizzling hot. It was then I discovered an orange-fleshed melon Shangri-La on the tables of the summer's farmers' market. Tiny, outrageously sweet, nubby-skinned melons came out in abundance in the months when we needed them the most. Numerous heirloom varieties, particularly ones about the size of a softball, exploded with fleeting flavor. Heaven. And obviously Papa was hip to this many decades earlier. This incredibly simple, two ingredient, refresher is a stunning way to use this stunning fruit. It also helps in keeping their fast-ripening goodness around for a day or two longer. Happy Birthday Charlie, and thank goodness for the humble cantaloupe.
 | ||||||||||||||||||||||


It has been a pretty swell week for this little blog. First, I get the baby to nap just long enough that I manage to post my first recipe in months. Then, I get not one, but two really lovely mentions, on the websites of not one, but two major publications I adore. Gourmet Live, the blog of Gourmet Magazine featured my Cornmeal Crusted Soft Shell Crab recipe as its Image of the Week. Swoon.
Then, today my photo for my edible flower ice cubes was featured in a slide show on Bon Appetit's site. I'm the second slide. Right after Martha. Stewart.
And the really lovely bonus of both of these mentions is that they reminded me of two recipes which I really enjoyed from last summer, and will revisit again now. Thanks! and Thanks again! | ||||||||||||||||


I'm back. My hands have been very, delightfully full these last many months, but I feel like we are all finally starting to figure out a good rhythm together. And being a mom is, well, utterly remarkable, and it is hard to not devour every minute. Even with our full hands, we did manage to get our gardens in this year. Even more square footage than last year, as I am more able bodied this summer and can actually do something. More plants, more varieties, more of everything. And so far it is all looking strong and healthy. I cannot wait to cook with all of it. I walk through the rows and see recipes everywhere. I have also had my first food pieces and photographs in print, in the months since the baby has been born. There is a beautiful one year old magazine in our area called Green Door, and I have been so honored to do pieces for their last three issues. In the latest issue I have a piece on gourmet farmers' market popsicles. Three great recipes, which we have been enjoying ourselves, very frequently, since the weather turned warm. (The magazine is on sale throughout the Hudson valley, in New York City, for download, as well as subscriptions.) There was one other ice pop recipe that was gnawing at me as I was developing the recipes for the article: Rhubarb. However, there was no rhubarb to be found to recipe test with in the spring when the piece was due. So at last, with piles of ruby stalks covering market tables, I was able to give it a try. Rhubarb is indeed sour, yet in a perfect, summer way. It is almost always paired with strawberries to balance its tartness. I opted instead for beautiful white cherries that were on the next market stand over. The fresh in-season cherries gave the whole mixture a really mellow sweetness, and the combination with the very tart rhubarb results in a overall sour cherry flavor, which is one of my favorites. The sugar amount below is just a guideline. Certainly your cherries' sweetness will vary. Taste the mixture and adjust to your liking. However, keep in mind that when frozen a good portion of the perception of sweetness will be deadened by the cold, so the mixture should taste a bit more sweet at room temperature than you are shooting for. Happy summer.
| ||||||||||||||||||||||


Dreaming of our trip to Barcelona, that was this month a year ago, I tried combining two of my favorites: spanish romesco sauce with just-picked spaghetti squash from our garden. Nutty, tangy, rich and warm, with a wonderful crunch from the squash, I literally had to make myself put the mixing spoon in the dishwasher so I would stop eating and have enough to photograph. Romesco is a very traditional spanish sauce originating in Catalonia. It is incredibly rich and creamy, thanks to pulverized toasted almonds and hazelnuts included to thicken the sauce, that also provide an extra dose of protein. As with most ages-old, traditional dishes, the recipe varies from cook to cook, including this cook, and is a reflection of how they view it most balanced. In addition to using it here with spaghetti squash, it is incredible with grilled fish and vegetables, as well as a dip, or spread on sandwiches. It is a great way to use up those few remaining, not-exactly-pretty, tomatoes and peppers looking for a home at the markets right now. | ||||||||||||||||


I just discovered the Telepan TV channel on youtube. Bill Telepan is one of my most favorite NYC chefs, who I had the great, great pleasure of cooking with for many months that the start of his inspirational and important Wellness in the Schools school lunch campaign. He has started to put together videos, sharing some of his incredible recipes from his incredible restaurant Telepan. The three recipes using cherry tomatoes in the video above are making me very. very. hungry. Run! and get some cherry tomatoes at the markets this weekend while they are still available (we had a frost at our house last night!). | ||||||||||||||||


 Corn this time of year is so sweet and full of natural sugar, that it lends itself to both sweet and savory preparations. (They don't call it "Butter and Sugar" for nothing.) This recipe is part homage to Meredith Kurtzman, the pastry chef and queen of all things gelato, at New York City's Otto. In addition to her famous and irresistible olive oil gelato, Meredith also has a criminally delicious sweet corn gelato, that I first had at a master class she gave while I was in culinary school. Not too sweet, creamy and highlighting everything that is best about corn right now, it is perfect, and only available for the few weeks while the best fresh corn is in season. Crème caramel, often called crème renversee, is a classic french custard dessert. Very similar in overall flavor to a crème brulee, but the difference being that in this case the caramelized sugar is first placed on the bottom of the ramekin baking dish and the custard baked on top of it. It is then removed from the dish to serve, and reversed, like an upside down cake, with the now top of the custard infused with the caramel. The magic trick of this recipe, is that also somehow in the cooking, some of the caramel first put in the bottom of the dish and hardened, permanently liquifies, making its own sauce at the same time. (For a crème brulee, the custard is baked on its own, topped with sugar just before serving, and then the sugar is burnt (bruleed) with either a torch or broiler, to make that crackly hard top.) Anyway, custard + caramel= amazingly good. Caramel + corn=old time ballpark good. Two together? Yes, good. (more…) | ||||||||||||||||


 Glorious cobs of corn will still be around at the farmers' markets for a couple of weeks. Sweet, meltingly tender, golden or pearly white, they are never better (or cheaper) than right now. We eat it with dinner nearly every night for the month when it is at it's best, just barely cooking it, as it doesn't need much more, and then say farewell for another eleven months. However, we also religiously freeze corn to use in meals in the months ahead. Pulling out and defrosting a bag of farmer's market kernels feels so luxurious in the depths of winter--not to mention a tremendous vitamin-packed time and money saver. Great for chowders, soups and chili, I'll also combine the corn with my frozen peppers for a tex-mex-y topper for eggs, or a perfect start for fajitas and burritos. Slowly saute some onions along with them, and add a little cumin, chili powder, ground corriander, and epazote for a colorful, sweet, base for a meal. Glorious cobs of corn will still be around at the farmers' markets for a couple of weeks. Sweet, meltingly tender, golden or pearly white, they are never better (or cheaper) than right now. We eat it with dinner nearly every night for the month when it is at it's best, just barely cooking it, as it doesn't need much more, and then say farewell for another eleven months. However, we also religiously freeze corn to use in meals in the months ahead. Pulling out and defrosting a bag of farmer's market kernels feels so luxurious in the depths of winter--not to mention a tremendous vitamin-packed time and money saver. Great for chowders, soups and chili, I'll also combine the corn with my frozen peppers for a tex-mex-y topper for eggs, or a perfect start for fajitas and burritos. Slowly saute some onions along with them, and add a little cumin, chili powder, ground corriander, and epazote for a colorful, sweet, base for a meal.How to Freeze Corn (more…) | ||||||||||||||||


 These fritters are an homage to the perfect little hometown restaurant we had in our shoreline Connecticut town growing up in the 80s. A place where everybody knew our name, where you could pop in casually for a wholesome lunch, or count on it for a suitably festive and elegant special occasion dinner. I've been thinking a lot about food of that era lately. As a kid I was permitted to tag along on many grownup restaurant dates, luncheons and dinner parties, giving me the chance to try copious amounts of new foods, many definitely not considered on the childrens' menu. I remember these new tastes and textures more vividly than I do where I was or who I was with (go figure.) But what is most interesting to me in hindsight, is that what was 80s nouvelle cuisine, was in many ways using a huge amount of the same ideas of locavore cooking now--using the freshest possible ingredients, lighter sauces or preparation to let the produce or proteins really be the focus, an overall lighter, fresher, more in-the-moment way of cooking. The only difference being that then it seemed revolutionary and nouvelle, while today it is seen as a return to the basics. This fritter is exactly in keeping with that. The freshest possible ingredients, at the height of their season, minimally dressed up. In the 80s something like this seemed very exotic, today it feels like the perfect, summer, wholesome appetizer, right out of a Deborah Madison book. And plus...ding! ding! ding!...it is something to do with all of those zucchini piling up on your counters, that you perhaps might be starting to resent in just the slightest way.
 | ||||||||||||||||||||||


 This may be the garnish to end all garnishes. I remember so vividly the day we learned this in culinary school, and how I raced home to try it myself, feeling like I had just unlocked some illusive five star chef secret. This simple little technique gives you magnificent, fragrant green gold to drizzle about a plate, swirl atop a bowl of soup (it floats!), and dunk very lucky crusty bread in. Seriously, this just smeared on a white plate, and you look like a superstar. Regular ol' oil becomes glistening emerald and is all things basil...or parsley or cilantro--it works for a variety of herbs. I made a thai basil-cilantro oil to drizzle around a Thai-spiced quail dish that worked beautifully. The oil will keep for about a week in the refrigerator. I've also frozen it in ice cube trays to defrost later in the year, to swirl on top of a creamy soup, or drizzle along side some roasted salmon. But try this now, even to just dress up some sliced tomatoes. There. Is. Nothing. Better.
| ||||||||||||||||||||||


 Basil has definitely arrived at the party. Bunch upon fragrant bunch are cramming tables at the markets. Not surprisingly we mostly think green and the same familiar scent and flavor when basil comes to mind. But there are loads of heirloom varieties that are becoming much easier to track down. (and grow yourself!) Try a new one on your next trip to the market. What's old will be a little newer again. Genovese Basil: The traditional Italian large-leafed sweet basil that we all know and love. Ideal for all things pesto, but best when the leaves are small. If the leaves are huge, blanch them quickly to remove some of the (too) strong flavor, making them more suitable for a delicately balanced pesto sauce. Holy Basil: Becoming more and more popular on menus with chefs, it is called holy basil primarily because it is used as an offering in South Asia in Hindu temples. Generally eaten raw, it has a bright, sweet smell, that is strikingly like Juicy Fruit gum. Thai Basil: This is those big fragrant sprigs strewn across your Thai green curry noodles, or tucked inside a Vietnamese summer roll. A deep magenta stem with small green leaves, it is much spicier than Italian basil. Heavy anise and clove flavors compliment Southeast Asian cuisines perfectly. Dark Purple Opal Basil: There are several purple basil varieties out there, and I always love to have at least one plant in my garden. Very similar in flavor to traditional Italian basil, it is a gorgeous way to add unexpected color to a dish. Thinly slice with green basil for instant edible confetti. Lemon Basil: Smaller leaves with a deep citrus smell and taste. A great compliment to seafood dishes, cocktails, and summer salads. | ||||||||||||||||


 This is a peach pie my grandmother has made for years. I adore the visual of the entire peach halves, that always elicits at least one gasp of admiration when set down on the table. With peaches stunningly sweet this time in the season, I also really appreciate the addition of the custard-like filling, instead of the usual toss with cinnamon and sugar. Though it does contain sugar, the custard-souffle-y filling really compliments the fruit and cuts the sweetness some. This pie is also really beautiful, and really delicious, with blueberries tucked into the spaces and cavities in and around the peaches. Summer overload in a crust. I haven't tried it, but I imagine raspberries wouldn't be awful either.
 | ||||||||||||||||||||||


 Peaches and other stone fruit are perfect and plentiful (and pretty cheap!) at the markets right now. Taking an hour or so and freezing a bunch will be total treasure in your freezer come winter. And...far extend your season for making David Lebovitz's ridiculously good peach ice cream (it contains sour cream, people! Sour cream!!). Here are a couple of quick, and a little easier, tips for puttin' up the peach. Blanching (to remove the skin). Nothing new or revolutionary, but the quickest way to remove the skin, and really idiot-proof. You'll be thankful later on that the skins are gone, so you can just pop those frozen slices of sunshine virtually from the freezer to your blender for a smoothie or to a pie shell (give or take a little thawing.) Method: 1. Bring a large pot of water to a boil. Wash whole peaches. Don't bother to dry. 2. Cut a small "X" in the bottom of the peach with a sharp knife, just cutting through the skin. This will give the skin a place to start to slip-off when blanched. 3. Slowly lower peaches, several at a time depending on the size of your pot, into the boiling water. 4. Remove peaches from the boiling water after one minute with a slotted spoon. Immediately transfer the peaches to either a large bowl of ice water, or a colander and run under very cold water. 5. Starting where you made the "X" on the bottom, just literally slip the skin off the peach with your hands. It will come off very very easily. Freezing To extend the life of your frozen peaches, and ward off freezer burn, you want as little air in the container with the frozen fruit (and vegetables too) as possible. Sucking air out of a freezer bag with a straw, and then trying to zip-lock-it as quickly as possible was my method of choice for years. But this method below, using water to displace the air, has worked much better, and much quicker, for me in recent seasons. 1. Fill a large bowl with water, leaving some room at the top. 2. Lower a freezer-safe bag, filled with whatever you are freezing, into the bowl, with the top of the bag still partially open, with room for air to escape.  3. As you lower the bag further into the bowl, the water will surround the shape of the bag, and press out a good amount of air. Continue to lower the bag, until the level of the water is as close to the top of the bag as you can go, without risking getting water in with the fruit. Seal bag immediately and remove from bowl. 4. Gently press on the fruit in the bag to redistribute and make it flatter for storage in the freezer. Label and freeze. Peaches will keep for about six months in the freezer. Peach pie in February anyone? To preserve the color a little better, you can add a little citric acid  | ||||||||||||||||


 | ||||||||||||||||


 Here is a quick recipe I dreamt up, while on my roasted produce kick this week, using what is in abundance in the gardens and at the market. Thankfully, it turned out to be heavenly, lick-the-bowl-clean good. There is a magical, sum is definitely greater than it's parts, result here, as with many very simple summer dishes (think: Tomatoes+Basil+Olive Oil.). Sweet and sour and earthy and salty and bright and crunchy all going on in your mouth together. Roasting the nectarines and zucchini really intensifies their flavor and makes them both feel like vegetables...or fruit...or something new and unique completely. A beautiful side dish for any summer meal, I imagine this would also be spectacular atop grilled fish, pork, or chicken.
 | ||||||||||||||||||||||


 By this point in the summer I definitely get into a rut and prepare fruit and vegetables from the gardens and market in almost the same ways daily. Not that that is a bad thing, as with produce this amazing, at the height of their season, there is often very little that can improve upon them. A little grilling here, a little lightly dressed salad there, a little sautéing tossed with fresh pasta over there… Vegetable and fruit roasting feels like almost too basic a technique to even justify a whole blog post. However, several times during the year I have these ah-ha moments where I am bored with what I have been cooking and then suddenly remember to mix things up I just need to roast, which I somehow forget about for spells at a time. The long exposure to dry heat and the contact with the surface of a baking sheet or roasting pan transforms produce in ways very different than grilling, steaming or sautéing. Most importantly it evaporates much of the water in the fruit or vegetable, drying it out some (Take that watery zucchini!), and deeply concentrating the flesh and the flavor. Also the edges of the produce start to get brown and sweet and caramelized and utterly irresistible after the natural sugars are exposed to heat and the surface of the baking dish. (more…) | ||||||||||||||||


 These weeks the gardens are bursting with flowers. Not the flower gardens, but the herb and vegetable gardens. Some of the flowers I planned on (nasturtiums and chamomile), some are part of the journey (pole bean blossoms which will become bean pods), and some are a result of me not harvesting fast enough and a bit of the plant going to seed (cilantro, basil, dill, oregano, and radish). I'm a big proponent of using as much of a plant or vegetable as I can. One of my favorite "tip to toe" recipes doing this is Chef Bill Telepan's Beet Greens Pierogi with Mixed Summer Beets and Brown Butter Sauce. I also got much too excited when I learned in a master class in culinary school, with chef Michael Anthony of NYC's Gramercy Tavern, that I could pickle the technicolored chard stems I had been pushing aside and composting for years. It is equally exciting for me to use flowers in dishes. As mentioned, some are planned, some are not, but there is a lot of flavor, and a ton of color and texture there that would otherwise go to waste. They are not just a pretty face--and frequently fetch a premium price at the markets. Certainly make sure you know what you are serving and eating, so as not to go all Arsenic and Old Lace on unsuspecting BBQ guests. But there are so many varieties of edibles around right now, and just a small edition of a few feels very very special. Cleaning and Storage Try to pick the flowers as close to use as possible. Store them, unwashed, wrapped gently in paper towel in the refrigerator, protected in a bowl or open container. Teeny tiny bugs love to hide out in their petals and folds, so examine each blossom carefully. To wash, and to refresh flowers that are a little droopy, plunge the entire blossom in a bowl of cold water for about five minutes, and then allow to dry on a paper towel. After washing, flowers can be floated. right side up, in a bowl of cold water until ready to go onto the plate. Ideas for Use - Salads! Whole or torn, little bursts of blossom color are a magnificent addition to salads. Nasturtiums in particular, leaves and flowers, with a wonderful peppery zing, are a great addition. But also think about the flowers of complimentary herbs like dill, basil, cilantro, and chervil. Then consider adding some of the same herb to the dressing to tie it all together. - Garnish soups by floating a single blossom in the middle of the bowl. This is particularly effective with cold soups, as it won't wilt the flower. Try it with Borage, a beautiful purple flower with a taste very similar to fresh cucumber. - Decorate cakes, cupcakes and pastry with a blossom here and there. Edible flowers definitely each have their own flavor, so stick with the sweeter and more floral plants for this, like chamomile, lavender, and mint. - Tear up some petals and sprinkle them over a plate or platter like confetti right before serving. Or make a tiny micro salad of flowers to top a piece of grilled fish or meat.  A quick snapshot from lunch--Buttermilk with Fuji Apple Dashi, Market Herbs and Flowers, and Pine Nuts at Momofuku Ssäm Bar, NYC. | ||||||||||||||||


 There are few things that could get me to turn on the oven in the middle of this oppressive heat wave. However, much to the dismay of my panting dog, clafouti is one of them. Unlike almost everyone else in the country right now, the red and golden raspberries in our garden are adoring the heat. They have just started to really take off, offering up several pints a week. (That is, those that aren't stolen when I'm not looking, right off the thorny branches, by aforementioned panting dog). Clafouti ("klau-foo-tee") is a both rustic and elegant dessert, with a ridiculously fun to say name, that originated in the Limousin region in the southwest of France. It was traditionally made with cherries, as they had an abundance they had to figure out what to do with each summer, poor things. I learned of it from my well-loved, dog-eared copy of Julia Child's Mastering the Art of French Cooking, and was in love from the start. Further investigation revealed that when made with any other fruit other than the traditional cherries, it is actually not called Clafouti, but "Flaugnarde". Are you kidding me? I feel like those rogue Limousinians just came up with the most clumsy sounding word they could to shame the rest of the world into strict adherence to their recipe. My fancy, summer, whatever-berry-filled french dessert will be called clafouti, so there. (more…) | ||||||||||||||||


 Move over scallions. I may have to cheat on you. My love affair with dim sum scallion pancakes is no secret. There are few times I can think of when they don't appeal to me. (or make me start to go all Pavlovian as I even type the words.) Though green and doing very well, the scallions planted in my garden are still about the size of glorified dental floss and won't be serving up any exotic savories for a few weeks. However, we do have garlic scapes! And herbs! Lots of both! Scallions? Who needs scallions? While not exactly a necessity, (more of an insatiable craving), mother invention shone down and offered up this bright, summery, mildly garlicky, herby, southeast Asian-inspired perfection on a greasy paper towel. There is a tremendous (and tremendously cheap) hole-in-the-wall dumpling shop in NYC's Chinatown, to which I make frequent pilgrimages. Alongside their dumplings, they have a monstrous cast iron pan in which they make a very similar sesame pancake. You can get a pizza-slice-sized wedge "stuffed with veggies" for $1.25, which is split laterally and crammed with shredded carrot and chopped cilantro leaves and stems. There was definitely some inspiration from there in this as well. Give these a try, using all that summer is offering up right now. Shredded zucchini, carrot or beet, torn squash blossoms, thyme, sage, thinly sliced chard could all be welcome additions. Fried dough + farm fresh herbs and produce = What could possibly be bad? (more…) | ||||||||||||||||


With our growing season a little later here in slightly cooler upstate New York, we still have bundles and bundles of garlic scapes in the markets and gardens for a week or two. A garlic scape is the flower shoot that has shot up from the stem of a hardneck garlic bulb when growing. The scapes are slender, bright green, and often twisting and turning in elegant swan-like shapes. Shortly after they appear, which seems to happen almost overnight, it is important to snap them off of the rest of the stem to allow the garlic plant to instead put its energy into growing the garlic bulb, which will be harvested a few weeks later. The scapes have a flavor that is definitely garlic, but much mellower, with hints of herbal summerness. They make a stunning pesto, turning into an outrageously bright green paste that keeps its color when cooked or frozen. I will often just puree garlic scapes with olive oil and freeze in about one cup portions that will keep for several months. Always on the lookout for new oils and vinegars for homemade salad dressings, this year I made garlic scape infused vinegar. It will still be a week or so before it hits its full potency, but so far so good, and the snaking scapes in the bottles are stunning if nothing else. The vinegar will be beautiful in simple vinaigrettes to dress greens and cucumbers from the garden, and also added to a marinade for grilling meat and seafood, splashed on sauteed chard, collards or kale, or for dunking crusty grilled bread. If your herb garden is overflowing, you can certainly add a few sprigs of basil, dill, thyme, or even a dried chili pepper to the bottle for your own personal melange. Experiment, use what is around you, and enjoy. GARLIC SCAPE VINEGAR 1-2 whole garlic scapes, about 12" in length 1 cup light flavored vinegar, such as white wine vinegar or rice vinegar Glass container non-metal cap or cover Note: I like the ratio of 1-2 scapes per cup of vinegar, but you can certainly add more to make the flavor more concentrated. And absolutely double or triple the recipe based on the size of container you are using. Triple the recipe, for example, if using a wine bottle. 1. Sterilize the bottle and cap, either by simmering in hot water on the stove for 10 minutes or washing in the dishwasher right before using. Allow to container and cap to dry thoroughly. 2. Wash garlic scapes and dry completely. Cut into lengths that will allow the scape to be completely submerged below the level of the vinegar. Any exposed piece of scape not in the vinegar will start to deteriorate and rot. 3. Gently bruise the scapes, by rolling over slightly with a rolling pin, to release a bit more flavor. 4. Place the scape pieces in the sterilized container and cover completely with vinegar. Cover with lid, cap or cork. 5. Store in the refrigerator, or other cool, dark place. The following day, check the level of the vinegar and add more if the level has dropped at all. It is possible that the scapes will absorb some overnight. 6. Allow to infuse for 10 days to 2 weeks, in a cool, dark place. Strain out original garlic scape pieces, if desired, and replace with fresh ones (if available), primarily for decoration. Will keep for 2-4 months. Keep vinegar bottle out of sunlight or it will become cloudy. The acid in the vinegar acts as an inhibitor for bacteria growth, but certainly keep an eye out for changes in color, an off smell, or cloudiness in the bottle and discard if there is a question. Storing the vinegar in the refrigerator, particularly in the summer months, is the safest.  | ||||||||||||||||


 Our herb garden is growing like weeds. Well, truth be told, the weeds are also growing like weeds. But between the weeds are fragrant, mystical herbs, that are spicing up meals and will also shortly be hoarded away in ziplocks in the freezer for less bountiful months. My favorite herb is lemon verbena. It smells like something that should come from a much more tropical locale--even the plant, with its woody stems and slender leaves, looks rainforesty. Rubbing your fingers on one of the leaves, as I do at the start of many days, is an instant antidepressant. Bright, intensely fragrant, with an aroma and flavor that is distinctly the sweeter side of citrus. Too much and it can make a dish taste like bad perfume, in the right amounts it is transporting. My husband's favorite herb is thyme. It definitely stems (pun intended) from his early childhood-rooted love affair with weekly roast chickens. He painstakingly freezes bunch upon bunch of this savory treasure and stuffs several sprigs under the skin of our weekly roast chickens through the year--as well as it being used in our homemade soups and beloved stocks. So this recipe is a love letter to our favorite herbs. Citrus and thyme marry beautifully, fortunately for us, and both herbs are in great abundance now and for the next couple of months in gardens and markets. A not-too-sweet aromatic addition to sodas and cocktails, and a refreshing palate cleanser when spun into a sorbet or scraped into a granita. Try any of the above with a few fresh berries, oh my. (more…) | ||||||||||||||||


Radishes of every color are pushing their way up through the dirt of my garden and attracting paparazzi-esque crowds at the farmers' market. This fresh and this young, they are sweet and mild, and add a peppery snap to salads and summer meals. Try some this week, with this so-easy-my-sheep-could-make-it recipe for irresistible radish, butter, and sea salt crostini. And don't compost the radish greens tops just yet. They are equally edible and equally wonderful. Treat them as you would other hearty bitter greens; sauteed and tossed with pasta, stirred into soups, or whirled into pesto. Here are a few ideas to try out from the kitchn.com. Enjoy! | ||||||||||||||||


So here is another recipe handed down from Catherine the Great. No, not the Empress of Russia, but my maternal grandmother--one of my first cooking influences, and for whom I am named. I make this pie at least once a year. I can't keep myself from it as soon as I see quarts of local strawberries showing up on the tables at the farmers' markets. It is simple as pie (pun intended). A great buttery crust, plump, fresh, raw strawberries, and a quick jammy glaze. Fruit and high quality carbs: two tastes that should always go together. It is reminiscent of toast and jam, strawberry short cake, or dare I say...pop tart? Since the ingredients are so sparse, the quality of the products you use is paramount. Make a wonderful, flaky, homemade pie crust, use a golden farm-fresh egg and great butter, and above all, use amazing strawberries at the height of their season. It just won't be that great otherwise. Also, because the strawberry flavor can vary a lot from sour to sweet, start slowly with the sugar and the lemon juice in the glaze, and adjust as necessary depending on the flavor of the strawberries you are using. (more…) | ||||||||||||||||


With sorrel in its tangy, bright abundance at the farmers' markets now and throughout the summer, this pistou (or pesto or coulis) is a dynamite way to show it off. Set out a platter of baguette slices, ricotta, and the green stuff and let your BBQ guests at it for a DIY appetizer. Less work for you, no soggy for them. Or, as we did last night, set out a platter of it between you and your loved one on the porch and call it dinner. The lemony-green-herbal potency of the pistou is heavenly with the savory-creaminess of the homemade fresh ricotta. But it is also an incredible addition in any place where you want a little herby, slightly sour, punch. Toss it with warm pieces of boiled red potatoes for a new twist on potato salad, stir a small spoonful into a creamy root vegetable soup just before serving, toss with shrimp and orzo for a cold pasta salad, or drizzle over grilled vegetables, seafood, and chicken. This is also a wonderful recipe to use to put away sorrel for the winter. Make a big batch of the pistou and freeze in smaller portions, to stir into heavier winter dishes in the months to come.
SORREL PISTOU AND FRESH RICOTTA CROSTINI by Catie Schwalb makes about 1 1/2 cups of sorrel pistou For the Pistou: 3/4 cup, packed, fresh sorrel leaves, thicker stems removed, washed and dried thoroughly 1/4 cup, packed, fresh parsley, washed and dried thoroughly 1 garlic clove 1 cup extra virgin olive oil about 4 turns of fresh black pepper salt to taste, a large pinch at least For the Crostini: Fresh ricotta cheese thin slices of baguette, toasted or grilled if desired For the pistou: Combine sorrel, parsley, garlic clove, olive oil, salt and pepper in a blender or food processor. Blend until uniform and smooth. Taste and adjust salt and pepper to liking. Will keep in an airtight container in the refrigerator for up to a week, but is most green and most flavorful the day it is made. It can also be frozen, and thawed overnight in the refrigerator. Stir before serving. For the crostini: Top slices of baguette, or thinly sliced rustic bread, with a large dollop of ricotta. Top with a generous drizzle of pistou. Serve immediately. Alternative: HERB POTATO SALAD Steam or boil red skinned new potatoes. Cut into bite-sized pieces while still warm, but cool enough to touch. Toss with a generous amount of sorrel coulis. Chill before serving. | ||||||||||||||||


 Now I know my Italian affogato-loving purists will find the title of my recipe sacrilegious. Affogato means "drowned" in Italian, and the classic Affogato dessert is really named affogato al cafe or "drowned in coffee". It is a shot of hot espresso poured over a scoop of vanilla ice cream. When I first had it, it was presented in a tall wine glass. Tall, elegant, bitter and sweet, hot and cold, and melty--heaven in a goblet. Musing on rhubarb this month, I keep returning to the first and only rhubarb recipe I knew as a kid. My grandmother would stew down some rhubarb with a little sugar, and strawberries if on hand. Served warm over vanilla ice cream, it was perfect. Rhubarb pie a la mode, without the pie. Ice cream drowned in warm rhubarb sauce. Can you see where I am going with this? And so I offer you affogato of the rhubarb variety. Hot and cold, sour and sweet, tart and creamy--heaven in a goblet too. The woodsiness of the rosemary cuts the sweetness of rhubarb, and adults-up this compote. Feel free to add strawberries if you have them around. And none of this is to say that the original affogato holds any less of a place in my heart. Try that one immediately as well.
 | ||||||||||||||||||||||


This remarkably quick meal is a colorful and crunchy way to use the insanely good soft shell crabs that are coming into season right now. I made this for my husband and I a few nights ago, and was so pleased with the speed to wow ratio. But in addition it was so so so good that we craved the exact same thing for dinner the following night with the extra crabs I bought to photograph for the blog. Though the crabs need to be served immediately after pan-frying, they take just minutes, and so still could be a great alternative for a small group BBQ, turning out crabs as you would burgers off the grill. You can also skip the rolls and just serve them atop a salad of greens and slaw. I also highly recommend trying the same recipe using thick green tomato slices in place of the crabs later in the summer. Oh, how I love cooking during these months... (more…) | ||||||||||||||||


 Here is another soda syrup recipe to accompany yesterday's homemade ginger soda syrup. Super refreshing and light, making me crave flip flops and sunscreen. Try mixing a little of both syrups together for mango-lime-gingerlicious beach blanket bingo in a glass. Who says it's only april? HOMEMADE MANGO LIME SODA SYRUP by Catie Schwalb makes approximately 1 1/2 cups. 1 mango, peeled, and roughly chopped, save the pit 1 cup of sugar (you may decide to use much less, depending on how sweet and ripe your fruit is) 2 cups water 2 limes, juice (about 3 tablespoons) and zest fine strainer cheesecloth Place mango, mango pit, sugar, water, lime juice and zest in a small pot. Bring to a gentle boil, and the turn off heat. Allow to steep and infuse for thirty minutes. Return the mixture to a gentle boil, and reduce the syrup by about half, until it is a slightly thicker consistency. Remove from heat and allow to cool Strain through a fine strainer lined with cheesecloth. Squeeze cheese cloth to extract any remaining juices. Refrigerate for up to one week. Mango Lime Soda: Mix 1 part soda syrup with 5 parts seltzer | ||||||||||||||||


 Perhaps because of the few (very few) days of slightly decent weather we've had lately, my attention has recently shifted from hot teas and afternoon hot mochas to cold, effervescent beverages. We are not big soda drinkers in our house, almost none at all, for all of the obvious reasons (high fructose corn syrup, chemicals, artificial colors,and the environmental impact of all of the packaging and distribution.) But a small spell of stomach queasiness that my husband and I both shared not too long ago (lovely), had me at the grocery store searching for ginger ale, or even better a more gingery ginger beer, sans HFCS and with real ginger as an ingredient. After not an easy time I did find a couple of options, but all ended up being too sweet for my liking. I've been following the blog and success of Brooklyn's P&H Soda Co., a small artisanal producer of all natural, small batch, soda syrups, for a little while now. With flavors including hibiscus, lime and cream, I can't wait for my next time in the city to pick up some at one of their new retail locations. But it also occurred to me that with my flail at the grocery store, and with summer gatherings-on-the-porch weather quickly approaching, perhaps I should just get myself in the kitchen and try to figure out the whole shebang, or at least part of the shebang, myself. The result made me and my stomach very happy. And like so many of my DIY endeavors, was ultimately not difficult, offers endless delicious possibilities, and has everything I want and nothing I don't. I mixed the gorgeous syrup with seltzer for an outstanding ginger soda. (A side note, we have owned the SodaStream home seltzer maker The best part of all is that you can control the sweetness, by adding more or less sugar to taste, and the ka-pow of the soda, by adding more or less syrup to your seltzer. Experiment, concoct and enjoy.  HOMEMADE GINGER SODA SYRUP by Catie Schwalb 1 cup sugar 1 cup fresh ginger, peeled and coarsely grated on the large holes of a box grater 2 cups water 1 tablespoon lemon juice fine strainer cheesecloth TIP: To peel ginger, wash and then use the front of a small spoon to scrape away the thin peel. It will come off easily and a vegetable peeler tends to remove too much of the ginger meat. Grate the ginger, and gently transfer it to a saucepan, careful not to squeeze out or lose any of the flavorful juice in the process. Add the sugar, water, and lemon juice to the ginger. Bring mixture to a gentle boil and turn off heat. Allow mixture to steep and infuse for thirty minutes. Return the ginger mixture to a gentle boil and reduce it by about half, until it has a slightly thicker, more syrupy consistency. This is just really evaporating the extra water, and adjusting how concentrated you want the syrup to be, so go as long or short as you want, but do not let it cook so long that the syrup starts to get very thick, turn amber in color and caramelize. Remove from heat and allow syrup to cool. Strain through a fine strainer lined with cheesecloth. Squeeze cheesecloth to extract any remaining juices. Refrigerate for up to a week. For ginger soda: Combine 1 part ginger syrup with 4 parts seltzer, or more or less to taste. | ||||||||||||||||


Here's a great little dish using those irresistable watermelon radishes and microgreens now growing at a farmers' market near you. Ready in under a half hour, this would be a deceptively easy, super impressive first course for a local-chic dinner soiree. Or triple the scallops, and pair it with cool buckwheat soba noodles dressed with sesame vinaigrette and sprinkled with additional microgreens for a light and springy main course. Either way it uses some of the best items our farmers are offering up at this moment. And after months and months of braised root vegetables, some very welcome fresh leafy crunchy variety.
[caption id="attachment_2004" align="aligncenter" width="600"]  http://www.pitchforkdiaries.com/2011/03/25/pan-seared-sea…crogreen-salad/[/caption] http://www.pitchforkdiaries.com/2011/03/25/pan-seared-sea…crogreen-salad/[/caption] | ||||||||||||||||||||||


It was announced yesterday that Mark Bittman's weekly column in the New York Times will end its thirteen year delicious, informative, enthusiastic, and encouraging run.
http://www.youtube.com/watch?v=kqChHSsf42c I have learned many lessons from Mr. Bittman's column. Starting in 1997, a year after I graduated from college, I cooked recipe after recipe from his writing and suggestions and road maps of seasonal dishes. His overarching philosophy of don't be intimidated, just get in the kitchen and make good, real food--"It's not rocket science"--is the cornerstone of what I deem most important in the work I do and what I am most trying to impart in this blog. His article The Well-Dressed Salad Wears Only Homemade in 2006, not only instantly convinced me to remove all store-bought salad dressing from my life, but also started my path of questioning any and all store bought food-stuffs. He sent my husband and I on a scavenger hunt through winding cobblestoned back streets of Genoa, Italy, and putting Genoa on our itinerary at all, because of his completely intriguing description of the hole-in-the wall greasy spoon, Trattoria Maria, as "one of my favorite restaurants in the world." It ended up being our favorite city of the trip---the trip on which we got engaged. His coverage of Jim Lahey's no-knead bread technique, sent me, and throngs of other eager cooks, out in search of hearty lidded cast iron cookware (according to the sales person at the Le Creuset outlet in Woodbury Commons: "Are you here because of The Bread?"), and got the country excited about making homemade bread. I encourage you to go back over his fun, relaxed and heartfelt collection of pieces, and cookbooks (How to Cook Everything, 2,000 Simple Recipes for Great Food Thank you, Mr. Bittman. Looking forward to what's next on the menu. A few of my favorites from the past years, that I return to again and again: Soto Ayam--Indonesian Chicken Soup with Noodles and Aromatics Chard Stuffed with Lemon Saffron Risotto and Mozzarella Chicken Biriyani 101 Simple Salads for the Season 101 Simple Appetizers in 20 Minutes or Less Almond-Apricot Granola Bars | ||||||||||||||||
As a follow-up to my previous post about all things salad dressings, here is a recipe for another rock-star of a vinaigrette, following the same formula: 1 part acid + 3 parts oil + seasonings and flavoring ingredients.
This is dynamite tossed with fresh blanched local beans, perhaps adding soba noodles for downright craveable homemade sesame noodles. But it is also wonderful as a marinade for grilled chicken, beef, or pork, with the acid of the vinegar bringing the added bonus of a great meat tenderizer.  SESAME GINGER VINAIGRETTE RECIPE By Catie Makes approximately ¼ cup Rice Vinegar, 1 TBS Garlic, ½ clove, crushed and finely chopped Fresh Ginger, ½ tsp, grated Toasted Sesame Oil, 3 TBS Salt, to taste Combine the vinegar, garlic and ginger in a bowl, and allow to sit for 10 minutes, to infuse the vinegar with the flavor of the garlic and ginger. Then, while whisking constantly, pour the sesame oil into the bowl in a slow, thin stream. Taste, and adjust salt. Serve as a dressing for a green salad, tossed with cooked vegetables (green beans, broccoli, carrots, sautéed greens) or as a marinade for grilled meats. SESAME GREEN BEANS RECIPE Blanch green beans, by cooking in a pot of boiling, heavily salted, water for a few minutes, until crisp-tender. Immediately remove with a slotted spoon to a bowl of ice water to shock to stop the cooking. Drain and pat dry. Toss with Sesame Ginger Vinaigrette and toasted sesame seeds. Can combine with noodles, like Japanese buckwheat Soba noodles, for a more substantial dish. Top with slivered scallions and toasted sesame seeds. | ||||||||||||||||


 Just about four years ago, Mark Bittman wrote a great piece in the New York Times; A Well-Dressed Salad Wears Only Homemade, and it got me thinkin'. Why did salad dressings feel like such a mystery? Why is there usually a huge amount of grocery store real estate devoted to them? Why are they so darn expensive? A recent peek at dressings in my grocery store upstate, showed even the cheapest dressings at around $2.50 for an 8 oz bottle, jumping to $3.59 a bottle for something just slightly more natural. That's $40-57 a gallon--compare that to something like the price at the pump, and it feels like complete lunacy. The other glaring issue I noticed was that sugar, often in the form of high fructose corn syrup, and WATER, frequently make up two of the first three ingredients. Again, lunacy.  A few weeks ago I did a cooking demonstration at a local harvest festival. Showcasing the gorgeous local produce (supplied by Beaver Dam Brook Farm in Ferndale, NY), I did a brief primer on dressings and vinaigrettes. As I was myself when I first started cooking, many of the audience members at my cooking demos were surprised at how fast and simple it was to make a vinaigrette. And so much less expensive while eliminating chemicals, emulsifiers, and that big dose of unnecessary sugar. It seemed crazy that there we were, at a huge farmers' market, a group of people devoted to buying the freshest, least traveled, produce, and yet were not thinking much about then topping that produce with something that was possibly over a year old (when purchased, not to mention the time it has sat on that narrow shelf on the door of your refrigerator), gooey, syrupy, and most likely swimming with ingredients from a factory and not a farm. A few weeks ago I did a cooking demonstration at a local harvest festival. Showcasing the gorgeous local produce (supplied by Beaver Dam Brook Farm in Ferndale, NY), I did a brief primer on dressings and vinaigrettes. As I was myself when I first started cooking, many of the audience members at my cooking demos were surprised at how fast and simple it was to make a vinaigrette. And so much less expensive while eliminating chemicals, emulsifiers, and that big dose of unnecessary sugar. It seemed crazy that there we were, at a huge farmers' market, a group of people devoted to buying the freshest, least traveled, produce, and yet were not thinking much about then topping that produce with something that was possibly over a year old (when purchased, not to mention the time it has sat on that narrow shelf on the door of your refrigerator), gooey, syrupy, and most likely swimming with ingredients from a factory and not a farm.So here's the basic formula: 1 part acid + about 3 parts oil + seasonings and flavoring agents Put the acid in a bowl with the seasonings and flavoring ingredients, if using. If you have time, allow that to sit for 5-10 minutes to better infuse the vinegar. Then while whisking continually, pour the oil into the acid, in a slow, steady stream. The mixture will begin to come together and emulsify. You can also do the same, a bit quicker, with a fork for a "broken" vinaigrette. Or make things very easy and put it in a blender, instead of a bowl, in the same order, streaming the oil in the top while the blade is going. This works particularly well if adding fruit or vegetables for flavor. Most commonly, extra virgin olive oil is used, but gorgeously flavored hazelnut, walnut, pumpkin seed, and avocado oils are also becoming widely available. The acid can be lemon juice, lime juice, vinegars (balsamic, white or red wine, sherry, rice, cider) or a combination. Season with salt and pepper, and flavor with shallot, garlic, mustard, pureed fruit or juice, honey, pureed roasted vegetables, fresh herbs, dried herbs, or ground spices. One of my favorites is a three-ingredient vinaigrette of lemon juice, sea salt, and hazelnut oil over a green salad with roasted beets. Experiment with some of these combinations: olive oil + white wine vinegar + dijon mustard (just a dab), minced shallots and garlic (a classic) grapeseed oil + rice vinegar + fresh mango (pureed in a blender), season with salt and pepper to taste olive oil + sherry vinegar + roasted red peppers (again season and puree in a blender) walnut oil + white wine vinegar + roasted fennel and roasted garlic olive oil + lime juice + honey and ground cumin or this Roasted Cherry Tomato Vinaigrette, I posted recently. The formula is simple, it's not rocket science, you can hardly go wrong, and the options are so much more rewarding than the same-old same-old you'll find on the dusty eye-level shelf at your store. Do yourself a huge favor, work this into your life. Experiment, taste, and experiment some more. Tonight. | ||||||||||||||||


Red hot chili peppers. Sweet orange bell peppers. Long curly Jimmy Nardello peppers. Short stubby serrano peppers.
All of them. Peppers are still abundant at the farmers' market, super sweet this time of the season, and the easiest vegetable to put away for the winter months. You don't need to peel them or blanch them or can them--they can be frozen raw! Instructions: Wash the peppers and dry thoroughly. For larger, sweet or bell peppers, cut in half lengthwise, and remove stem, seeds and ribs. They can be left in halves or sliced smaller. Smaller peppers, particularly tiny chili, jalapeno or serrano peppers can be left whole. Put in resealable freezer-safe bag or container and freeze. That's it. Alternatively, if you want have more control over how many you use at once, place trimmed pieces in a single layer on a cookie sheet, and freeze. When frozen, transfer individually frozen pieces to resealable freezer-safe container or bag and return to freezer. (This method also works great when freezing individual berries.) Peppers do lose some of their crisp texture when frozen and thawed, but these are great to slice up and saute with onions, cumin and herbs for a quick fajita, burrito, or omelette filling, or to add to a slow simmered stew. The hot peppers are easy to slice finely when frozen, returning the rest to the freezer, to add just a small shot of heat to a dish. Above all, they are packed full with flavor right now, far outshining anything you will find them passing off as a pepper in February. Don't delay!  | ||||||||||||||||


 Our 52 heirloom tomato plants are in their final days, but have heroically yielded hundreds of pounds of beautiful fruit this year. A very triumphant relief, following the yield of six (yes, just six) tomatoes we got from the same number of plants last summer in the throws of the huge tomato blight. We are still managing to gather buckets of red, orange, and golden cherry tomatoes almost daily, though are even a little tomatoed-out after weeks and weeks of eating nothing but. This roasted tomato vinaigrette is one of our favorites, and so much so it was served over sliced local tomatoes at our wedding three Augusts ago, and printed on the back of the menu. As the weather gets cooler, and I automatically start to crave autumn foods, this hanger-on recipe from summer works beautifully over sauteed hearty greens, the last of the zucchini and summer squash, grilled pork, chicken or fish, as a tangy base for a stew, as well as a dressing for a simple green salad. I also love to can a few pints of it in our pressure canner to wake up meals, or dip crusty bread in, in the dreary days of winter.
 | ||||||||||||||||||||||


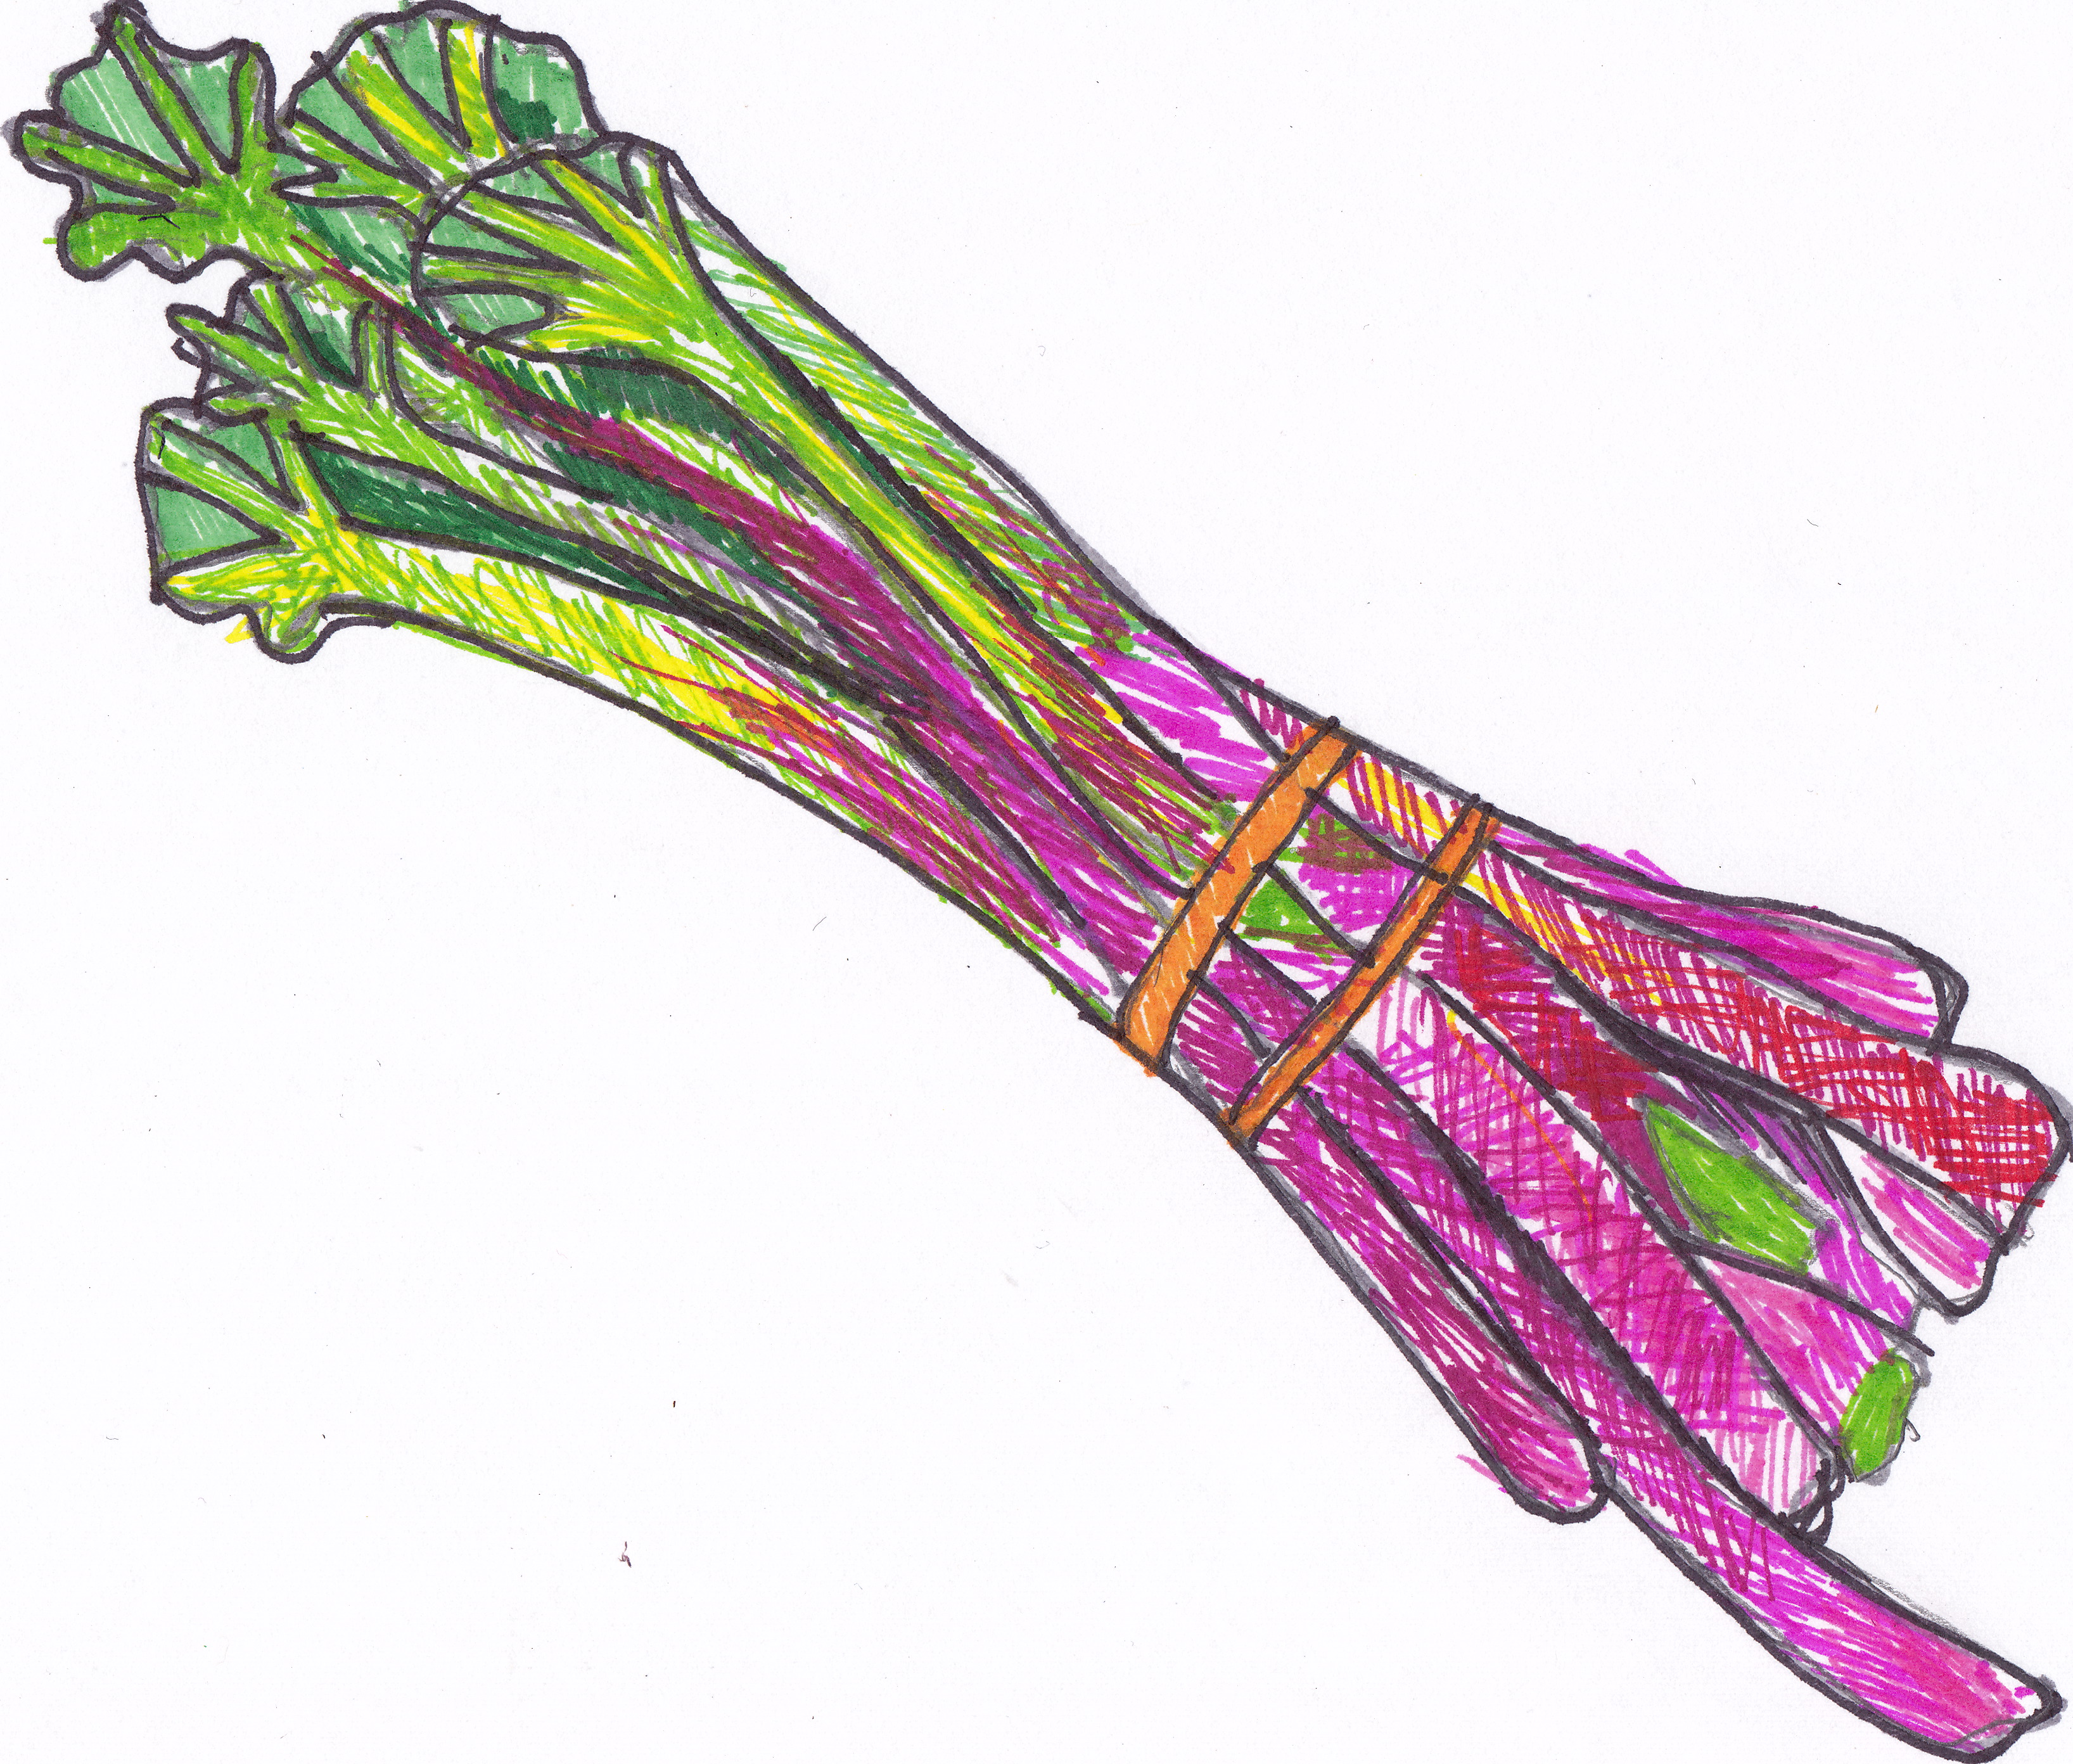
 First, yes, it is a terrible pun. But in all honesty, I had a dream about writing this post, and that is the title I watched myself type in the dream. So who am I to interfere with subconscious inspiration/intervention? Moving on... Our garden is still loaded with beautiful food. But as is the case when September shows up, the plants are not looking quite as robust as they did a few weeks ago. There is definitely a sign that it is the end of the season and these plants are tired. However, our gorgeous Five Color Silverbeet Chard, that was looking a little peaked in the hottest days of August, has started to really perk up in this last week, with it's cool evenings. I first started growing this heirloom variety of chard, after reading Barbara Kingsolver's glowing endorsement of it in Animal, Vegetable, Miracle: A Year of Food Life "If I could only save one of my seed packets from the deluge, the heirloom vegetable I’d probably grab is five-color silverbeet. It is not silver (silverbeet is Australian for Swiss chard), but has broad stems and leaf ribs vividly colored red, yellow, orange, white or pink. Each plant has one stem color, but all five colors persist in a balanced mix in this beloved variety. It was the first seed variety I learned to save, and if in my dotage I end up in an old-folks’ home where they let me grow one vegetable in the yard, it will be this one." Chard is a wonderful culinary green, loaded with iron and antioxidants. It stands up well in soups, and sautés, as well tarts and fillings. It is a great alternative to spinach and kale, and unlike either, comes up early in the garden season and lasts through early frosts. With it too warm to have spinach in the garden lately, I substituted chard recently in Spanakopita-inspired phyllo purses. These little bundles are impressive and loaded with summer flavor. The filling is also equally good folded into larger phyllo pockets for a great lunch or vegetable dish.  CHARD, DILL, AND FETA BUNDLES by Catie makes approximately 30 hors d'oeuvres bundles, or 10 large pockets. 2 TBS Olive Oil 1 small Sweet Onion, diced small Large bunch of Chard, about 1 lb, tough stems removed and roughly chopped 1 TBS fresh Dill, chopped, or 1 tsp dried Dill 2 TBS fresh Parsley, chopped 4 oz Feta Cheese, finely crumbled 1 egg, slightly beaten Salt and Pepper, to taste 1/2 pkg of Phyllo Dough (8 oz) melted butter Heat the oven to 350° F. Heat the oil in a large pan. Add the diced onion and gently saute until fragrant and translucent. Add the chopped chard, in large handfuls, as it starts to wilt down. Saute for a minute more until just cooked, adding the dill and parsley about 30 seconds before removing from heat. Using either a spoon on the edge of the pan, or pouring the mixture into cheesecloth, squeeze out and drain as much liquid as you can from the vegetables. Add the feta cheese to the chard mixture and evenly combine. Taste the mixture at this point before seasoning. Feta is salty and you may only need to add pepper. Once you are happy with the seasoning, add the egg and mix well. Unwrap the phyllo dough, and keep flat under a damp towel or paper towels. On a counter or cutting board, place one sheet of dough. Brush dough lightly, but evenly, with melted butter, and top with another sheet of dough. Repeat so you have a stack that is three sheets thick. With a large knife or pizza cutter, cut sheets into 6 pieces (down the middle the long way, and then in thirds in the other direction). Place about a tablespoon of chard mixture in the center of one of the phyllo rectangles, gather up corners, and twist slightly in one direction. Place on a cookie sheet. Repeat with remaining mixture and dough sheets.  Alternatively, you can cut the stack of three sheets in half, lenghwise, put about 1/3 of a cup of mixture in the lower right corner, and then fold in triangles, as you would fold a flag. Bake for 15-20 minutes, until dough is golden brown. Bakelightly longer for the larger triangles.  | ||||||||||||||||


 Our few small winter squash plants, that I started from seed this year, have taken off, and taken over, and are now literally climbing the walls of the new squash garden we put in. It is still amazing to me that one tiny 1.5 cm long seed can turn into a gigantic sprawling little-shop-of-horrors-like vine with leaves that are waist-high. Looks like we will pretty certainly have an abundance of squash, and currently have an abundance of glorious, delicate, and elegant squash blossoms. If picking them yourself, try to do it early in the day, when they are open and slightly more resilliant--they tear very easily. Also, you'll want to pick the male flowers, as the females are the ones that the squash will grow from. So with our glut of blossoms, guess I'll just have to stuff them with creamy cheese and fry them, fry them, fry them. 
 | ||||||||||||||||||||||


A lovely and unexpected flavor combination, that serves as a small sweet forecast of warmer weather ahead.
 I saw a new stand at the market this week I hadn't noticed previously. Lavender by the Bay is a lavender farm in East Marion, NY. They were selling a variety of dried lavender sachets and bouquets, but what caught my eye were small bags of dried lavender buds "for baking and tea."  Inspired by Sophie Dahl's iced tea recipe in this month's Food and Wine magazine, I experimented with the lavender and some excellent organic earl grey loose tea I had from specialteas.com, and came up with a delicate, floral, light dessert, that is not too sweet, and slightly musky. Definitely has me dreaming of warmer days with glass of iced tea on the porch. 
 | ||||||||||||||||||||||


On a trip to the farmers market it doesn't serve you to bring a list or to have rigid expectations. The most effective shopping there is always done by just discovering what is the very best of this week's offerings. As mentioned before, that can sometime be rough in the less produce-friendly times of year.
 This week the stars, or farmers, seemed to align. There are a few bonuses of spring starting to show up, and enough cold storage winter vegetables left to anchor a recipe. I found sweet, plump shallots, an abundance of hearty greens, luscious queso blanc made from goats milk, and had a few bags of organic polenta from a farm in Ithaca, NY, I had stocked up on during a previous market day. They all came together beautifully in this comforting, yet bright dish. A great vegetarian meal, or elegant side dish, that could be easily expanded to a more substantial meal by adding some braised chicken thighs or aromatic local sausages to the mix on top.    
 | ||||||||||||||||||||||


|
{ welcome! }
 Catie Baumer Schwalb is a chef, food writer and photographer, who splits her life between the city and the country. Not too long ago Catie was a New York City based actress and playwright for more than a decade. She has her Master of Fine Arts from the National Theater Conservatory, and her Grand Diplôme in classic culinary arts from the French Culinary Institute in New York City.
... Read More ≫
Catie Baumer Schwalb is a chef, food writer and photographer, who splits her life between the city and the country. Not too long ago Catie was a New York City based actress and playwright for more than a decade. She has her Master of Fine Arts from the National Theater Conservatory, and her Grand Diplôme in classic culinary arts from the French Culinary Institute in New York City.
... Read More ≫{ get in touch }
{ what's new }
September 12, 2015
August 19, 2013
August 15, 2013
August 13, 2013
August 1, 2013
{ favorites }
{ archives }
Appetizers / Breads & Pastry / Breakfast / Cakes / Canning / Condiments / Dinner / DIY foods / Drinks / Fall / favorites / Grains / Holidays / Local / Noodles & Pasta / Pies & Tarts / Poultry / Salads / Seafood / Snacks / Soup / Spring / Summer / Sweets / Techniques / Vegetables / Vegetarian / Winter /
{ currently reading }
|


