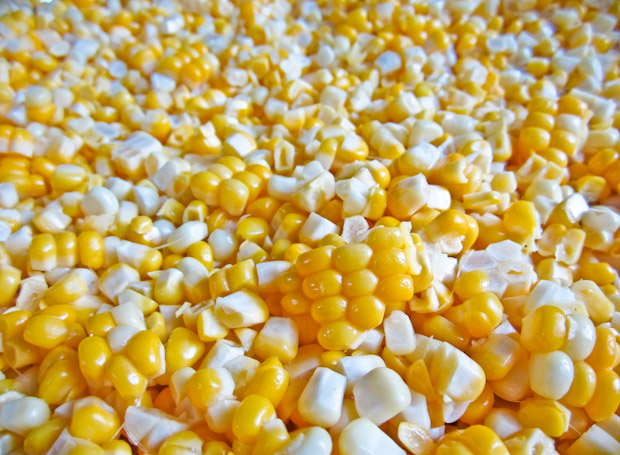
 Glorious cobs of corn will still be around at the farmers' markets for a couple of weeks. Sweet, meltingly tender, golden or pearly white, they are never better (or cheaper) than right now. We eat it with dinner nearly every night for the month when it is at it's best, just barely cooking it, as it doesn't need much more, and then say farewell for another eleven months. However, we also religiously freeze corn to use in meals in the months ahead. Pulling out and defrosting a bag of farmer's market kernels feels so luxurious in the depths of winter--not to mention a tremendous vitamin-packed time and money saver. Great for chowders, soups and chili, I'll also combine the corn with my frozen peppers for a tex-mex-y topper for eggs, or a perfect start for fajitas and burritos. Slowly saute some onions along with them, and add a little cumin, chili powder, ground corriander, and epazote for a colorful, sweet, base for a meal. Glorious cobs of corn will still be around at the farmers' markets for a couple of weeks. Sweet, meltingly tender, golden or pearly white, they are never better (or cheaper) than right now. We eat it with dinner nearly every night for the month when it is at it's best, just barely cooking it, as it doesn't need much more, and then say farewell for another eleven months. However, we also religiously freeze corn to use in meals in the months ahead. Pulling out and defrosting a bag of farmer's market kernels feels so luxurious in the depths of winter--not to mention a tremendous vitamin-packed time and money saver. Great for chowders, soups and chili, I'll also combine the corn with my frozen peppers for a tex-mex-y topper for eggs, or a perfect start for fajitas and burritos. Slowly saute some onions along with them, and add a little cumin, chili powder, ground corriander, and epazote for a colorful, sweet, base for a meal.How to Freeze Corn Buy corn on the day or as close as possible to the day you are going to freeze it, for the freshest, least starchy, product to put away. Also, buy in bulk! The whole set up and clean up takes the most time, so it is almost as much work to freeze one or two dozen ears of corn as it is to freeze just a few. Plus it is usually literally cheaper by the dozen. Two dozen ears of corn will yield between 24 and 48 ounces of corn kernels. I always freeze my corn already cut off the cob, mostly to save precious freezer space, but also to further cut down (no pun intended) on the work I need to do later when getting a meal together. But the corn can be frozen right on the cob too. All vegetables when raw contain enzymes that will eventually discolor and deteriorate them when frozen over a period of time. Briefly, partially, cooking the corn, as described here, will kill the enzymes, allowing for a longer storage life in the freezer. If sealed tightly, with most of the air removed, the frozen corn should last for eight months to a year. 1. Bring a large pot of water to boil. 2. Shuck the ears of corn as you would normally for eating. Remove as much of the stringy silk as possible. A soft vegetable brush can help with this, and I also have found that twisting the ear gently in your hand will pull off a lot of stray strands. 3. Fill another large pot, or similar sized bowl or just the kitchen sink, with cold water and as much ice as you have around. 4. When the water is boiling, gently put a few ears of corn in the pot to blanch for four minutes (four to five ears for a large stock pot). Start timing as soon as the corn is in the water. Don’t crowd the pot with too many ears, or the temperature will drop too much. The water should return to a boil in the first minute, if not too crowded. 5. At the four-minute mark, quickly remove the ears of corn from the pot with tongs or a spider skimmer 6. If you have one, get out a low, wide mixing bowl. Holding the top of one ear of corn, stand the other end in the middle of the bowl and with a sharp knife cut down the cob to cut off kernels at their base, but not so close that you are getting pieces of the hard cob. The kernels will fly about some, so doing this is a bowl is key for keeping as much corn for yourself and clean-up to a minimum. In lieu of a bowl large enough to cut in, a sided cookie sheet or very large cutting board are other options. 7. Fill freezer bags in reasonable few-serving portions, removing as much air as possible. (see my tip for this in my post about freezing peaches). This is one of the times I am also madly in love with my foodsaver machine. Label, date, and freeze. | ||||||||||||||||
|
{ welcome! }
 Catie Baumer Schwalb is a chef, food writer and photographer, who splits her life between the city and the country. Not too long ago Catie was a New York City based actress and playwright for more than a decade. She has her Master of Fine Arts from the National Theater Conservatory, and her Grand Diplôme in classic culinary arts from the French Culinary Institute in New York City.
... Read More ≫
Catie Baumer Schwalb is a chef, food writer and photographer, who splits her life between the city and the country. Not too long ago Catie was a New York City based actress and playwright for more than a decade. She has her Master of Fine Arts from the National Theater Conservatory, and her Grand Diplôme in classic culinary arts from the French Culinary Institute in New York City.
... Read More ≫{ get in touch }
{ what's new }
September 12, 2015
August 19, 2013
August 15, 2013
August 13, 2013
August 1, 2013
{ favorites }
{ archives }
Appetizers / Breads & Pastry / Breakfast / Cakes / Canning / Condiments / Dinner / DIY foods / Drinks / Fall / favorites / Grains / Holidays / Local / Noodles & Pasta / Pies & Tarts / Poultry / Salads / Seafood / Snacks / Soup / Spring / Summer / Sweets / Techniques / Vegetables / Vegetarian / Winter /
{ currently reading }
|



Leave a Reply