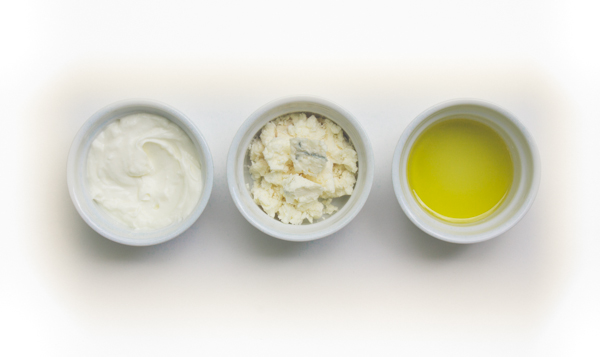
 This is a rich, luxurious, and even slightly healthier take on a classic blue cheese dressing. It certainly marries beautifully with a big old bacon-scattered wedge salad, or as a spread on a tomato and wheat toast sandwich. But also try it alongside grilled zucchini, eggplant, and even grilled peaches. Blue cheeses tend to be pretty robust and on the salty side, so taste as you go and you may not need to add any additional salt at all.
| ||||||||||||||||||||||


 I love this dressing and use it all year long--but particularly in the summer over a bowl of fresh sliced cucumbers, or a batch of quick-blanched fresh broccoli or green beans, or sauteed greens, all from the garden. I love this dressing and use it all year long--but particularly in the summer over a bowl of fresh sliced cucumbers, or a batch of quick-blanched fresh broccoli or green beans, or sauteed greens, all from the garden.Toasted sesame oil, one of my most favorite pantry staples ever, is widely available, but if you pick it up in an asian market or anywhere in Chinatown, it will be dollars cheaper per bottle.
| ||||||||||||||||||||||


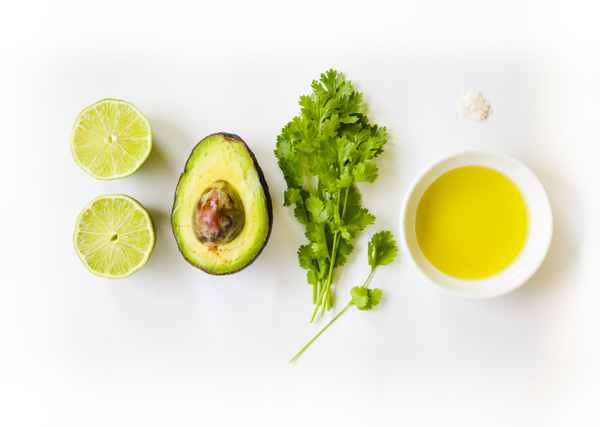
I made this quickly in the blender this week, to go over a cold rice salad with shredded poached chicken, local corn, a few early tomatoes and chunks of avocado. Mostly the goal was to distribute the little bit of avocado I had on hand as much as possible throughout the salad. We loved the result, and I expect we'll be drizzling this all over salads, soups, sandwiches, and all sorts of grilled things all summer long. Creamy Avocado Lime and Cilantro Dressing By Catie Baumer Schwalb makes about one cup. 1/2 avocado 3 tablespoons fresh lime juice, from one large lime, or a few smaller 1/4 cup, packed, fresh cilantro (include stems too if they are young and fresh) 1/2-3/4 cup olive oil salt, to taste In a blender, combine avocado, lime juice and cilantro. Blend until smooth. Through the hole in the blender lid, slowly pour in the olive oil, with the blender on low. Start with a half cup, and taste for balance. If it seems too tart, add a little more gradually, tasting as you go. Season with salt, to taste. Serve immediately, or chill briefly. | ||||||||||||||||


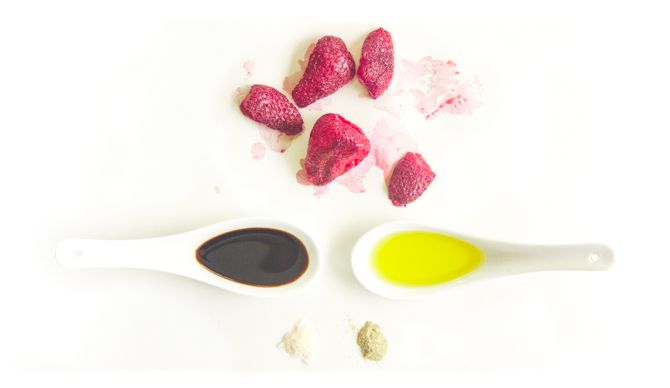
Make this right now, with all those plump ephemeral strawberries lurking around. (If you are making this out of season--gasp--consider adding a small pinch of sugar to the berry puree to help boost the flavorless winter berries). If you can make it past eating it directly from the mixing bowl, serve this dressing over a spinach salad with toasted pecans or walnuts and some crumbly goat cheese. Or dip some grilled chicken into it. Or grilled pork. Or duck. Or heck, put that on the salad too. Oh, and do yourself a favor: get some really good balsamic vinegar.
| ||||||||||||||||||||||


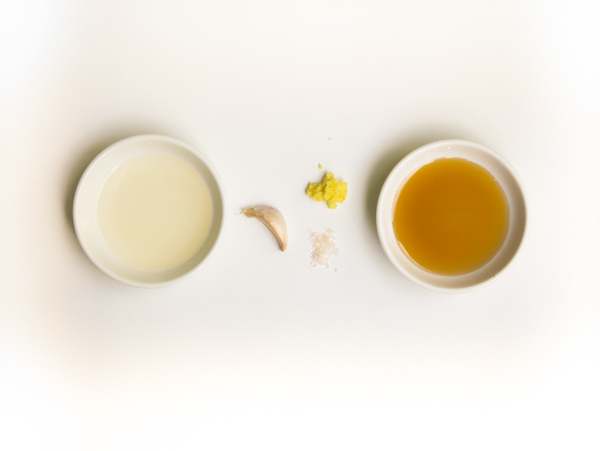
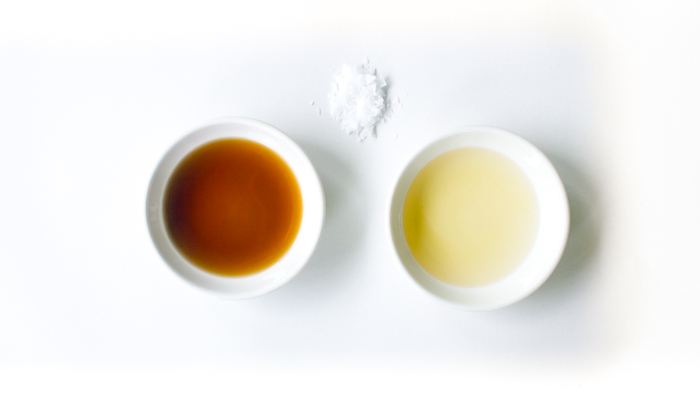 Last night I was having dinner with some of my favorite lady friends, and we were talking about salad dressings, as you do with your lady friends. They were saying that they each always make their same standby dressing, and were enjoying this new blog feature to help get out of their ruts. We shared what each of our quick, don't have to think about it, dressing recipes are, and I had forgotten that for the longest time this one was mine. The mellow rounded sweetness of the sherry vinegar and the rich roasted nuttiness of the hazelnut oil are a combination that is tough to beat. It also makes one of my favorite birthday or hostess gifts. A bottle of each, and perhaps some great salad servers, have yet to make anyone unhappy. Use this dressing as an excuse to use up any hazelnuts that are left over in your pantry from some long-forgotten holiday cookie recipe. I love subtly mirroring the dressing in the salad ingredients.
| ||||||||||||||||||||||


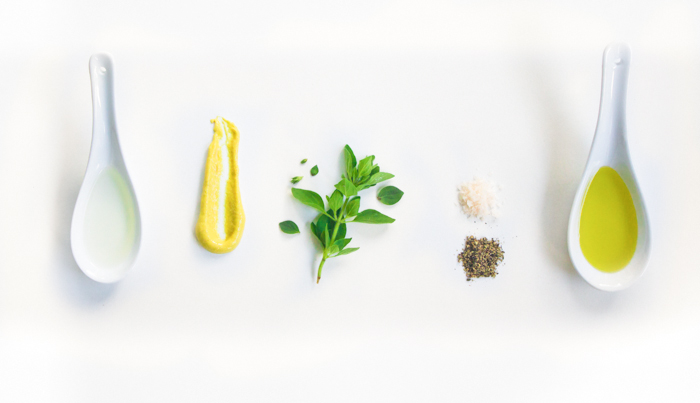 For another step in my continued fight to close down the salad dressing aisle in grocery stores, I'll offer you a homemade salad dressing recipe each week. Fresh oregano certainly has a pronounced flavor, but actually so much more mellow and herbal and complex than what dried drab green flecks and pizza restaurant shakers have lead you to believe. We had this dressing last night on crisp fresh red leaf romaine, a small handful of fresh sorrel leaves (both sliced into ribbons, both from our garden), cucumber, and a generous handful of toasted sesame seeds. This vinaigrette would also be incredible on a salad of baby spinach, chickpeas and sliced hardboiled egg, or as a base for a potato salad. Also, P.S., oregano is probably the most idiot-proof herb to grow, super hearty, pops up first in the spring and faithfully returns each year. Grab a plant and stick it almost anywhere in your yard now for years of salad dressings and marinaras to come.
| ||||||||||||||||||||||


 April 1st. The "I think I can, I think I can..." continues. I think I can make it to the end of this relentless Catskill's winter. Right now, even as I type this, one day after we were admiring deep purple crocuses at my mother's for Easter, there are wide swirls of snow flurries mocking me outside the windows over my desk. But the garden seeds have been ordered. Seedlings will be started shortly. And our neon pink rhubarb stalks have just broken through the cold muddy ground. And chives. And oregano. Maybe ramps next. In the meantime, while I am fantasizing about warm weather cooking, getting to take daily advantage of vibrant fresh produce, with their bright colors and refreshing textures, I'm tucking away some other favorite produce, soon to be gone until the late fall. (more…) | ||||||||||||||||


Full disclosure: in season or not, I use a lot of scallions. I love their subtle oniony vibe, pop of color, and exotic feel. I love their tubey shape and making thin cuts on an extreme angle for geometric garnishes. I love that they are equally useable raw or cooked. I LOVE them in my Homemade Scallion Pancakes and David Chang's Scallion Ginger Sauce from his Momofuku cookbook. So, each summer I faithfully devote an entire garden bed to growing my own scallions. And each year it is wildly unsuccessful. The seeds are microscopic, making it insanely difficult to evenly distribute them in the ground. When they do start to sprout up, in awkward clusters, they are the tiniest green threads, impossible to see and differentiate from the weeks that are intent on choking them out. But every year, I try, try again. So, cut to me on the subway a couple of weeks ago, overhearing a conversation between two adorable twenty-something hipsters, waxing poetic about the treasures on pinterest. Now I have not really explored pinterest, other than to see some referring pages that have come into my blog. And I have some mixed feelings about it from first glance. However, what I heard the DIYers going on and on about was the "growing scallions thing" on pinterest. Ok, I was curious and googled as soon as I got above ground. Apparently the scallion thing that has swept across the pinterestsphere, is the lesson that you can regenerate whole, perfectly edible scallions from the bottom tips that are usually cut off and tossed away. Yep. And I tried it. And yep. It works! Just place the root ends of scallions upright in about an inch of water and put in a sunny spot. In twenty four hours you will see some growth, and in just under a week they'll be full grown again. The only upkeep is to change the water every other day or so, which also helps cut down on any oniony smell. You can repeat the process three or four times with the same scallion tip. So excited to have a much more successful way of growing my own. And thrilled to add another vegetable to my eating local list--all year round. My apologies to the national scallion growers council.  | ||||||||||||||||


 It always is the case that this time of year is when I finally start to think about drying and putting away some fresh herbs from the garden. Maybe it is because I am so busy using them fresh in the previous months, or I'm subconsciously trying to put them away as late as possible to have them fresher longer (or I procrastinate...). Regardless, it is not until the the temperatures flirt a little with the upper 30s (like it did last week!) (and which can be the kiss of death, literally, for basil and other more delicate herbs) do I seem to motivate to do anything long-term with them. Along with the weather dipping lower, and Friday's first day of fall, I also start craving warm cups of tea, and, just as big marketing execs would want, start thinking ahead to the holidays. This project helps satisfy both categories.  Herbs at the Jean-Talon market in Montreal last month. Giant, and criminally inexpensive, bunches of gorgeous, fragrant, vibrant herbs are still available in the farmers' markets, and until a frost, perhaps in your yard or garden. Drying an assortment will give you great building blocks for your own herbal tea. Endlessly customizable, and super-natural, will be far more flavorful than anything that has been sitting on a store shelf for months and months. And putting away more than you need will also give you the raw materials for a lovely on-the-fly holiday gift. (more…) | ||||||||||||||||


 This may be the garnish to end all garnishes. I remember so vividly the day we learned this in culinary school, and how I raced home to try it myself, feeling like I had just unlocked some illusive five star chef secret. This simple little technique gives you magnificent, fragrant green gold to drizzle about a plate, swirl atop a bowl of soup (it floats!), and dunk very lucky crusty bread in. Seriously, this just smeared on a white plate, and you look like a superstar. Regular ol' oil becomes glistening emerald and is all things basil...or parsley or cilantro--it works for a variety of herbs. I made a thai basil-cilantro oil to drizzle around a Thai-spiced quail dish that worked beautifully. The oil will keep for about a week in the refrigerator. I've also frozen it in ice cube trays to defrost later in the year, to swirl on top of a creamy soup, or drizzle along side some roasted salmon. But try this now, even to just dress up some sliced tomatoes. There. Is. Nothing. Better.
| ||||||||||||||||||||||


Remember those old lady knickknacks of the late 70s of a flower completely frozen in a globe of lucite? There were a few geriatric abodes I visited during that era, and those stopped-in-their-tracks flowers were always a fascination. So perfect and yet so bizarrely frozen. You can make your own, a bit more ephemeral, version as another gorgeous use for edible flowers. Encase your posies in ice cubes to chic up late summer cocktails or mocktails. You can use any edible flowers for this project. The flower doesn’t impart all that much flavor to the cube or drink when simply frozen or floating, so it is possible to just focus on color. However, if you think they’ll be eaten, or floating around for a while after they’ve thawed, there are a few pairing ideas below. This is a super quick, nearly effortless way to bring some garden to your cocktail hour. I think it would also be a stunning addition to the season’s bridal and baby showers. Ring-a-round the spritzer, a pocket full of on the rocks. Directions: 1. Wash your flowers gently and carefully, making sure to get rid of any unsuspecting bugs so you don’t accidentally go all fossilized wooly-mammoth on your guests. Tiny, perfect flowers can be frozen whole, but large, somewhat less perfect blossoms, can be torn for an equally pretty effect. 2. In an ice cube tray, pour the slightest amount of water to just cover the bottom (which will be the top) surface. Place your flowers in, facing the bottom (so ultimately right-side-up) touching the thin layer of water as much as possible. Remember: The larger the ice cubes, the longer it will take them to melt… 3. Place trays in the freezer, until the first layer is solid. Remove from freezer, and top with a bit more water and another layer of flowers, if desired, or fill completely. 4. Return ice cube trays to the freezer until frozen and ready to use. Unmold and cheers! Ideas for Use: -- Clear drinks work best. This is even a great way to doll-up a simple glass of seltzer. -- Use flowers from mint, lemon verbena, chamomile, lemon balm, lavender, and even thyme for lemonade. -- Try mint, leaves and flowers, in ice cubes for mojitos -Try thai basil blossoms in ice cubes for thai basil mojitos. -Mint, chamomile, apple blossoms, rose petals and rose hips would be delish in iced tea. -Elderflowers or cucumbery Borage in a gin and tonic on a summer evening. Oh my.  | ||||||||||||||||


 Move over scallions. I may have to cheat on you. My love affair with dim sum scallion pancakes is no secret. There are few times I can think of when they don't appeal to me. (or make me start to go all Pavlovian as I even type the words.) Though green and doing very well, the scallions planted in my garden are still about the size of glorified dental floss and won't be serving up any exotic savories for a few weeks. However, we do have garlic scapes! And herbs! Lots of both! Scallions? Who needs scallions? While not exactly a necessity, (more of an insatiable craving), mother invention shone down and offered up this bright, summery, mildly garlicky, herby, southeast Asian-inspired perfection on a greasy paper towel. There is a tremendous (and tremendously cheap) hole-in-the-wall dumpling shop in NYC's Chinatown, to which I make frequent pilgrimages. Alongside their dumplings, they have a monstrous cast iron pan in which they make a very similar sesame pancake. You can get a pizza-slice-sized wedge "stuffed with veggies" for $1.25, which is split laterally and crammed with shredded carrot and chopped cilantro leaves and stems. There was definitely some inspiration from there in this as well. Give these a try, using all that summer is offering up right now. Shredded zucchini, carrot or beet, torn squash blossoms, thyme, sage, thinly sliced chard could all be welcome additions. Fried dough + farm fresh herbs and produce = What could possibly be bad? (more…) | ||||||||||||||||


With our growing season a little later here in slightly cooler upstate New York, we still have bundles and bundles of garlic scapes in the markets and gardens for a week or two. A garlic scape is the flower shoot that has shot up from the stem of a hardneck garlic bulb when growing. The scapes are slender, bright green, and often twisting and turning in elegant swan-like shapes. Shortly after they appear, which seems to happen almost overnight, it is important to snap them off of the rest of the stem to allow the garlic plant to instead put its energy into growing the garlic bulb, which will be harvested a few weeks later. The scapes have a flavor that is definitely garlic, but much mellower, with hints of herbal summerness. They make a stunning pesto, turning into an outrageously bright green paste that keeps its color when cooked or frozen. I will often just puree garlic scapes with olive oil and freeze in about one cup portions that will keep for several months. Always on the lookout for new oils and vinegars for homemade salad dressings, this year I made garlic scape infused vinegar. It will still be a week or so before it hits its full potency, but so far so good, and the snaking scapes in the bottles are stunning if nothing else. The vinegar will be beautiful in simple vinaigrettes to dress greens and cucumbers from the garden, and also added to a marinade for grilling meat and seafood, splashed on sauteed chard, collards or kale, or for dunking crusty grilled bread. If your herb garden is overflowing, you can certainly add a few sprigs of basil, dill, thyme, or even a dried chili pepper to the bottle for your own personal melange. Experiment, use what is around you, and enjoy. GARLIC SCAPE VINEGAR 1-2 whole garlic scapes, about 12" in length 1 cup light flavored vinegar, such as white wine vinegar or rice vinegar Glass container non-metal cap or cover Note: I like the ratio of 1-2 scapes per cup of vinegar, but you can certainly add more to make the flavor more concentrated. And absolutely double or triple the recipe based on the size of container you are using. Triple the recipe, for example, if using a wine bottle. 1. Sterilize the bottle and cap, either by simmering in hot water on the stove for 10 minutes or washing in the dishwasher right before using. Allow to container and cap to dry thoroughly. 2. Wash garlic scapes and dry completely. Cut into lengths that will allow the scape to be completely submerged below the level of the vinegar. Any exposed piece of scape not in the vinegar will start to deteriorate and rot. 3. Gently bruise the scapes, by rolling over slightly with a rolling pin, to release a bit more flavor. 4. Place the scape pieces in the sterilized container and cover completely with vinegar. Cover with lid, cap or cork. 5. Store in the refrigerator, or other cool, dark place. The following day, check the level of the vinegar and add more if the level has dropped at all. It is possible that the scapes will absorb some overnight. 6. Allow to infuse for 10 days to 2 weeks, in a cool, dark place. Strain out original garlic scape pieces, if desired, and replace with fresh ones (if available), primarily for decoration. Will keep for 2-4 months. Keep vinegar bottle out of sunlight or it will become cloudy. The acid in the vinegar acts as an inhibitor for bacteria growth, but certainly keep an eye out for changes in color, an off smell, or cloudiness in the bottle and discard if there is a question. Storing the vinegar in the refrigerator, particularly in the summer months, is the safest.  | ||||||||||||||||


 Our herb garden is growing like weeds. Well, truth be told, the weeds are also growing like weeds. But between the weeds are fragrant, mystical herbs, that are spicing up meals and will also shortly be hoarded away in ziplocks in the freezer for less bountiful months. My favorite herb is lemon verbena. It smells like something that should come from a much more tropical locale--even the plant, with its woody stems and slender leaves, looks rainforesty. Rubbing your fingers on one of the leaves, as I do at the start of many days, is an instant antidepressant. Bright, intensely fragrant, with an aroma and flavor that is distinctly the sweeter side of citrus. Too much and it can make a dish taste like bad perfume, in the right amounts it is transporting. My husband's favorite herb is thyme. It definitely stems (pun intended) from his early childhood-rooted love affair with weekly roast chickens. He painstakingly freezes bunch upon bunch of this savory treasure and stuffs several sprigs under the skin of our weekly roast chickens through the year--as well as it being used in our homemade soups and beloved stocks. So this recipe is a love letter to our favorite herbs. Citrus and thyme marry beautifully, fortunately for us, and both herbs are in great abundance now and for the next couple of months in gardens and markets. A not-too-sweet aromatic addition to sodas and cocktails, and a refreshing palate cleanser when spun into a sorbet or scraped into a granita. Try any of the above with a few fresh berries, oh my. (more…) | ||||||||||||||||


 The cilantro we planted in our garden around Memorial Day, has already started to bolt some from the heat in recent weeks--it is nearly July after all--and shortly will start to go to seed. Those seeds, as you may or may not know, are coriander. They will first be plump and bright green, a wonderful ingredient in and of themselves, then maturing and drying to the tan spice with which we are more familiar. They'll probably be showing up at the farmer's markets shortly too. Cardamom comes from a tropical plant, so probably won't be making any appearances at my New York State farmer's markets or gardens, but is a flavor that seems to scream summer and snuggle up exceptionally well with summer flavors. Peaches, apricots, lemons, pears, warm weather baked goods, and definitely coriander, all have a great affinity for pairing with cardamom. This soda syrup is a vacation in a glass on a steamy summer day. Mix it with seltzer (from my favorite appliance ever, the Sodastream Seltzer Maker Sip. Sip. Fizz. Fizz. CARDAMOM AND CORIANDER SODA SYRUP by Catie Schwalb Makes about 2 cups. 4 tablespoons whole green cardamom pods, crushed gently to expose inner black seeds 1 tablespoon whole coriander seeds 3/4 cup sugar 1 1/2 cup water Place coriander seeds in a small pan on medium-high heat. Toast gently, swirling frequently, until the seeds just start to become fragrant. Immediately remove from heat and pan. In a sauce pan combine sugar, water, coriander and cardamom. Bring to a boil, and then turn down to a moderate simmer for about three minutes, until all of the sugar has dissolved and the liquid is clear. Allow the syrup to sit and infuse with the flavors for at least and hour and up to overnight. Refrigerate if leaving for longer than a couple of hours. Strain syrup and discard spice solids. Store syrup in an airtight container in the refrigerator for up to five days. To make cardamom and coriander soda--Combine about 1 oz of syrup to 12 oz of seltzer, fill the rest of the glass with ice. Stir well. Adjust syrup, if you prefer a stronger flavor. Garnish with a slice of lemon. | ||||||||||||||||


 I don't know about you, but I am a tad worn out from all of the high-spirited holidays that have been crammed into the calendar as of late. Earth Day, Easter, Passover, National Eggs Benedict Day (I wish I was kidding), Arbor Day, May Day, Cinco De Mayo, and even a wedding of the century thrown in there. I'm feeling a little tapped out for brilliant ideas to mark this weekend's Mother's Day. So when in doubt, I go homemade. English Muffins, that is. I did some tinkering with the dough, including a few highly hockey puckable versions, and came up with one that has a full flavor and tender texture. The addition of buttermilk (ah-hem, something to do with all that you have leftover from making your own butter) gives these a wonderful sour flavor, not unlike (a shortcut) sourdough. The sourness, the sweet honey and the nutty wheat make these perfect for a slathering of oozy stinky cheese and a drizzle of honey or fig preserve, or use the bounty of the spring and smear on some strawberry rhubarb jam. English muffins have long been my favorite hamburger buns, and don't for get our national treasure (see above) Eggs Benedict. As with store bought english muffins, these are fine with a little butter right out of the oven, but really show their stripes when "fork split" (poke all around the side with the tines of a fork, to divide the top and bottom, and gently pull the top and bottom apart to reveal the nooks and crannies), and then lightly toasted to crunch up the hole-y texture. Make them a day or two before, toast them up, and bring them on a tray to the bedside of your favorite mom. Instruct her devour them with her pinky up, channeling the Duchess of Cambridge. English indeed. BUTTERMILK HONEY WHEAT ENGLISH MUFFINS Makes 18 three inch muffins or one dozen four inch muffins. 2 teaspoons active dry yeast 1/2 cup warm water 2 1/2 cups bread flour 1 1/2 cups whole wheat flour 1 teaspoon salt 1 1/4 cup buttermilk 1/4 cup honey cornmeal, for dusting Place the warm water in a small bowl and sprinkle yeast over the surface. Allow to sit for 5 minutes. Yeast will turn the water cloudy and the surface will froth some. In a large bowl, or bowl of a stand mixer, comine bread flour, wheat flour and salt. Make a well in the center of the dry ingredients and pour in yeast mixture, buttermilk, and honey. Either using your hands or the paddle of a stand mixture, combine the ingredients throughly, until you have a shaggy dough. Change to a stand mixer dough hook, or pour the dough onto a well-floured surface, and knead for 8-10 minutes. Form dough into a large ball. Lightly oil the inside of a large bowl. Place the dough in the bowl, turning gently to coat with oil. Cover lightly with a towel or plastic wrap and allow to rise in a warm place for sixty to ninety minutes. Gently stretch the dough into a "pancake" that is about a half inch thick, on a floured surface. Using a round biscuit cutter (you could also use a knife and just make square muffins), cut out muffin shapes and transfer to a piece of parchment dusted liberally with cornmeal. You can gently combine the "scraps" back together to cut out additional muffins. Just be careful not to squeeze out all of the air in the dough. Sprinkle tops of muffins with cornmeal, and cover loosely with plastic wrap. Allow to rise in a warm place for sixty to ninety minutes. Preheat oven to 350 F. Place a large, lightly oiled skillet, on medium to medium-high heat. Carefully transfer the muffins, so not to deflate the nooks and crannies, to the skillet and gently pan-fry until the bottom is golden brown, about 2 minutes. Carefully flip over to brown the top. As soon as each muffin is ready, transfer to a baking sheet in the oven, and finish baking. Transfer the muffins to the oven as they are ready, not waiting for the others to finish browning in the pan. Bake for 8-10 minutes, until the muffin sounds hollow when thumped with a finger on the bottom. Cool finished muffins on a baking rack. The english muffins will keep for about 4 days in an airtight container. To serve, fork-split, and toast.  | ||||||||||||||||


 A huge part of the allure of pungent, earthy, and exotic ramps, is that their season and availability is so fleeting. With only about a month to harvest until their flavor becomes too strong, the annual pilgrimages into the muddy woods for chefs and epicurians has commenced (or early-bird trips to the farmer's markets for the less adventurous, or more wise). But now also begins the search for ways to preserve ramps, to be enjoyed alongside the bounty of summer produce that is just a couple of months out of reach. I am a big fan of pickling ramps (and of pickled ramp martinis). This offers a great way to preserve ramps for months from now, if you can keep them around that long. I have also become smitten with ramp compound butter. Compound butter is nothing more than butter that has been mixed with herbs or seasonings, but the whole is much more exciting than the sum of its parts. It is a great way to add a little unexpected flavor or color to a meal, or to create an instant pain-free sauce for a dish. Now that you've mastered homemade butter, this is a perfect way to compliment your new home-spun delicacy. The flavored butter can be packed into a small ramekin or dish for slathering on warm bread, or rolled into logs, chilled and sliced. Top a hot grilled steak with a slice of ramp butter, and ooh la la. It is also beautiful on grilled fish, vegetables, dolloped on grilled oysters, or stuffed under the skin of a roast chicken. Try it when making scrambled eggs, whipped into mashed potatoes or polenta, or tossed with pasta and some grated pecorino. It will keep for several months in the freezer, giving you lots of opportunities to use ramps with foods that the weather isn't cooperating with just yet. Experiment and enjoy, and be the envy of all your foraging friends when their ramps have long run out.  RAMP COMPOUND BUTTER 1 lb unsalted butter 4-6 ounces ramps, white and green parts, depending on how concentrated you desire the ramp flavor zest of one large lemon salt, to taste Bring butter to room temperature to fully soften. Trim root end and wash ramps thoroughly, making sure to remove all dirt and grit in the layers near the root. Bring a pot of heavily salted water to a boil, and prepare a bowl of water with lots of ice. Blanch ramps in boiling water, for 30 seconds. Remove quickly and shock in the ice water to stop the cooking and preserve the bright green color. Drain and squeeze out as much water as possible. Spread ramps out on paper towel to allow to dry a bit more. Either thinly chop by hand, or mince in a food processor, the white and green parts of the ramps. Add lemon zest and then combine with softened butter. If you want a more uniform, very green, butter, puree it all together in a food processor (as in the photo of the butter above). If you want a more chunky, rustic butter, either fold the butter in by hand or use the paddle attachment of a stand mixer. Add salt, tasting as you go, if you want salted butter. If you think you'll be adding it to foods that are already sufficiently salted, perhaps don't add any or very little just to enhance the ramp flavor slightly. Pack compound butter into ramekins, small dishes, or air-tight containers and store in the refrigerator for about a week. You can also roll the butter into logs, either in parchment, wax paper, or plastic wrap, to be chilled and sliced. The compound butter can also be frozen for up to three months. Thaw in refrigerator overnight before serving. Recipe credit: Catie Schwalb. | ||||||||||||||||


 Ever since the first time I whipped my own fresh whipped cream, I have kept my gaze obcessively glued to it, in dreaded fear of over-whipping and having it turn into butter. The horror! Imagine! And so to this day I anxiously sweat that critical make or break, stiff peak to useless butter, moment. But wait...I can turn cream into butter? Thus making my own butter? And that easily? Well, yes, yes, and yes. I finally gave it a try this week, gleefully letting my mixer plow right through from beautiful lofty whipped cream to deflated heavier looking cream-paste to cheerful little golden globules of butter separating from ivory buttermilk. And all in about ten minutes. The transformation was kind of thrilling, and the result revelatory. A pint of heavy cream yielded about 6.5 ounces of butter and a cup and a half of buttermilk. Pound for pound this is will end up being a bit more costly than store-bought. However, I found the taste superior and just fresher all around, and it didn't have the "natural flavorings" that I just noticed on the ingredient list of my butter package. I cannot wait to try it with the outstanding, abundantly flavorful, local cream from farmers at the markets. There are also plenty of times when I have bought heavy cream for a recipe, or had extra whipped cream left over from a dinner, and wish I had used it to whip up some butter, rather than having it sit in my refrigerator waiting for another recipe to come up. This is a remarkably easy process and tremendously satisfying. Of all of the challenging and technical cooking projects I have attempted it is amazing that I haven't tried this before, as it is most definitely simpler than most. Give it a try. Slip some on the table at your next gathering. "Oh that? I just whipped that up." (more…) | ||||||||||||||||


 Here is another soda syrup recipe to accompany yesterday's homemade ginger soda syrup. Super refreshing and light, making me crave flip flops and sunscreen. Try mixing a little of both syrups together for mango-lime-gingerlicious beach blanket bingo in a glass. Who says it's only april? HOMEMADE MANGO LIME SODA SYRUP by Catie Schwalb makes approximately 1 1/2 cups. 1 mango, peeled, and roughly chopped, save the pit 1 cup of sugar (you may decide to use much less, depending on how sweet and ripe your fruit is) 2 cups water 2 limes, juice (about 3 tablespoons) and zest fine strainer cheesecloth Place mango, mango pit, sugar, water, lime juice and zest in a small pot. Bring to a gentle boil, and the turn off heat. Allow to steep and infuse for thirty minutes. Return the mixture to a gentle boil, and reduce the syrup by about half, until it is a slightly thicker consistency. Remove from heat and allow to cool Strain through a fine strainer lined with cheesecloth. Squeeze cheese cloth to extract any remaining juices. Refrigerate for up to one week. Mango Lime Soda: Mix 1 part soda syrup with 5 parts seltzer | ||||||||||||||||


 Perhaps because of the few (very few) days of slightly decent weather we've had lately, my attention has recently shifted from hot teas and afternoon hot mochas to cold, effervescent beverages. We are not big soda drinkers in our house, almost none at all, for all of the obvious reasons (high fructose corn syrup, chemicals, artificial colors,and the environmental impact of all of the packaging and distribution.) But a small spell of stomach queasiness that my husband and I both shared not too long ago (lovely), had me at the grocery store searching for ginger ale, or even better a more gingery ginger beer, sans HFCS and with real ginger as an ingredient. After not an easy time I did find a couple of options, but all ended up being too sweet for my liking. I've been following the blog and success of Brooklyn's P&H Soda Co., a small artisanal producer of all natural, small batch, soda syrups, for a little while now. With flavors including hibiscus, lime and cream, I can't wait for my next time in the city to pick up some at one of their new retail locations. But it also occurred to me that with my flail at the grocery store, and with summer gatherings-on-the-porch weather quickly approaching, perhaps I should just get myself in the kitchen and try to figure out the whole shebang, or at least part of the shebang, myself. The result made me and my stomach very happy. And like so many of my DIY endeavors, was ultimately not difficult, offers endless delicious possibilities, and has everything I want and nothing I don't. I mixed the gorgeous syrup with seltzer for an outstanding ginger soda. (A side note, we have owned the SodaStream home seltzer maker The best part of all is that you can control the sweetness, by adding more or less sugar to taste, and the ka-pow of the soda, by adding more or less syrup to your seltzer. Experiment, concoct and enjoy.  HOMEMADE GINGER SODA SYRUP by Catie Schwalb 1 cup sugar 1 cup fresh ginger, peeled and coarsely grated on the large holes of a box grater 2 cups water 1 tablespoon lemon juice fine strainer cheesecloth TIP: To peel ginger, wash and then use the front of a small spoon to scrape away the thin peel. It will come off easily and a vegetable peeler tends to remove too much of the ginger meat. Grate the ginger, and gently transfer it to a saucepan, careful not to squeeze out or lose any of the flavorful juice in the process. Add the sugar, water, and lemon juice to the ginger. Bring mixture to a gentle boil and turn off heat. Allow mixture to steep and infuse for thirty minutes. Return the ginger mixture to a gentle boil and reduce it by about half, until it has a slightly thicker, more syrupy consistency. This is just really evaporating the extra water, and adjusting how concentrated you want the syrup to be, so go as long or short as you want, but do not let it cook so long that the syrup starts to get very thick, turn amber in color and caramelize. Remove from heat and allow syrup to cool. Strain through a fine strainer lined with cheesecloth. Squeeze cheesecloth to extract any remaining juices. Refrigerate for up to a week. For ginger soda: Combine 1 part ginger syrup with 4 parts seltzer, or more or less to taste. | ||||||||||||||||


 Here is another cracker recipe with which to send you off into the weekend! This recipe and the Cornmeal and Chive Cracker recipe from earlier this week contrast each other nicely, and would make a sublime little cracker basket assortment. This cracker is a little more subtle in flavor and more tender in texture than the other, so pairs nicely with soft, less powerful cheeses too. With or without the everything seed mix and this is a perfect, versatile, go-to cracker recipe to have in your bag of tricks.
 | ||||||||||||||||||||||


 In my ongoing quest to eliminate store-bought processed foods from our kitchen and life, this week I tackled crackers. There is a long and growing list food items that I no longer even think of not making myself, and yet almost weekly I think nothing of tossing (overpriced) box after box of these crisp vices in my shopping basket. Growing up in shoreline Connecticut in the 80's "cheeseandcrackers" were a very big deal. Practically their own extracurricular activity. I vividly remember going to our immpeccable cheese shop on Main Street with my grandmother and picking out an appropriate assortment of contrasting cheeses and suitable cracker sidekicks for that weekend's cheese tray. I was always most intrigued by the layer cake-esque Huntsman cheese, consisting of stripes of Double Gloucester and Stilton cheeses. Carrying on in that early-ingrained tradition, we always have a nice piece or two of cheese on hand and a cupboard stocked with cracker choices for insta-entertaining. So with my long history with cheeseandcrackers, I am even more surprised that making my own crackers hadn't come up before (particularly with now making my own cheese from time to time). A remarkably easy project, offering a gazillion flavor possibilities, from as hearty and rustic to delicate and subtle as you want to make them. When picking out a special piece of carefully crafted cheese, you can decide exactly what vehicle will deliver this creamy treasure to your gullet. Doesn't your own cheeseandcrackers ritual deserve at least as much?
 | ||||||||||||||||||||||


 Kiss me! I'm nearly 1/4 Irish! The tradition of enjoying a "drop of the hard stuff" on St. Patrick's Day is an old custom known as Pota Phadraig or Patrick's Pot. The legend goes that St. Patrick taught a stingy innkeeper a lesson, when served a less than generous portion of whiskey. He threatened the innkeeper, claiming there was a demon in his basement who thrived on dishonesty. The next time St. Patrick returned to the inn, the innkeeper made a point of having the glasses overflowing and declaring that everyone should enjoy a drink on the day for St. Patrick. Well played. That's my kind of saint. My more than generous and much more than 1/4 Irish neighbor recently shared with me her family recipe for homemade Irish Cream. This elixir is whipped up in a minute or two and kicks Bailey's to the curb. Creamy, sweet, swirling with rich flavor, this Irish Cream tastes decadent and very special. Chill it well and enjoy it on the rocks, added to coffee, drizzled over ice cream, or dare I say...in a milkshake. Anyway you choose, a treat indeed, for a fraction of the cost of store bought, you know exactly what's in it and can adjust the alcohol strength to your liking. Have a safe and lucky St. Patrick's Day. Sláinte!
 | ||||||||||||||||||||||


 Sweet, elegant, rosy, and full of the ocean, homemade lobster stock grabs my attention like little else. Having a few quarts of this on hand in my freezer has allowed me, on more than one occasion, to pull a seafood risotto out of thin air for unexpected dinner guests. I'll repeat that--pull seafood risotto out of thin air. Like last week's tutorial on making chicken stock, I think it is incredibly important to make a point to use every part of an animal and take nothing for granted. Particularly with pricy lobsters, not wasting any of their precious flavor or nutrients seems paramount. The shells and body have loads of luscious lobster essence, and tossing that out feels criminal. (more…) | ||||||||||||||||


Of all of the amazing things I learned in culinary school, by far the most valuable was how to make great stock. I clearly remember the lightbulb moment when it was demonstrated to us. I clearly remember rushing home that weekend with a bag of carrots, celery, and onions, dying to practice it on my own, and proudly showing my husband my new skill. At this point it is totally ingrained in our weekly life. We whip up a pot of stock almost without thinking, whenever we have extra bones or the reserve in the freezer is getting low. Daily we use lovely homemade stock in all areas of cooking, sometimes where you would just add water, adding a huge boost of flavor and protein. It is such a joy to have it always on hand, know exactly what is in it, and have such a superior ingredient. I can't even smell store-bought broth in a can anymore. There. Is. No. Comparison. I also really value that we are using every bit of the animal, right down to its bones, neck and feet. There is incredible flavor and protein in there. But also if that animal is going to die for me to eat it, and I am certainly not going to take that for granted and be wasteful. Do yourself a giant favor and have a few quarts of this on deck in your freezer. Use it to cook rice and grains, reduce it for sauces, throw in shredded vegetables and thin noodles for a quick soup, and hundreds of other applications. I also love sipping a mugful for a mid-afternoon snack.
| ||||||||||||||||||||||


The flavored vodka market appears to have exploded in the past few years. On a recent trip to the spirits shop, there were shelves upon shelves of vodkas in all imaginable flavors. Whipped cream, bacon, and sweet tea were new ones that caught my eye, but not quite my wallet.  Infusing alcohols is an ancient practice. I read recently of a newly translated Mongolian cookbook dating from 1330, that included a recipe for lamb stew infused vodka. When my husband and I were in China for our honeymoon, on several occasions we were offered a nip from a large glass bottle of grain alcohol, which housed several poisonous snakes. The traditional elixir is thought to have medicinal properties, and held a place of honor in most of the homes we visited. I can't comment on its medicinal effects, but when we finally gave in (impressed?), it wasn't awful, though had a slightly slippery feel as it went down my throat. And I didn't die. Infusing alcohols is an ancient practice. I read recently of a newly translated Mongolian cookbook dating from 1330, that included a recipe for lamb stew infused vodka. When my husband and I were in China for our honeymoon, on several occasions we were offered a nip from a large glass bottle of grain alcohol, which housed several poisonous snakes. The traditional elixir is thought to have medicinal properties, and held a place of honor in most of the homes we visited. I can't comment on its medicinal effects, but when we finally gave in (impressed?), it wasn't awful, though had a slightly slippery feel as it went down my throat. And I didn't die.But snakes and bacon aside, infusing your own spirits is a simple and delicious project, and good skill to have at the ready. A couple of months ago I posted a recipe for DIY Vanilla Extract, which included instructions for homemade vanilla vodka. I took my own advice and gave a few of these as holiday hostess gifts, and was the belle of the ball. My very first attempt at home infused alcohols was this beautiful recipe for fresh strawberry aquavit liqueur, from the gorgeous La Cucina Italiana magazine. In both cases I very much appreciated that I was able to use fresh and natural ingredients, that resulted in a far superior flavor, from anything I had tasted from a store. (more…) | ||||||||||||||||


My mother and grandmother, 1951. Just a year ago today I published my first blog post. There have been a bunch of changes over the year (including the name and url), but I am so thrilled where I have landed and am so excited for all that is ahead. In the past twelve months I've published 35+ original recipes, about 15 DIY tutorials, and am just shy of 80 posts--which included a handful of months I needed to be away from my laptop to get our heirloom vegetable micro farm planted, weeded, and thriving. I have finally managed to set up a Pitchfork Diaries facebook fan page, am no longer intimidated by twitter (@pitchforkdiary), and just this past weekend had an incredibly flattering feature on thekitchn.com. A splendid way to start year number two. Thank you so much for all of your invaluable interest and comments. More delicious days to come. Some of my favorite posts from the last year...
| ||||||||||||||||


Scallion pancakes. Oh how I love thee.
 These remarkable, little chewy, salty, scallion-y, layered disks of oily crunchy heaven completely stole my heart when I first had them my first year living in the city a decade and a half ago. Often I would grab a late night snack of scallion pancakes and dumplings on my way home from rehearsal near midnight, back when my metabolism could handle such an indulgence. On our honeymoon in China three years ago, I stumbled upon a mirage-like goddess making scallion pancakes on a narrow back street in Beijing.  Just look at the size of that pan! We got a New York pizza slice-sized wedge (see the table on the right), wrapped loosely in wax paper, that the newlyweds pawed at, stopped dead on the street, like malnourished tiger cubs. Who got the last bite should have gone in a prenup. Too recently I discovered that these treasures are not all that difficult to make yourself--however dangerous it could be to embark upon in the privacy of your own home. Proceed with caution. The management is not responsible for the abandonment of any new year's resolutions. But if only in honor of Chinese New Year, give these a try. The rolled out, uncooked, pancakes can be layered in slightly floured wax paper and stored in the refrigerator wrapped in plastic for about twenty-four hours, and then finished in a frying pan for two minutes on each side. Do we hear a great Year of the Rabbit themed Super Bowl appetizer?
 | ||||||||||||||||||||||


 Chinese new year begins tonight at midnight. An integral part of the celebratory feasts are meat and vegetable stuffed dumplings. Called jiao-zi in northern China, they are typically eaten right at the start of the new year. Their crescent shape is reminiscent of the shape of ancient Chinese currency, silver and gold ingots, and eating them at the birth of the new year is thought to bring wealth and prosperity. When I first moved to New York City in the mid-nineties, I had my first taste of really authentic chinese dumplings. It was love at first slightly-burned-tongue. More of an obsession, to be honest, as I would devour as many as I could afford, as often as I could justify. Three years ago, my husband and I celebrated our honeymoon in China. I had the wonderful good fortune of being able to learn a tremendous amount about the cuisine, with trips to many local markets, tremendous meals, and some cooking lessons at the Cloud 9 cooking school in Yangshuo on the banks of the breathtaking Li River. One of the dishes we cooked in class were dumplings. Here is one of our lovely teachers explaining how to fold the rounds of dough into the crescent shape. http://www.youtube.com/watch?v=aphirz7wcbM So below are my recipes for both pork and vegetable dumplings. I have adapted them through the years from what I learned in that class, what I've learned from a big assortment of great cookbooks, and most definitely from what I've learned from eating this favorite of any food I can think of. On a desert island, these are what are coming with me. I am sure there are Chinese grandmothers who will find unauthentic hues in some part of my recipes. But they are as authentic as I've been able to learn through every best effort, and when I burn my tongue with that first divine chewy bite, send me back to China and Chinatowns I've loved, and make me feel very fortunate.
 | ||||||||||||||||||||||


It was announced yesterday that Mark Bittman's weekly column in the New York Times will end its thirteen year delicious, informative, enthusiastic, and encouraging run.
http://www.youtube.com/watch?v=kqChHSsf42c I have learned many lessons from Mr. Bittman's column. Starting in 1997, a year after I graduated from college, I cooked recipe after recipe from his writing and suggestions and road maps of seasonal dishes. His overarching philosophy of don't be intimidated, just get in the kitchen and make good, real food--"It's not rocket science"--is the cornerstone of what I deem most important in the work I do and what I am most trying to impart in this blog. His article The Well-Dressed Salad Wears Only Homemade in 2006, not only instantly convinced me to remove all store-bought salad dressing from my life, but also started my path of questioning any and all store bought food-stuffs. He sent my husband and I on a scavenger hunt through winding cobblestoned back streets of Genoa, Italy, and putting Genoa on our itinerary at all, because of his completely intriguing description of the hole-in-the wall greasy spoon, Trattoria Maria, as "one of my favorite restaurants in the world." It ended up being our favorite city of the trip---the trip on which we got engaged. His coverage of Jim Lahey's no-knead bread technique, sent me, and throngs of other eager cooks, out in search of hearty lidded cast iron cookware (according to the sales person at the Le Creuset outlet in Woodbury Commons: "Are you here because of The Bread?"), and got the country excited about making homemade bread. I encourage you to go back over his fun, relaxed and heartfelt collection of pieces, and cookbooks (How to Cook Everything, 2,000 Simple Recipes for Great Food Thank you, Mr. Bittman. Looking forward to what's next on the menu. A few of my favorites from the past years, that I return to again and again: Soto Ayam--Indonesian Chicken Soup with Noodles and Aromatics Chard Stuffed with Lemon Saffron Risotto and Mozzarella Chicken Biriyani 101 Simple Salads for the Season 101 Simple Appetizers in 20 Minutes or Less Almond-Apricot Granola Bars | ||||||||||||||||


In honor of last week's National Popcorn Day, I've done some tinkering in the kitchen with flavorings. My favorite project was coming up with different flavored salts. It is outrageous that I haven't done this sooner, and even more outrageous the number of super costly little precious jars of flavored finishing salts that I have sitting in my spice cabinet. The technique is nothing more than combining good quality salt, either kosher or sea salt, and good quality spices, herbs, citrus, or a combination. It is up to you as far as the ratio of salt to flavors, depending on how concentrated you want the flavor and the color, and how strong the ingredient is you are using. On average I used about 1 part flavor to 1 1/2 parts salt. Simply put all ingredients in a spice grinder, coffee grinder, food processor, or mortar and pestle and pulse or grind until well incorporated. Hint: For spices, toast them lightly first to release more of their flavor. Place them in a dry pan over medium heat, swirling frequently for a few minutes until they start to become fragrant. This powdery little flavor bomb is amazing sprinkled over hot fresh popcorn, and as a finish for so many of your dishes. It also looks gorgeous as a pop of color sprinkled around a plate. They'll keep for about a year in an airtight container, making them fantastic gifts. I mean, have you seen what these things cost lately? Here are a few ideas below, but the combinations are endless. Keep a little jar or two on your counter, and you'll find yourself using them on everything. Put a few small dishes on your dinner party table, and let guests play with their food. CURRY SALT I used a brilliant french version of an indian masala, called Vadouvan, from the exquisite Spice House in Chicago. Amazing on popcorn, but also chicken, fish, roasted vegetables (especially cauliflower), or a cold chicken salad. PIMENTON SALT Smokey, sweet, brilliantly colored spanish paprika. It rocked on popcorn. Would also be stunning on fried eggs, roasted potatoes, grilled shrimp, and roasted meats. CHIVE AND SHALLOT SALT I used some high quality freeze dried shallots and chives (again, thank you Spice House), resulting in a savory blend that exploded with the most amazing aroma as it hit the hot popcorn. It was also absurdly good on my poached eggs this morning, and the small batch is almost gone. Mashed potatoes? Yes. Roast Chicken? Yes. Just about anything you want to spruce up with a little savory brightness? Most definitely. Bonus points for drying your own homegrown chives. CITRUS SALT Zest the peel of a lemon, lime, orange, meyer lemon or tangerine. Allow to dry on paper towel, and then combine with salt. Poultry and seafood would be particularly good, as well as roasted peppers. VANILLA SALT Split and scrape a vanilla bean, and combine seeds with salt. Could have interesting results with some delicate fish and lobster, but I'm dreaming more of a stunning salty finish to a dessert, on a scoop of dense gelato, or a crunch on dark chocolate covered caramels. CHINESE FIVE SPICE POWDER SALT Get the best five spice you can, and then bring me the popcorn! ...And the roasted chicken wings, roasted pork, roasted brussels sprouts, and noodles. PORCINI SALT Pulse dried porcini mushrooms in grinder to a fine powder, and then pulse with salt. This earthy, chocolaty, elegant finisher adds a new element to a side of rice, a creamy pasta, eggs, a crostini with oozy cheese, or topping a puree of potato soup. LEMONGRASS AND KAFFIR LIME Dry both slightly, and grind with salt to make a bright, southeast Asian inspired topping. Beautiful in a ramen soup, on grilled fish or chicken, and even as an unexpected finisher to desserts.  | ||||||||||||||||


Bleached flour, partially hydrogenated lard with BHA and BHT, wheat starch, water, xanthan gum, potassium sorbate and sodium propionate (preservatives), Yellow 5, and Red 40.
Butter, Flour, Salt, Water, and sometimes an egg. The first is a list of just some of the ingredients of a popular, store-bought, ready-to-unroll, pie crust. The second is what comprises a homemade, you-are-looney-not-to-make-yourself, pie crust. I remember taking a homemade pie, with a homemade pie crust to a friend's house a few years back. When someone raved about the crust and asked what brand it was, I told them I had made it myself. They were shocked, and I was shocked that they were shocked. They then responded that "it must be nice to have the time to make your own pie crusts"... Well, I'm here to tell you, my friends, that you can have these made in about the time it takes you to defrost your hydrogenated lard sheets of dough, and your golden color will come from creamy butter and perhaps a farm fresh egg yolk, instead of Yellow numero 5. And let's just chat about cost for a brief moment. At a recent glance, store bought refrigerated or frozen pie crusts ranged from $3.79 to $4.99 for a two crust package. Making it at home will run you about $2. Are you with me people? But isn't it really tough? Only if you over work it. (gluten humor.) No! But there are a couple of things to be aware of that will help you achieve buttery flaky pastry nirvana, and avoid a gravelly, leaden disappointment. Gluten! This small word (from the latin word for glue) is getting an enormous amount of air-time these days. Gluten is a substance found in certain grains and flours, most commonly wheat, that when mixed with moisture is activated to create a sticky, bonding compound which makes great bagels so chewy, or lousy pastries dense doorstops. The stronger the gluten bond, the less flaky and light the crust will be. Fats, sugar, or acids inhibit the formation of a strong gluten structure. However, the more you knead, play with, or "work" a dough, the more developed the gluten bonds will be. So when working with a dough, you want to handle it as little as possible. Don't leave the food processor on high and have the ball of dough whipping around the machine. Don't knead it! Just do as much as you have to to get the ingredients to come together, and then hands off. Also, allowing the dough to rest in the refrigerator for a half hour after you've made it, will allow the gluten structure to relax some as well. The recipe below makes two crusts, for one double crusted pie (top and bottom), or two separate single pie shells. If I am going to take the time to get flour about the kitchen, I always make this full recipe, sometimes doubling it for four crusts. Divide and wrap unused dough in two airtight layers of plastic wrap or freezer bags, and they can be frozen for about 3 months. Remove to the refrigerator the day before to thaw. Give this a try. The ease, and more importantly, the taste will astound you. Get this down now and you'll be a crust making-fool in time for peach pie season. BASIC PIE CRUST PASTRY Makes 2 crusts for one double crust pie, or two single pie shells. 3 cups all-purpose unbleached flour 1 teaspoon salt 8 oz (2 sticks) unsalted butter, cubed and chilled (or popped in freezer for 15 minutes after cut into cubes) 1/2 cup water, ice cold OR 2 large eggs with 4 teaspoons of water Step 1: Combine flour and salt in a food processor. Add cubes of chilled butter.  Step 2: Gently pulse food processor, until the butter is the size of small peas. These pieces of fat in the dough will create pockets when it is baked, and result in the flaky texture.  Step 3: Evenly distribute the ice water, or egg and water mixture, and pulse just until the dough comes together in a ball. It may be necessary to add just a bit more moisture, which you can do a tablespoon at a time, again, just until the dough comes together.  Step 4: Pour the dough onto a well-floured surface. In balls about the size of a walnut, gently push and smear the dough out with the heel of your hand, just once each ball. Continue until you have done this with all of the dough. The term for this in french is fraisage. It will help make sure there aren't any giant pieces of unincorporated butter, that will melt and cause a hole in your crust, but will also help create long layers of butter in your dough, that will ideally help with the flakiness.  Step 5: When all of the dough has been fraisage-d, form into two disks, that are generally flat and round. This will help give you a head start on the shape you are trying to achieve when it comes time to roll it out. Wrap individually in plastic, and place in the refrigerator for a half hour to rest. You can also freeze the disks of dough at this point.  Step 6: Remove the dough disk from the refrigerator and place on a gently floured surface. It might need a minute or two to come up just a bit in temperature, so it doesn't crack all over when you put a rolling pin to it. Gently press down with a rolling pin, and apply light pressure, at first, as you roll forward. Continue to roll forward only, turning the dough as you need, until you have a circle about an inch wider on all sides than the pie plate you are using.  Step 7: Brush excess flour off the top surface of the dough. To transport the rolled out dough to a pie plate, gently roll the dough around the rolling pin, brushing off excess flour on the bottom, as you go.  Step 8: Bring the dough-wrapped rolling in to your baking dish, and unroll in the opposite direction.  Step 9: Loosely fit the dough into the shell, using a small ball of spare dough to push it gently into the corners, if needed. Trim any large overhanging edges, leaving about a 1/2 inch on all sides. With your thumb and pointer finger on one hand, and the tip of your thumb on the other, go around the top of the edge, pinching your two hands together every inch or so, to create a fluted edge to your crust.  Step 10: Return pie shell to the refrigerator to chill slightly before baking, or filling and baking. Voila! | ||||||||||||||||


The Kitchn.com recently had a great piece with a bunch of ideas for gift kits that include everything to make a new recipe or culinary project. From kimchi to ricotta to granola, the article suggests groupings of ingredients, instructions and any special container or tool.
I've done similar things for gifts through the years, and while usually a big hit, I also love giving a gift that gets my friend to learn, try or taste something new. But even better, what is so great about this gift idea is not that it is filled with expensive or hard to find items, but that you've simply done all of the organization and planning for them. Most of the items are right on the shelves of your food store, and can be easily obtained...even at this late date! And if you're not ordering it, or shipping it, you can be a little more liberal with perishable items, leaving the playing field wide open. Throw in a recipe card, cookbook, or utensil and you are a gift givin' fool. So here are a few of my own "kits" and ideas. Feel free to steal them. And please let me hear any ideas of your own in the comments. Vinaigrette Kit: Hazelnut Oil + Sherry Vinegar. I just gave this as a gift this weekend! This is one of my very favorite combinations for a vinaigrette, and I love introducing friends to it. Make your own combination. Throw in a snazzy pair of salad tongs. Risotto Kit: arborio rice + generous hunk of great parmesan + organic onions + dried porcini mushrooms + wooden spoon or dry white wine. For that special someone, splurge on a risotto pan Regional Kit: Head to a spice shop or ethnic grocer, particularly if you're in an urban area, and stock up on an intoxicating array of spices from one region or country or cuisine. Print out a few recipes or throw in a cookbook Oyster Kit: oyster knife Chocolate Covered Grape Kit: Gorgeous seedless grapes + unsweetened cocoa + great dark chocolate + this amazing recipe from Michel Richard Date in a Box! I just gave this as a first anniversary present!! A great bottle of champagne + fresh cherries + baguette + couple of great cheese + some charcuterie or fixin's for Shrimp Cocktail + chocolates. Or pick out your favorite recipe, sweet or savory, print up the recipe on a eye-catching card, gather up all easily transportable ingredients, stick a bow on it and voila! | ||||||||||||||||
I just saw this great tutorial on Instuctables.com on how to make your own cookie cutters.
[caption id="attachment_928" align="alignnone" width="560" caption="photo by j_l_larson, on instructables.com"]  [/caption] [/caption][caption id="attachment_929" align="alignnone" width="560" caption="photo by j_l_larson, on instuctables.com"]  [/caption] [/caption]Genius idea. Particularly for hard-to-shop-for-relatives-with-quirky-interests (you know who you are...). Make a cutter that suits them, whip up a batch of cookies, bundle up said cookies, and tie their custom cutter on top with a big shiny bow for their own future batches. Maybe even include a cookie recipe card if you are feeling particularly jolly. Thanks j_l_larson and instructables.com! | ||||||||||||||||


 There is little that will get me running to the kitchen faster than reading about a new (or most of the time, quite old) culinary trick to produce a food or ingredient that I had never thought about making by hand. Food and Wine magazine has a great feature this month on the Best Handmade Gifts. Included in that article is a recipe for homemade vanilla extract. Who knew? There is little that will get me running to the kitchen faster than reading about a new (or most of the time, quite old) culinary trick to produce a food or ingredient that I had never thought about making by hand. Food and Wine magazine has a great feature this month on the Best Handmade Gifts. Included in that article is a recipe for homemade vanilla extract. Who knew?The procedure couldn't be simpler: Combine 10 vanilla beans, split lengthwise, with 1 1/2-2 cups of vodka in a clean glass jar or bottle. Add a 1/2 cup more vodka, if needed, to completely cover the beans. Let sit for about 6 weeks in a cool, dark place. The extract is ready when the vodka is a rich, dark color and knocks you over with vanilla wafting from the jar when opened. If you'd rather not have the grainy vanilla bean seeds in your extract, pour through a coffee filter to strain. I also read in another extract article online, that you can make a second batch of extract with the same beans. Just fill up the container again with vodka when empty, and repeat the steeping process one more time. Yes, Christmas is only 3 1/2 weeks away, and well, Happy Hanukkah already. But I can certainly see giving this a start with the time you have, and then portioning it out for gifts, beans included in each bottle, with instructions to wait a week or two more before using. It would also make a lovely Valentine... Speaking of Valentine-- This year for Valentine's Day I gave my husband, the ice cream chef in the family, a half pound of glorious, moist, outrageously fragrant vanilla beans. I found an amazing online vanilla bean resource, Amadeus Vanilla Beans, and the totally indulgent bundle of about 50 beans, for about 65 cents each, far exceeded my wildest expectations. Start there. And here are a few great options for packaging up your gift portion of bean and extract: The Container Store Save on Crafts Specialty Bottle And finally, with New Year's right around the corner, while you are working with these same ingredients, how about also getting a larger glass bottle, using a slightly less vanilla bean to vodka ratio (2-4 beans per liter of vodka, depending on desired strength), and make homemade vanilla vodka. I mean, anyone can bring champagne to the party. Ho Ho Ho! | ||||||||||||||||


 Just about four years ago, Mark Bittman wrote a great piece in the New York Times; A Well-Dressed Salad Wears Only Homemade, and it got me thinkin'. Why did salad dressings feel like such a mystery? Why is there usually a huge amount of grocery store real estate devoted to them? Why are they so darn expensive? A recent peek at dressings in my grocery store upstate, showed even the cheapest dressings at around $2.50 for an 8 oz bottle, jumping to $3.59 a bottle for something just slightly more natural. That's $40-57 a gallon--compare that to something like the price at the pump, and it feels like complete lunacy. The other glaring issue I noticed was that sugar, often in the form of high fructose corn syrup, and WATER, frequently make up two of the first three ingredients. Again, lunacy.  A few weeks ago I did a cooking demonstration at a local harvest festival. Showcasing the gorgeous local produce (supplied by Beaver Dam Brook Farm in Ferndale, NY), I did a brief primer on dressings and vinaigrettes. As I was myself when I first started cooking, many of the audience members at my cooking demos were surprised at how fast and simple it was to make a vinaigrette. And so much less expensive while eliminating chemicals, emulsifiers, and that big dose of unnecessary sugar. It seemed crazy that there we were, at a huge farmers' market, a group of people devoted to buying the freshest, least traveled, produce, and yet were not thinking much about then topping that produce with something that was possibly over a year old (when purchased, not to mention the time it has sat on that narrow shelf on the door of your refrigerator), gooey, syrupy, and most likely swimming with ingredients from a factory and not a farm. A few weeks ago I did a cooking demonstration at a local harvest festival. Showcasing the gorgeous local produce (supplied by Beaver Dam Brook Farm in Ferndale, NY), I did a brief primer on dressings and vinaigrettes. As I was myself when I first started cooking, many of the audience members at my cooking demos were surprised at how fast and simple it was to make a vinaigrette. And so much less expensive while eliminating chemicals, emulsifiers, and that big dose of unnecessary sugar. It seemed crazy that there we were, at a huge farmers' market, a group of people devoted to buying the freshest, least traveled, produce, and yet were not thinking much about then topping that produce with something that was possibly over a year old (when purchased, not to mention the time it has sat on that narrow shelf on the door of your refrigerator), gooey, syrupy, and most likely swimming with ingredients from a factory and not a farm.So here's the basic formula: 1 part acid + about 3 parts oil + seasonings and flavoring agents Put the acid in a bowl with the seasonings and flavoring ingredients, if using. If you have time, allow that to sit for 5-10 minutes to better infuse the vinegar. Then while whisking continually, pour the oil into the acid, in a slow, steady stream. The mixture will begin to come together and emulsify. You can also do the same, a bit quicker, with a fork for a "broken" vinaigrette. Or make things very easy and put it in a blender, instead of a bowl, in the same order, streaming the oil in the top while the blade is going. This works particularly well if adding fruit or vegetables for flavor. Most commonly, extra virgin olive oil is used, but gorgeously flavored hazelnut, walnut, pumpkin seed, and avocado oils are also becoming widely available. The acid can be lemon juice, lime juice, vinegars (balsamic, white or red wine, sherry, rice, cider) or a combination. Season with salt and pepper, and flavor with shallot, garlic, mustard, pureed fruit or juice, honey, pureed roasted vegetables, fresh herbs, dried herbs, or ground spices. One of my favorites is a three-ingredient vinaigrette of lemon juice, sea salt, and hazelnut oil over a green salad with roasted beets. Experiment with some of these combinations: olive oil + white wine vinegar + dijon mustard (just a dab), minced shallots and garlic (a classic) grapeseed oil + rice vinegar + fresh mango (pureed in a blender), season with salt and pepper to taste olive oil + sherry vinegar + roasted red peppers (again season and puree in a blender) walnut oil + white wine vinegar + roasted fennel and roasted garlic olive oil + lime juice + honey and ground cumin or this Roasted Cherry Tomato Vinaigrette, I posted recently. The formula is simple, it's not rocket science, you can hardly go wrong, and the options are so much more rewarding than the same-old same-old you'll find on the dusty eye-level shelf at your store. Do yourself a huge favor, work this into your life. Experiment, taste, and experiment some more. Tonight. | ||||||||||||||||


Red hot chili peppers. Sweet orange bell peppers. Long curly Jimmy Nardello peppers. Short stubby serrano peppers.
All of them. Peppers are still abundant at the farmers' market, super sweet this time of the season, and the easiest vegetable to put away for the winter months. You don't need to peel them or blanch them or can them--they can be frozen raw! Instructions: Wash the peppers and dry thoroughly. For larger, sweet or bell peppers, cut in half lengthwise, and remove stem, seeds and ribs. They can be left in halves or sliced smaller. Smaller peppers, particularly tiny chili, jalapeno or serrano peppers can be left whole. Put in resealable freezer-safe bag or container and freeze. That's it. Alternatively, if you want have more control over how many you use at once, place trimmed pieces in a single layer on a cookie sheet, and freeze. When frozen, transfer individually frozen pieces to resealable freezer-safe container or bag and return to freezer. (This method also works great when freezing individual berries.) Peppers do lose some of their crisp texture when frozen and thawed, but these are great to slice up and saute with onions, cumin and herbs for a quick fajita, burrito, or omelette filling, or to add to a slow simmered stew. The hot peppers are easy to slice finely when frozen, returning the rest to the freezer, to add just a small shot of heat to a dish. Above all, they are packed full with flavor right now, far outshining anything you will find them passing off as a pepper in February. Don't delay!  | ||||||||||||||||


 Our 52 heirloom tomato plants are in their final days, but have heroically yielded hundreds of pounds of beautiful fruit this year. A very triumphant relief, following the yield of six (yes, just six) tomatoes we got from the same number of plants last summer in the throws of the huge tomato blight. We are still managing to gather buckets of red, orange, and golden cherry tomatoes almost daily, though are even a little tomatoed-out after weeks and weeks of eating nothing but. This roasted tomato vinaigrette is one of our favorites, and so much so it was served over sliced local tomatoes at our wedding three Augusts ago, and printed on the back of the menu. As the weather gets cooler, and I automatically start to crave autumn foods, this hanger-on recipe from summer works beautifully over sauteed hearty greens, the last of the zucchini and summer squash, grilled pork, chicken or fish, as a tangy base for a stew, as well as a dressing for a simple green salad. I also love to can a few pints of it in our pressure canner to wake up meals, or dip crusty bread in, in the dreary days of winter.
 | ||||||||||||||||||||||


 This past weekend friends who live near us upstate, on an area overrun with ramps, graciously invited us over for our second annual swap of all-we-can-pick ramps for a pick-up truck full of our "like gold" sheep manure for their garden. (So very cutting-edge-hipster-locavore. Then again, poop for weeds...) After a very muddy morning, we brought home two substantial garbage bags of ramps with their roots and soil intact, to transplant to our woods, and a very generous shopping bag of loose ramps to cook and eat. I got to work on a big batch of these slightly hot, slightly sweet, bright and tangy pickled ramps that night. I am now addicted, and looking forward to ice cold pickled ramp martinis later this summer. Oh, and picked ramps also go brilliantly with fish and roasted meats, on sandwiches, or alongside cheeses and charcuterie.
 | ||||||||||||||||||||||


 Lately we have been getting the most wonderful fresh milk from Dirie's Farm, a small family-owned dairy farm near us. The milk has a whole melody of flavor, that clearly illustrates what people are talking about when they refer to the terroir in wine. You can taste this area. You can taste the differences in the seasons, and the grassy fields and hay on which these cows are feeding. A few months ago I had an impromptu lunch out by myself (I mean, with my date, New York Magazine) at Veloce Pizzeria in the East Village of NYC. They have a divine ricotta crostini "spuntini" (Italian snacks). Superb rich ricotta slathered on crusty toasted bread with fresh black pepper. Heaven. So craving that, this week's farm milk became glorious ricotta. It's easy, easy, easy. There are many recipes out there, using several different acidifying agents (vinegar, lemon juice, buttermilk, and citric acid). I learned this from my culinary school, and Ricki the Cheese Queen, both using the exact same method with citric acid, so I'll stick with that. Citric Acid is pretty widely available. It is often called for in canning tomatoes. I have seen it in my grocery store near canning supplies or products like Fruit Fresh. But you can also easily get it here, from the wonderful New England Cheesemaking Supply Company.
  | ||||||||||||||||||||||


|
{ welcome! }
 Catie Baumer Schwalb is a chef, food writer and photographer, who splits her life between the city and the country. Not too long ago Catie was a New York City based actress and playwright for more than a decade. She has her Master of Fine Arts from the National Theater Conservatory, and her Grand Diplôme in classic culinary arts from the French Culinary Institute in New York City.
... Read More ≫
Catie Baumer Schwalb is a chef, food writer and photographer, who splits her life between the city and the country. Not too long ago Catie was a New York City based actress and playwright for more than a decade. She has her Master of Fine Arts from the National Theater Conservatory, and her Grand Diplôme in classic culinary arts from the French Culinary Institute in New York City.
... Read More ≫{ get in touch }
{ what's new }
September 12, 2015
August 19, 2013
August 15, 2013
August 13, 2013
August 1, 2013
{ favorites }
{ archives }
Appetizers / Breads & Pastry / Breakfast / Cakes / Canning / Condiments / Dinner / DIY foods / Drinks / Fall / favorites / Grains / Holidays / Local / Noodles & Pasta / Pies & Tarts / Poultry / Salads / Seafood / Snacks / Soup / Spring / Summer / Sweets / Techniques / Vegetables / Vegetarian / Winter /
{ currently reading }
|


