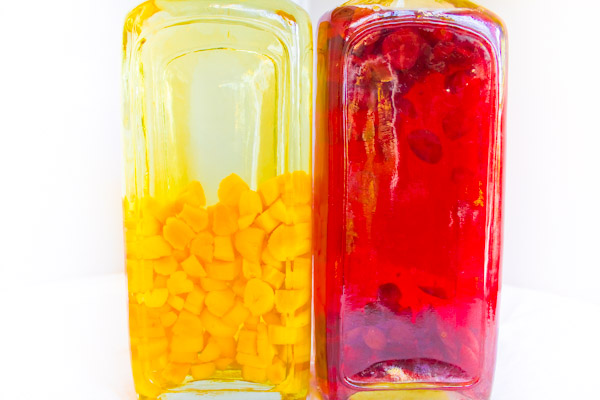
The flavored vodka market appears to have exploded in the past few years. On a recent trip to the spirits shop, there were shelves upon shelves of vodkas in all imaginable flavors. Whipped cream, bacon, and sweet tea were new ones that caught my eye, but not quite my wallet.  Infusing alcohols is an ancient practice. I read recently of a newly translated Mongolian cookbook dating from 1330, that included a recipe for lamb stew infused vodka. When my husband and I were in China for our honeymoon, on several occasions we were offered a nip from a large glass bottle of grain alcohol, which housed several poisonous snakes. The traditional elixir is thought to have medicinal properties, and held a place of honor in most of the homes we visited. I can't comment on its medicinal effects, but when we finally gave in (impressed?), it wasn't awful, though had a slightly slippery feel as it went down my throat. And I didn't die. Infusing alcohols is an ancient practice. I read recently of a newly translated Mongolian cookbook dating from 1330, that included a recipe for lamb stew infused vodka. When my husband and I were in China for our honeymoon, on several occasions we were offered a nip from a large glass bottle of grain alcohol, which housed several poisonous snakes. The traditional elixir is thought to have medicinal properties, and held a place of honor in most of the homes we visited. I can't comment on its medicinal effects, but when we finally gave in (impressed?), it wasn't awful, though had a slightly slippery feel as it went down my throat. And I didn't die.But snakes and bacon aside, infusing your own spirits is a simple and delicious project, and good skill to have at the ready. A couple of months ago I posted a recipe for DIY Vanilla Extract, which included instructions for homemade vanilla vodka. I took my own advice and gave a few of these as holiday hostess gifts, and was the belle of the ball. My very first attempt at home infused alcohols was this beautiful recipe for fresh strawberry aquavit liqueur, from the gorgeous La Cucina Italiana magazine. In both cases I very much appreciated that I was able to use fresh and natural ingredients, that resulted in a far superior flavor, from anything I had tasted from a store. (more…) | ||||||||||||||||
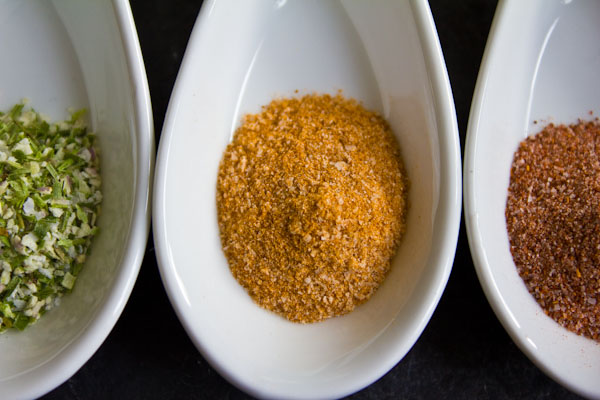
In honor of last week's National Popcorn Day, I've done some tinkering in the kitchen with flavorings. My favorite project was coming up with different flavored salts. It is outrageous that I haven't done this sooner, and even more outrageous the number of super costly little precious jars of flavored finishing salts that I have sitting in my spice cabinet. The technique is nothing more than combining good quality salt, either kosher or sea salt, and good quality spices, herbs, citrus, or a combination. It is up to you as far as the ratio of salt to flavors, depending on how concentrated you want the flavor and the color, and how strong the ingredient is you are using. On average I used about 1 part flavor to 1 1/2 parts salt. Simply put all ingredients in a spice grinder, coffee grinder, food processor, or mortar and pestle and pulse or grind until well incorporated. Hint: For spices, toast them lightly first to release more of their flavor. Place them in a dry pan over medium heat, swirling frequently for a few minutes until they start to become fragrant. This powdery little flavor bomb is amazing sprinkled over hot fresh popcorn, and as a finish for so many of your dishes. It also looks gorgeous as a pop of color sprinkled around a plate. They'll keep for about a year in an airtight container, making them fantastic gifts. I mean, have you seen what these things cost lately? Here are a few ideas below, but the combinations are endless. Keep a little jar or two on your counter, and you'll find yourself using them on everything. Put a few small dishes on your dinner party table, and let guests play with their food. CURRY SALT I used a brilliant french version of an indian masala, called Vadouvan, from the exquisite Spice House in Chicago. Amazing on popcorn, but also chicken, fish, roasted vegetables (especially cauliflower), or a cold chicken salad. PIMENTON SALT Smokey, sweet, brilliantly colored spanish paprika. It rocked on popcorn. Would also be stunning on fried eggs, roasted potatoes, grilled shrimp, and roasted meats. CHIVE AND SHALLOT SALT I used some high quality freeze dried shallots and chives (again, thank you Spice House), resulting in a savory blend that exploded with the most amazing aroma as it hit the hot popcorn. It was also absurdly good on my poached eggs this morning, and the small batch is almost gone. Mashed potatoes? Yes. Roast Chicken? Yes. Just about anything you want to spruce up with a little savory brightness? Most definitely. Bonus points for drying your own homegrown chives. CITRUS SALT Zest the peel of a lemon, lime, orange, meyer lemon or tangerine. Allow to dry on paper towel, and then combine with salt. Poultry and seafood would be particularly good, as well as roasted peppers. VANILLA SALT Split and scrape a vanilla bean, and combine seeds with salt. Could have interesting results with some delicate fish and lobster, but I'm dreaming more of a stunning salty finish to a dessert, on a scoop of dense gelato, or a crunch on dark chocolate covered caramels. CHINESE FIVE SPICE POWDER SALT Get the best five spice you can, and then bring me the popcorn! ...And the roasted chicken wings, roasted pork, roasted brussels sprouts, and noodles. PORCINI SALT Pulse dried porcini mushrooms in grinder to a fine powder, and then pulse with salt. This earthy, chocolaty, elegant finisher adds a new element to a side of rice, a creamy pasta, eggs, a crostini with oozy cheese, or topping a puree of potato soup. LEMONGRASS AND KAFFIR LIME Dry both slightly, and grind with salt to make a bright, southeast Asian inspired topping. Beautiful in a ramen soup, on grilled fish or chicken, and even as an unexpected finisher to desserts. 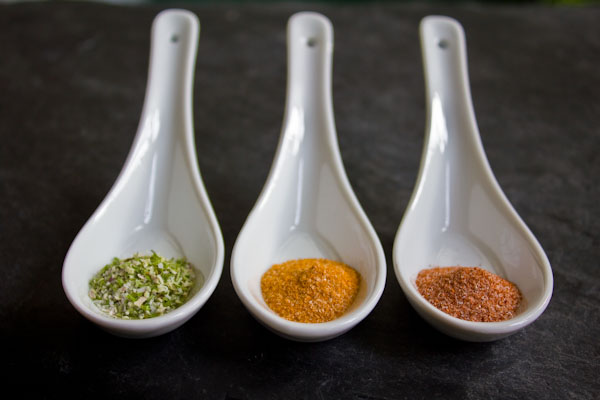 | ||||||||||||||||
 There is little that will get me running to the kitchen faster than reading about a new (or most of the time, quite old) culinary trick to produce a food or ingredient that I had never thought about making by hand. Food and Wine magazine has a great feature this month on the Best Handmade Gifts. Included in that article is a recipe for homemade vanilla extract. Who knew? There is little that will get me running to the kitchen faster than reading about a new (or most of the time, quite old) culinary trick to produce a food or ingredient that I had never thought about making by hand. Food and Wine magazine has a great feature this month on the Best Handmade Gifts. Included in that article is a recipe for homemade vanilla extract. Who knew?The procedure couldn't be simpler: Combine 10 vanilla beans, split lengthwise, with 1 1/2-2 cups of vodka in a clean glass jar or bottle. Add a 1/2 cup more vodka, if needed, to completely cover the beans. Let sit for about 6 weeks in a cool, dark place. The extract is ready when the vodka is a rich, dark color and knocks you over with vanilla wafting from the jar when opened. If you'd rather not have the grainy vanilla bean seeds in your extract, pour through a coffee filter to strain. I also read in another extract article online, that you can make a second batch of extract with the same beans. Just fill up the container again with vodka when empty, and repeat the steeping process one more time. Yes, Christmas is only 3 1/2 weeks away, and well, Happy Hanukkah already. But I can certainly see giving this a start with the time you have, and then portioning it out for gifts, beans included in each bottle, with instructions to wait a week or two more before using. It would also make a lovely Valentine... Speaking of Valentine-- This year for Valentine's Day I gave my husband, the ice cream chef in the family, a half pound of glorious, moist, outrageously fragrant vanilla beans. I found an amazing online vanilla bean resource, Amadeus Vanilla Beans, and the totally indulgent bundle of about 50 beans, for about 65 cents each, far exceeded my wildest expectations. Start there. And here are a few great options for packaging up your gift portion of bean and extract: The Container Store Save on Crafts Specialty Bottle And finally, with New Year's right around the corner, while you are working with these same ingredients, how about also getting a larger glass bottle, using a slightly less vanilla bean to vodka ratio (2-4 beans per liter of vodka, depending on desired strength), and make homemade vanilla vodka. I mean, anyone can bring champagne to the party. Ho Ho Ho! | ||||||||||||||||
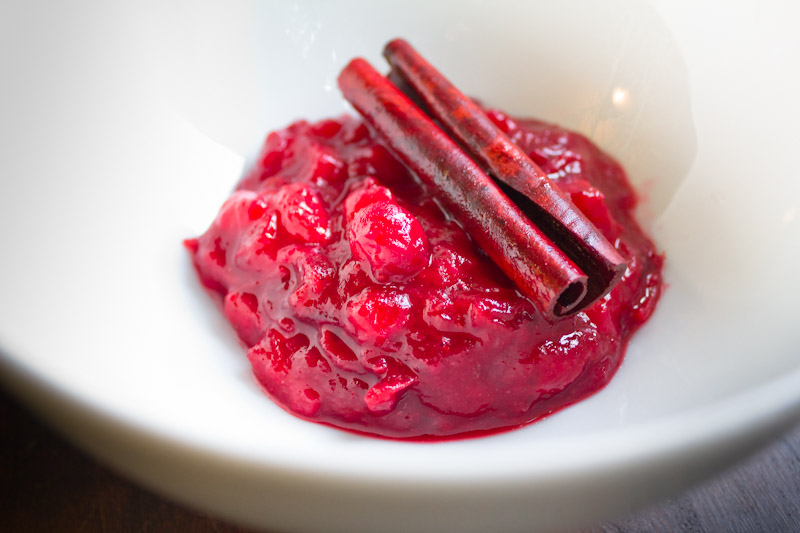
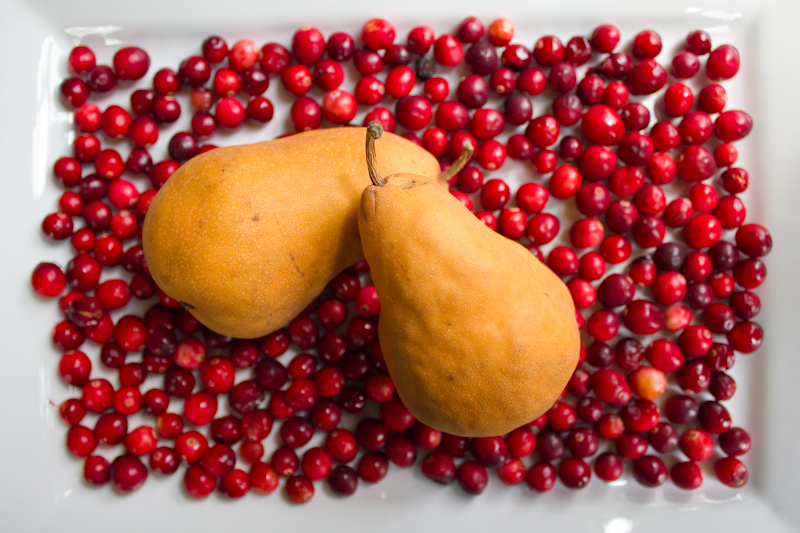 I was recently asked to be a guest blogger for the wonderful heart-healthy food blog What Would Cathy Eat? Cathy asked for a cranberry sauce for thanksgiving, that was less sweet than usual. Here is the post and recipe below, in case you hadn't caught it on her site. --Catie For years, as a child at the 1970’s American thanksgiving table, I too believed that cranberry sauce was always cylindrically shaped, with neatly organized parallel rings encompassing it. That is not to say that my family were not great cooks, slaving for days before over dozens of homemade recipes. However, somehow that little wobbly dish seemed like a required fixture on the holiday table, that someone very well might miss if absent. Though it felt far from “food” and as a result, usually went untouched. It also seemed somewhat sacrilegious to think of smearing that puckeringly sweet jelly on that luscious turkey meat that I had waited an entire year for. How could this red goo possibly improve on roasted perfection? So I took a crack at it myself this year. Drawing on ideas of recipes like Duck with a Sour Cherry Sauce, or a deeply flavored Indian Chutney stirred into a chicken salad, ending up with a condiment that I would actually want to add to my turkey to add to it’s flavor. I eliminated a lot of the sugar found it most recipes (up to a cup of white sugar was common). It’s on the tart end of the spectrum, but balanced, with lovely spice notes that will be beautiful with the richness of the meat. I think it would also be outstanding dolloped on top of a bowl of Greek yogurt for breakfast the next morning, and though not yet tested, I imagine pretty great pureed and used as a base for a holiday prosecco cocktail.
 | ||||||||||||||||||||||
|
|
{ welcome! }
 Catie Baumer Schwalb is a chef, food writer and photographer, who splits her life between the city and the country. Not too long ago Catie was a New York City based actress and playwright for more than a decade. She has her Master of Fine Arts from the National Theater Conservatory, and her Grand Diplôme in classic culinary arts from the French Culinary Institute in New York City.
... Read More ≫
Catie Baumer Schwalb is a chef, food writer and photographer, who splits her life between the city and the country. Not too long ago Catie was a New York City based actress and playwright for more than a decade. She has her Master of Fine Arts from the National Theater Conservatory, and her Grand Diplôme in classic culinary arts from the French Culinary Institute in New York City.
... Read More ≫{ get in touch }
{ what's new }
September 12, 2015
August 19, 2013
August 15, 2013
August 13, 2013
August 1, 2013
{ favorites }
{ archives }
Appetizers / Breads & Pastry / Breakfast / Cakes / Canning / Condiments / Dinner / DIY foods / Drinks / Fall / favorites / Grains / Holidays / Local / Noodles & Pasta / Pies & Tarts / Poultry / Salads / Seafood / Snacks / Soup / Spring / Summer / Sweets / Techniques / Vegetables / Vegetarian / Winter /
{ currently reading }
|


