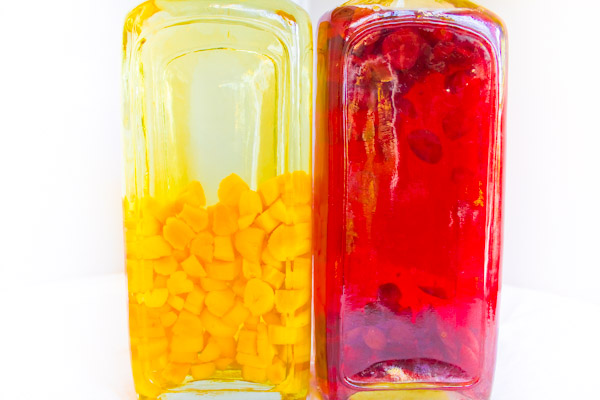
With our growing season a little later here in slightly cooler upstate New York, we still have bundles and bundles of garlic scapes in the markets and gardens for a week or two. A garlic scape is the flower shoot that has shot up from the stem of a hardneck garlic bulb when growing. The scapes are slender, bright green, and often twisting and turning in elegant swan-like shapes. Shortly after they appear, which seems to happen almost overnight, it is important to snap them off of the rest of the stem to allow the garlic plant to instead put its energy into growing the garlic bulb, which will be harvested a few weeks later. The scapes have a flavor that is definitely garlic, but much mellower, with hints of herbal summerness. They make a stunning pesto, turning into an outrageously bright green paste that keeps its color when cooked or frozen. I will often just puree garlic scapes with olive oil and freeze in about one cup portions that will keep for several months. Always on the lookout for new oils and vinegars for homemade salad dressings, this year I made garlic scape infused vinegar. It will still be a week or so before it hits its full potency, but so far so good, and the snaking scapes in the bottles are stunning if nothing else. The vinegar will be beautiful in simple vinaigrettes to dress greens and cucumbers from the garden, and also added to a marinade for grilling meat and seafood, splashed on sauteed chard, collards or kale, or for dunking crusty grilled bread. If your herb garden is overflowing, you can certainly add a few sprigs of basil, dill, thyme, or even a dried chili pepper to the bottle for your own personal melange. Experiment, use what is around you, and enjoy. GARLIC SCAPE VINEGAR 1-2 whole garlic scapes, about 12" in length 1 cup light flavored vinegar, such as white wine vinegar or rice vinegar Glass container non-metal cap or cover Note: I like the ratio of 1-2 scapes per cup of vinegar, but you can certainly add more to make the flavor more concentrated. And absolutely double or triple the recipe based on the size of container you are using. Triple the recipe, for example, if using a wine bottle. 1. Sterilize the bottle and cap, either by simmering in hot water on the stove for 10 minutes or washing in the dishwasher right before using. Allow to container and cap to dry thoroughly. 2. Wash garlic scapes and dry completely. Cut into lengths that will allow the scape to be completely submerged below the level of the vinegar. Any exposed piece of scape not in the vinegar will start to deteriorate and rot. 3. Gently bruise the scapes, by rolling over slightly with a rolling pin, to release a bit more flavor. 4. Place the scape pieces in the sterilized container and cover completely with vinegar. Cover with lid, cap or cork. 5. Store in the refrigerator, or other cool, dark place. The following day, check the level of the vinegar and add more if the level has dropped at all. It is possible that the scapes will absorb some overnight. 6. Allow to infuse for 10 days to 2 weeks, in a cool, dark place. Strain out original garlic scape pieces, if desired, and replace with fresh ones (if available), primarily for decoration. Will keep for 2-4 months. Keep vinegar bottle out of sunlight or it will become cloudy. The acid in the vinegar acts as an inhibitor for bacteria growth, but certainly keep an eye out for changes in color, an off smell, or cloudiness in the bottle and discard if there is a question. Storing the vinegar in the refrigerator, particularly in the summer months, is the safest. 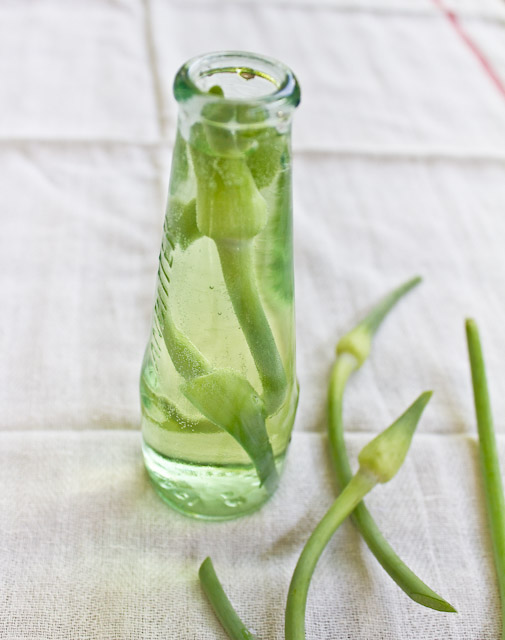 | ||||||||||||||||
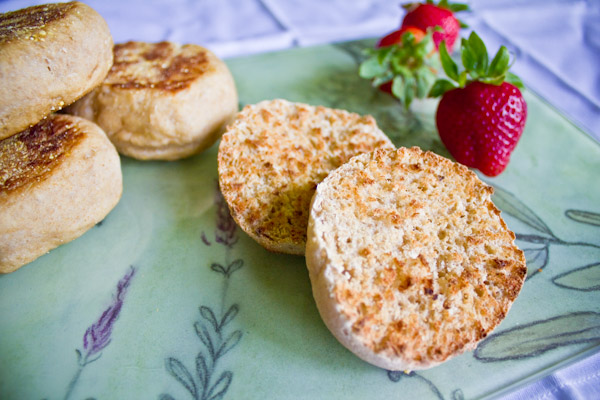 I don't know about you, but I am a tad worn out from all of the high-spirited holidays that have been crammed into the calendar as of late. Earth Day, Easter, Passover, National Eggs Benedict Day (I wish I was kidding), Arbor Day, May Day, Cinco De Mayo, and even a wedding of the century thrown in there. I'm feeling a little tapped out for brilliant ideas to mark this weekend's Mother's Day. So when in doubt, I go homemade. English Muffins, that is. I did some tinkering with the dough, including a few highly hockey puckable versions, and came up with one that has a full flavor and tender texture. The addition of buttermilk (ah-hem, something to do with all that you have leftover from making your own butter) gives these a wonderful sour flavor, not unlike (a shortcut) sourdough. The sourness, the sweet honey and the nutty wheat make these perfect for a slathering of oozy stinky cheese and a drizzle of honey or fig preserve, or use the bounty of the spring and smear on some strawberry rhubarb jam. English muffins have long been my favorite hamburger buns, and don't for get our national treasure (see above) Eggs Benedict. As with store bought english muffins, these are fine with a little butter right out of the oven, but really show their stripes when "fork split" (poke all around the side with the tines of a fork, to divide the top and bottom, and gently pull the top and bottom apart to reveal the nooks and crannies), and then lightly toasted to crunch up the hole-y texture. Make them a day or two before, toast them up, and bring them on a tray to the bedside of your favorite mom. Instruct her devour them with her pinky up, channeling the Duchess of Cambridge. English indeed. BUTTERMILK HONEY WHEAT ENGLISH MUFFINS Makes 18 three inch muffins or one dozen four inch muffins. 2 teaspoons active dry yeast 1/2 cup warm water 2 1/2 cups bread flour 1 1/2 cups whole wheat flour 1 teaspoon salt 1 1/4 cup buttermilk 1/4 cup honey cornmeal, for dusting Place the warm water in a small bowl and sprinkle yeast over the surface. Allow to sit for 5 minutes. Yeast will turn the water cloudy and the surface will froth some. In a large bowl, or bowl of a stand mixer, comine bread flour, wheat flour and salt. Make a well in the center of the dry ingredients and pour in yeast mixture, buttermilk, and honey. Either using your hands or the paddle of a stand mixture, combine the ingredients throughly, until you have a shaggy dough. Change to a stand mixer dough hook, or pour the dough onto a well-floured surface, and knead for 8-10 minutes. Form dough into a large ball. Lightly oil the inside of a large bowl. Place the dough in the bowl, turning gently to coat with oil. Cover lightly with a towel or plastic wrap and allow to rise in a warm place for sixty to ninety minutes. Gently stretch the dough into a "pancake" that is about a half inch thick, on a floured surface. Using a round biscuit cutter (you could also use a knife and just make square muffins), cut out muffin shapes and transfer to a piece of parchment dusted liberally with cornmeal. You can gently combine the "scraps" back together to cut out additional muffins. Just be careful not to squeeze out all of the air in the dough. Sprinkle tops of muffins with cornmeal, and cover loosely with plastic wrap. Allow to rise in a warm place for sixty to ninety minutes. Preheat oven to 350 F. Place a large, lightly oiled skillet, on medium to medium-high heat. Carefully transfer the muffins, so not to deflate the nooks and crannies, to the skillet and gently pan-fry until the bottom is golden brown, about 2 minutes. Carefully flip over to brown the top. As soon as each muffin is ready, transfer to a baking sheet in the oven, and finish baking. Transfer the muffins to the oven as they are ready, not waiting for the others to finish browning in the pan. Bake for 8-10 minutes, until the muffin sounds hollow when thumped with a finger on the bottom. Cool finished muffins on a baking rack. The english muffins will keep for about 4 days in an airtight container. To serve, fork-split, and toast. 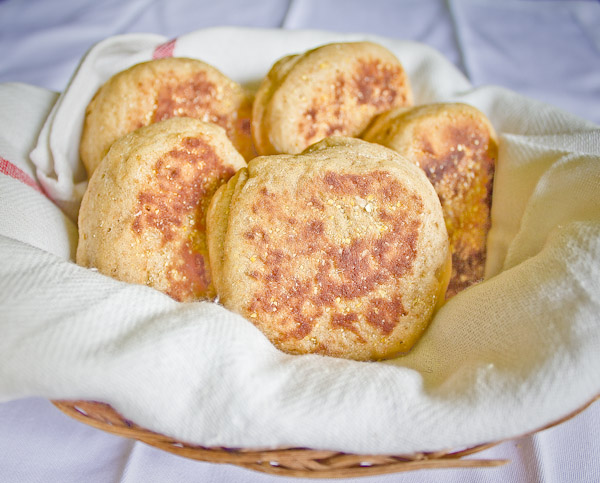 | ||||||||||||||||
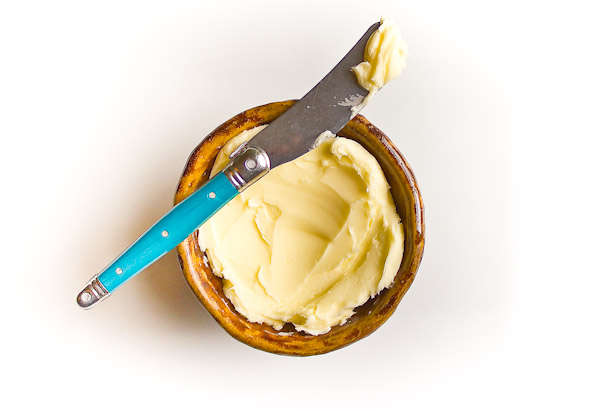 Ever since the first time I whipped my own fresh whipped cream, I have kept my gaze obcessively glued to it, in dreaded fear of over-whipping and having it turn into butter. The horror! Imagine! And so to this day I anxiously sweat that critical make or break, stiff peak to useless butter, moment. But wait...I can turn cream into butter? Thus making my own butter? And that easily? Well, yes, yes, and yes. I finally gave it a try this week, gleefully letting my mixer plow right through from beautiful lofty whipped cream to deflated heavier looking cream-paste to cheerful little golden globules of butter separating from ivory buttermilk. And all in about ten minutes. The transformation was kind of thrilling, and the result revelatory. A pint of heavy cream yielded about 6.5 ounces of butter and a cup and a half of buttermilk. Pound for pound this is will end up being a bit more costly than store-bought. However, I found the taste superior and just fresher all around, and it didn't have the "natural flavorings" that I just noticed on the ingredient list of my butter package. I cannot wait to try it with the outstanding, abundantly flavorful, local cream from farmers at the markets. There are also plenty of times when I have bought heavy cream for a recipe, or had extra whipped cream left over from a dinner, and wish I had used it to whip up some butter, rather than having it sit in my refrigerator waiting for another recipe to come up. This is a remarkably easy process and tremendously satisfying. Of all of the challenging and technical cooking projects I have attempted it is amazing that I haven't tried this before, as it is most definitely simpler than most. Give it a try. Slip some on the table at your next gathering. "Oh that? I just whipped that up." (more…) | ||||||||||||||||
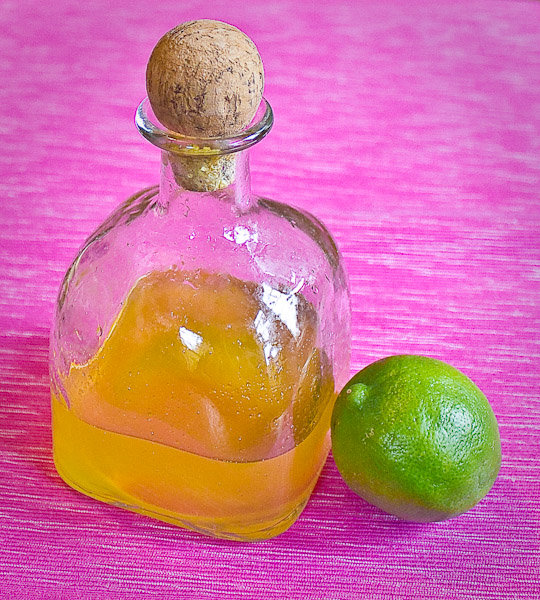 Here is another soda syrup recipe to accompany yesterday's homemade ginger soda syrup. Super refreshing and light, making me crave flip flops and sunscreen. Try mixing a little of both syrups together for mango-lime-gingerlicious beach blanket bingo in a glass. Who says it's only april? HOMEMADE MANGO LIME SODA SYRUP by Catie Schwalb makes approximately 1 1/2 cups. 1 mango, peeled, and roughly chopped, save the pit 1 cup of sugar (you may decide to use much less, depending on how sweet and ripe your fruit is) 2 cups water 2 limes, juice (about 3 tablespoons) and zest fine strainer cheesecloth Place mango, mango pit, sugar, water, lime juice and zest in a small pot. Bring to a gentle boil, and the turn off heat. Allow to steep and infuse for thirty minutes. Return the mixture to a gentle boil, and reduce the syrup by about half, until it is a slightly thicker consistency. Remove from heat and allow to cool Strain through a fine strainer lined with cheesecloth. Squeeze cheese cloth to extract any remaining juices. Refrigerate for up to one week. Mango Lime Soda: Mix 1 part soda syrup with 5 parts seltzer | ||||||||||||||||
 Perhaps because of the few (very few) days of slightly decent weather we've had lately, my attention has recently shifted from hot teas and afternoon hot mochas to cold, effervescent beverages. We are not big soda drinkers in our house, almost none at all, for all of the obvious reasons (high fructose corn syrup, chemicals, artificial colors,and the environmental impact of all of the packaging and distribution.) But a small spell of stomach queasiness that my husband and I both shared not too long ago (lovely), had me at the grocery store searching for ginger ale, or even better a more gingery ginger beer, sans HFCS and with real ginger as an ingredient. After not an easy time I did find a couple of options, but all ended up being too sweet for my liking. I've been following the blog and success of Brooklyn's P&H Soda Co., a small artisanal producer of all natural, small batch, soda syrups, for a little while now. With flavors including hibiscus, lime and cream, I can't wait for my next time in the city to pick up some at one of their new retail locations. But it also occurred to me that with my flail at the grocery store, and with summer gatherings-on-the-porch weather quickly approaching, perhaps I should just get myself in the kitchen and try to figure out the whole shebang, or at least part of the shebang, myself. The result made me and my stomach very happy. And like so many of my DIY endeavors, was ultimately not difficult, offers endless delicious possibilities, and has everything I want and nothing I don't. I mixed the gorgeous syrup with seltzer for an outstanding ginger soda. (A side note, we have owned the SodaStream home seltzer maker The best part of all is that you can control the sweetness, by adding more or less sugar to taste, and the ka-pow of the soda, by adding more or less syrup to your seltzer. Experiment, concoct and enjoy. 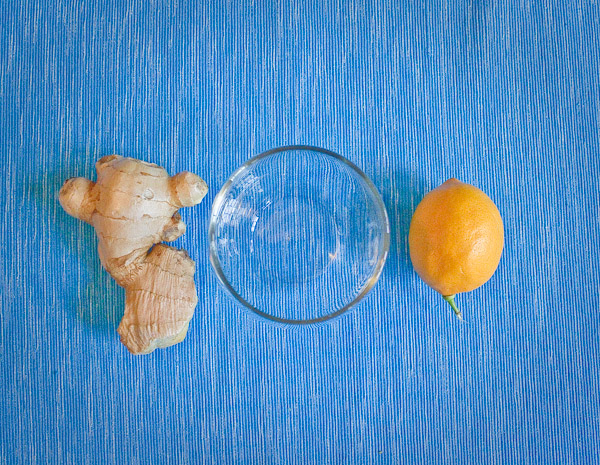 HOMEMADE GINGER SODA SYRUP by Catie Schwalb 1 cup sugar 1 cup fresh ginger, peeled and coarsely grated on the large holes of a box grater 2 cups water 1 tablespoon lemon juice fine strainer cheesecloth TIP: To peel ginger, wash and then use the front of a small spoon to scrape away the thin peel. It will come off easily and a vegetable peeler tends to remove too much of the ginger meat. Grate the ginger, and gently transfer it to a saucepan, careful not to squeeze out or lose any of the flavorful juice in the process. Add the sugar, water, and lemon juice to the ginger. Bring mixture to a gentle boil and turn off heat. Allow mixture to steep and infuse for thirty minutes. Return the ginger mixture to a gentle boil and reduce it by about half, until it has a slightly thicker, more syrupy consistency. This is just really evaporating the extra water, and adjusting how concentrated you want the syrup to be, so go as long or short as you want, but do not let it cook so long that the syrup starts to get very thick, turn amber in color and caramelize. Remove from heat and allow syrup to cool. Strain through a fine strainer lined with cheesecloth. Squeeze cheesecloth to extract any remaining juices. Refrigerate for up to a week. For ginger soda: Combine 1 part ginger syrup with 4 parts seltzer, or more or less to taste. | ||||||||||||||||
|
|
{ welcome! }
 Catie Baumer Schwalb is a chef, food writer and photographer, who splits her life between the city and the country. Not too long ago Catie was a New York City based actress and playwright for more than a decade. She has her Master of Fine Arts from the National Theater Conservatory, and her Grand Diplôme in classic culinary arts from the French Culinary Institute in New York City.
... Read More ≫
Catie Baumer Schwalb is a chef, food writer and photographer, who splits her life between the city and the country. Not too long ago Catie was a New York City based actress and playwright for more than a decade. She has her Master of Fine Arts from the National Theater Conservatory, and her Grand Diplôme in classic culinary arts from the French Culinary Institute in New York City.
... Read More ≫{ get in touch }
{ what's new }
September 12, 2015
August 19, 2013
August 15, 2013
August 13, 2013
August 1, 2013
{ favorites }
{ archives }
Appetizers / Breads & Pastry / Breakfast / Cakes / Canning / Condiments / Dinner / DIY foods / Drinks / Fall / favorites / Grains / Holidays / Local / Noodles & Pasta / Pies & Tarts / Poultry / Salads / Seafood / Snacks / Soup / Spring / Summer / Sweets / Techniques / Vegetables / Vegetarian / Winter /
{ currently reading }
|


